")
If you’re using two YoloBoxes for your production and want to bring the live stream from one device into another YoloBox as a separate video source—wirelessly and remotely—then the Live Stream Source feature in the Source List might be exactly what you’re looking for.
In this blog, I’ll walk you through how to set up and use the Live Stream Source feature, and I’ll also share a few important things you should keep in mind when using it to ensure everything runs smoothly.
Preparation
This feature is available on YoloBox Mini, YoloBox Pro, YoloBox Ultra, and YoloBox Extreme.
In Live Streaming Mode, whether you’re running a Standard Event, a YoloCast Event, or using Monitor Mode, you can add an ongoing Standard Live Stream from one YoloBox as a separate video source on another YoloBox.
Under ideal conditions, there’s no strict limit to how many Live Stream Sources you can add to a single device at the same time.
For this demonstration, I’m using one YoloBox Extreme and one YoloBox Ultra. What I want to do is take Live Event 1, which is currently streaming on the Extreme, and add it as a source to Live Event 2 on the YoloBox Ultra—completely wirelessly, without using any cables.
Before setting this up, make sure both devices meet two important requirements.
First, both YoloBoxes must be logged in to the same YoloLiv account. Second, in Streaming Mode, make sure the device is set to Multi-Streaming Mode.
Method
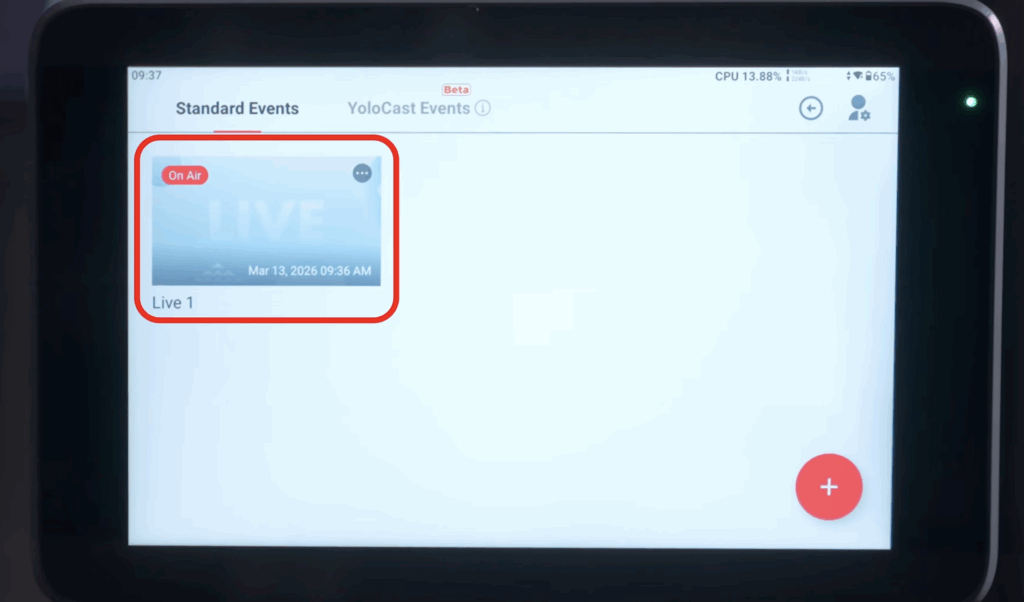
First, on the YoloBox Extreme, go to the Standard Event menu and open the Live Event 1 that we’ve already set up. Then tap Go Live to start the stream.
One important thing to keep in mind:
Only Live Events created under Standard Event can be used as a Live Stream source. YoloCast Events cannot currently be added as a source to another production.
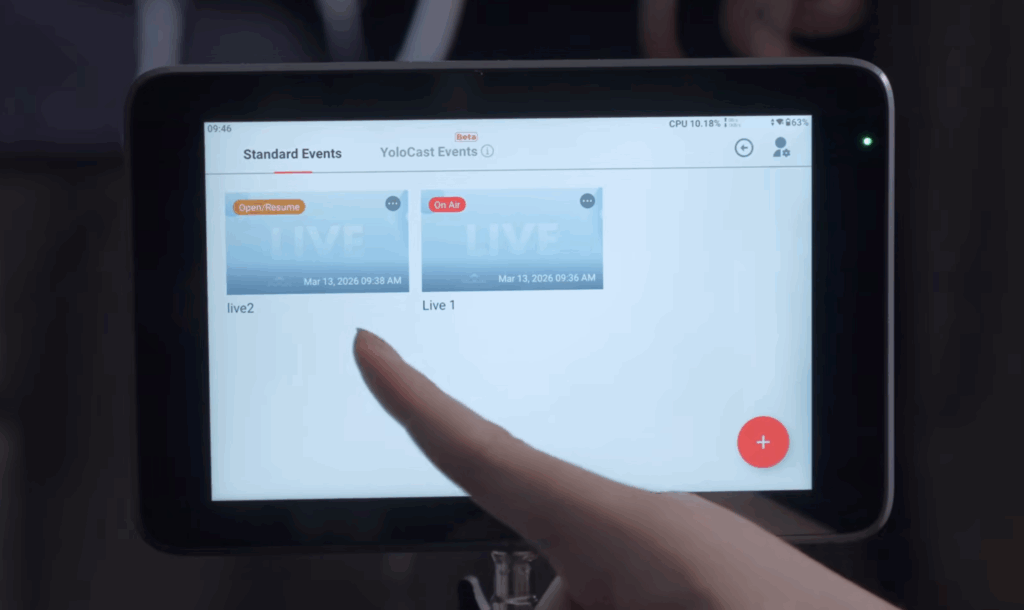
Next, let’s move over to the YoloBox Ultra and open the Standard Event page.
Here, you’ll be able to see Live Event 1, which is currently On Air.
Now this step is very important: you need to create a new event, which we’ll call Live Event 2.
A common mistake is that users click into Live Event 1, and then try to find the Live Stream source from the YoloBox Extreme inside that same event. No matter how many times they refresh or reload, it never appears.
And that’s because this workflow isn’t possible. Doing that would essentially mean adding the same live stream as a source inside the same live stream, which of course the system won’t allow.
So instead, create Live Event 2.
Inside this new event, open the Source menu, select Live Stream, and now you’ll see Live Event 1 listed as an available option. From there, you can simply select it and add it as a source.
And besides Standard Event, you can also add Live Event 1 as a source when working in YoloCast Event or Monitor Mode.
Points to Note
One of the great things about this Live Stream source feature is that it doesn’t require any cables, and it also supports cross-network connections.
What that means is, even if one device is in City A and another device is in City B, as long as both devices are logged into the same YoloLiv account, you can remotely add the live stream from the device in City A as a separate source inside the Stream Studio on the device in City B.
However, like most network-based workflows, this feature comes with both advantages and limitations.
Because the video signal is transmitted over the internet, some latency is unavoidable. So whether it’s video or audio, you should expect a noticeable delay when using this source type.
For that reason, it’s important to consider your production scenario and decide whether this workflow fits your streaming setup.
83 total views, 83 views today