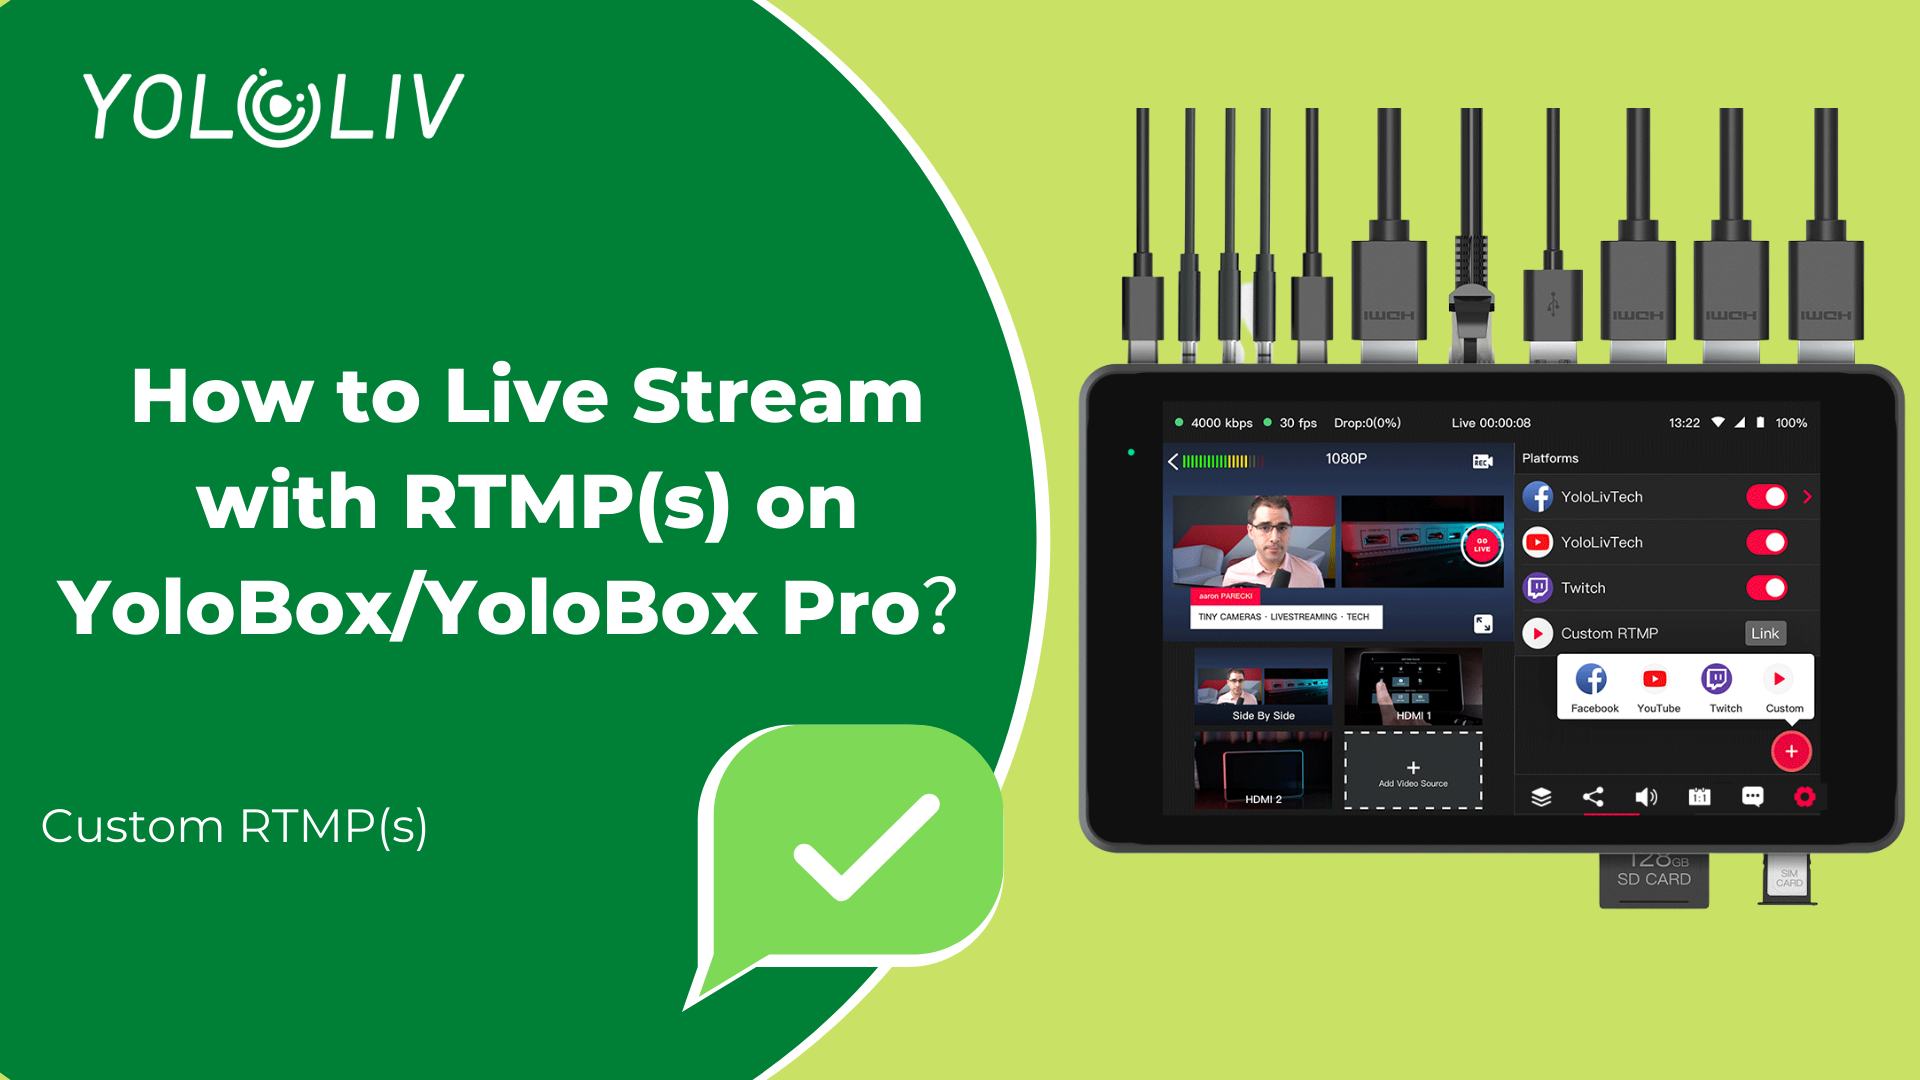
YoloBox/YoloBox Pro/YoloBox Ultra has a direct integration with several platforms like Facebook, YouTube and Twitch, that makes it easy to stream by simply selecting the destination on YoloBox/YoloBox Pro. However, users can stream to many different platforms without a direct integration by using Custom RTMP. Most simulcasting providers also rely on Custom RTMP.
RTMP, which stands for Real Time Messaging Protocol, is supported by most streaming providers. “Custom RTMP ” simply means you’ll create a unique streaming channel in YoloBox/YoloBox Pro/YoloBox Ultra based on parameters provided by your streaming platforms.
To use Custom RTMP with YoloBox/YoloBox Pro/YoloBox Ultra, you’ll need two RTMP values from the platform(s) you want to stream to:
- A Server/Stream URL
- A Stream Key/ID
Once you have these two values, you’ll enter them into the link page that YoloLiv sends, then set up a Custom RTMP channel to stream to the platforms you want.
How do you know that your destinations support Custom RTMP(S)?
Find the Go live part in the Dashboard of your platforms, and there will be in a part showing the Streaming setting. Once you’ve confirmed the platform supports RTMP, then read on.
How to Set up Custom RTMP with YoloBox/YoloBox Pro/YoloBox Ultra?
Different from other platforms, there is only one option for setting up a Custom RTMP channel on YoloBo/YoloBox Pro/YoloBox Ultra.
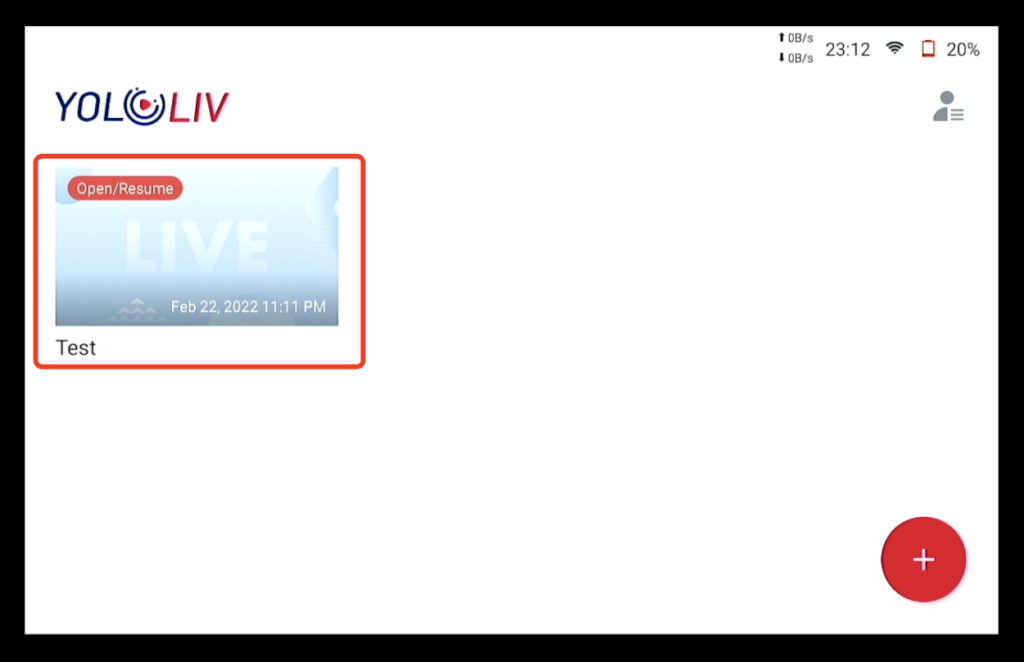
- First, create a live event on YoloBox/YoloBox Pro/YoloBox Ultra
- Second, go to the “Platform” tab > tap on the “” icon > tap on “RTMP(S)” to set up
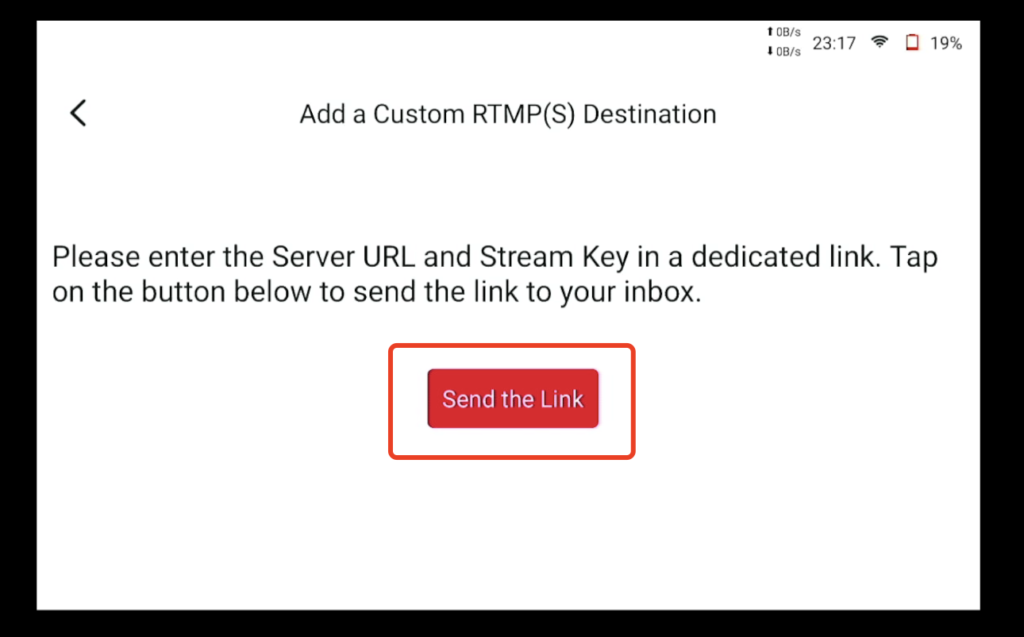
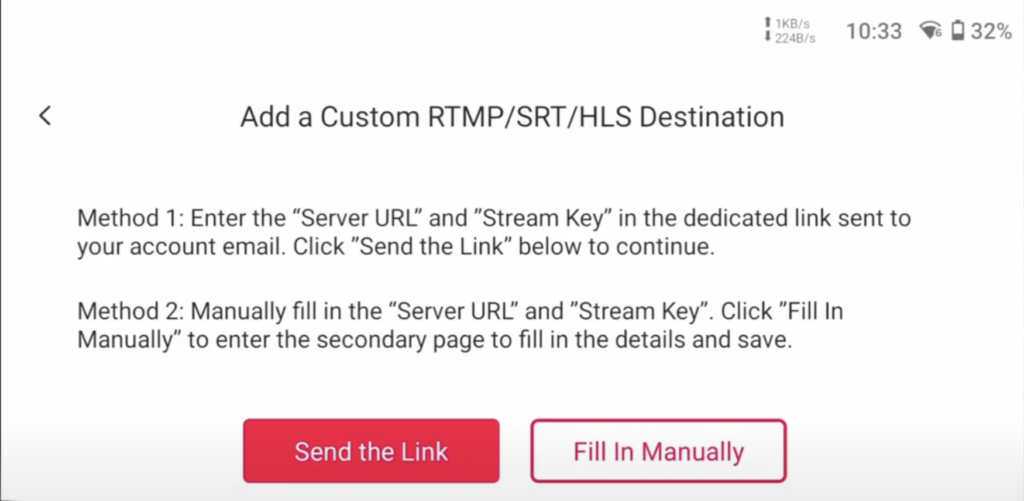
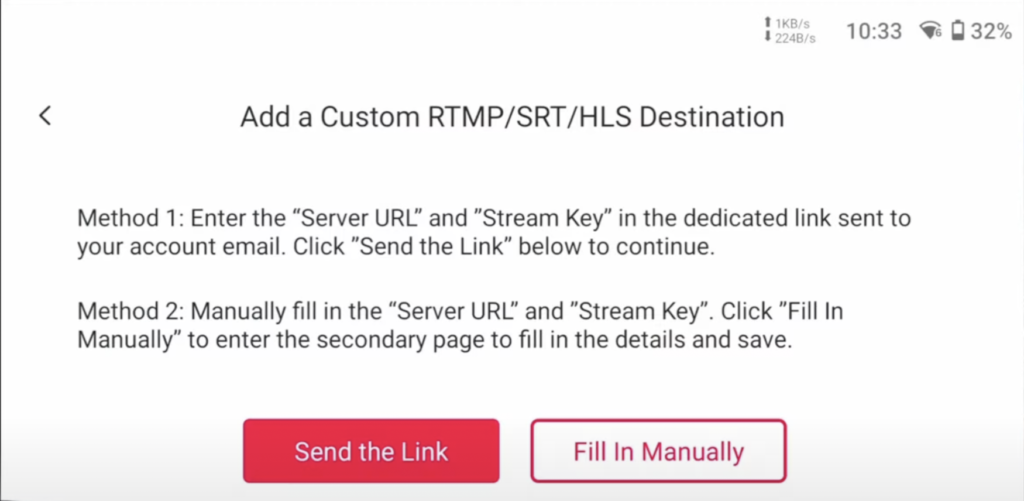
- Third, on the “Add a Custom RTMP(S) Destination” screen, tap on the red button “Send the Link”
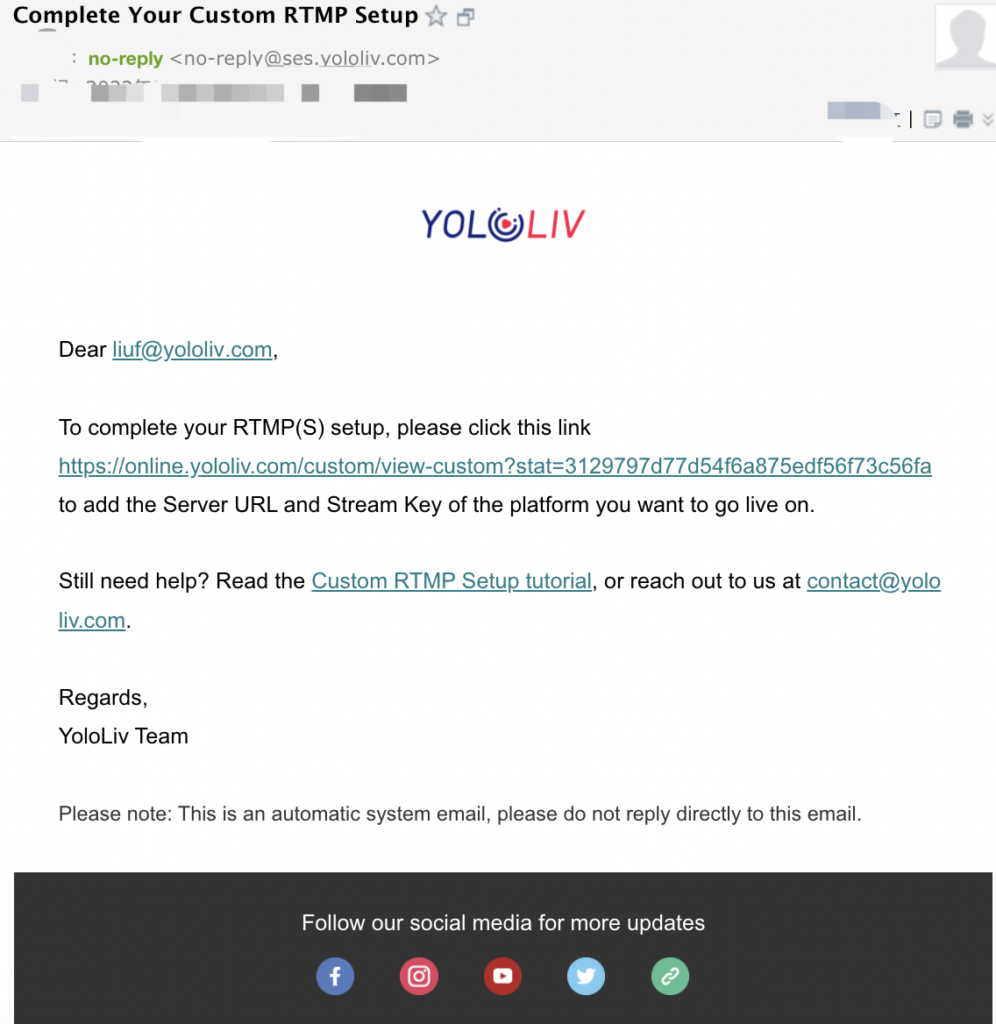
- Then go to your email inbox, find the email sent by “no-reply” with subject “Custom RTMP”
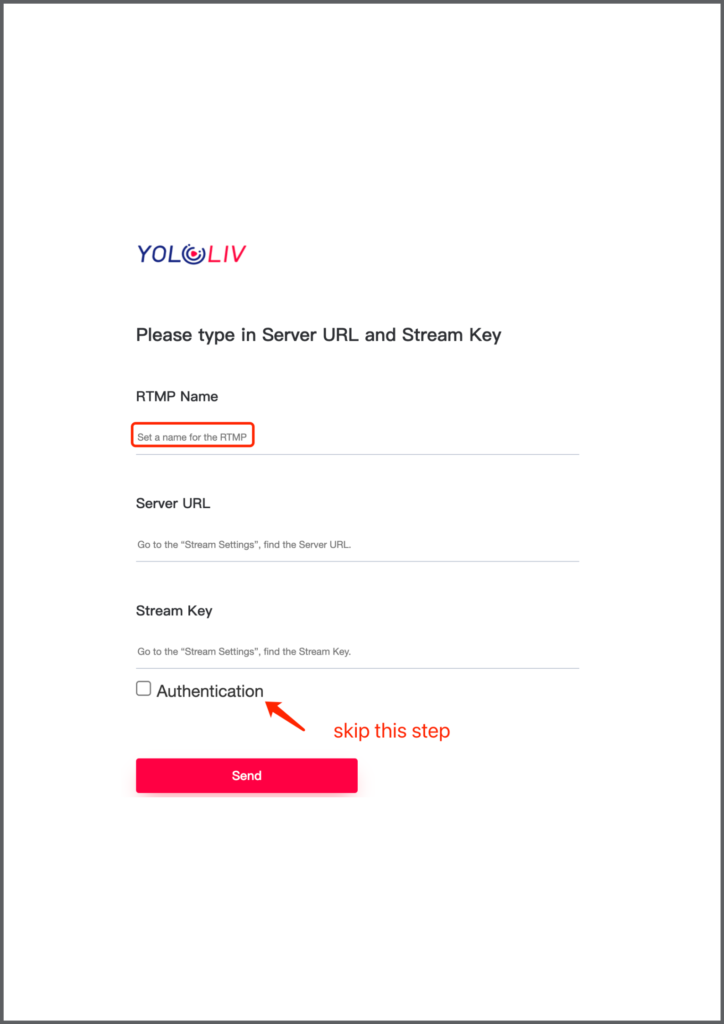
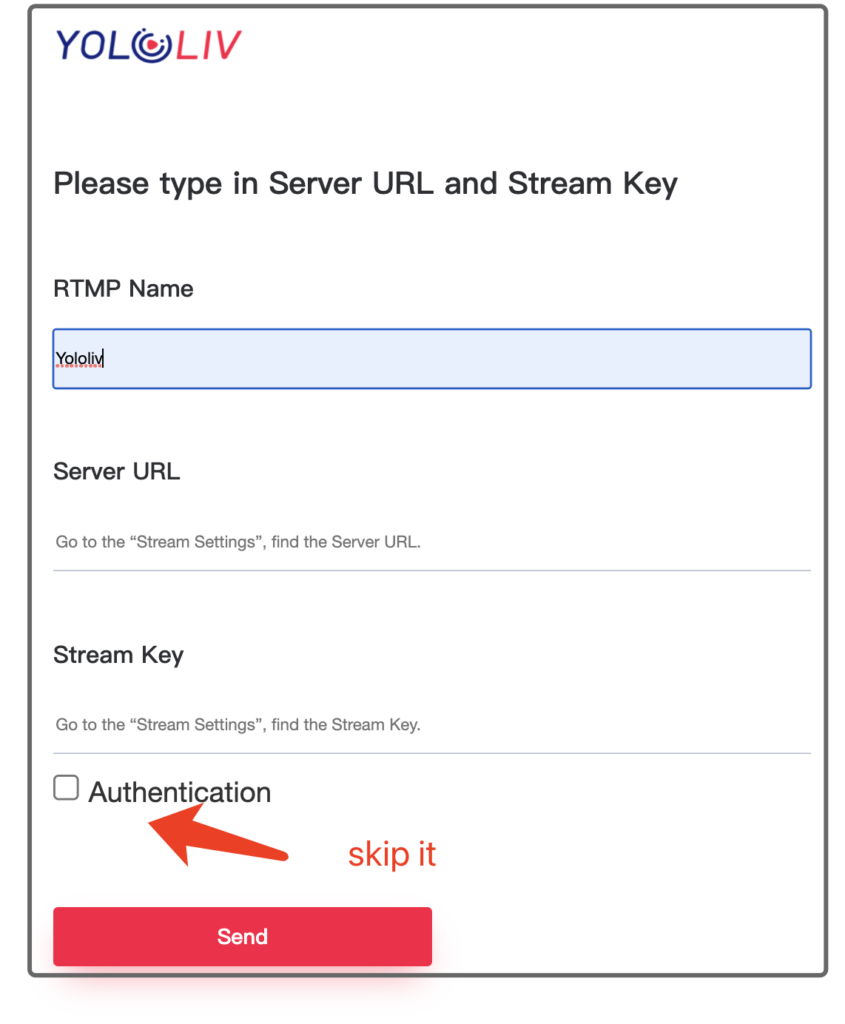
- Moreover, follow the link in the email, fill in the Server URL and Stream key of the platform you want to go live on. You can set the name of that platform as your RTMP name, such as Facebook, Youtube.
- Once filled up, tap on the “Send” button and you will be prompted with a successful message.
Please note:
- If you don’t receive the RTMP setup email, please check your network connection and also all folders of the email inbox, including spam and promotions.
- If the setup fails, please try the following ways to resolve it:
- Open the setup link with a different browser, like Safari, Microsoft Edge, Firefox.
- Double check the Server URL and Stream Key of the destination platform. Don’t mix them up!
- Skip the authentication
YouTube
To go live on Youtube, firstly go to your YouTube Channel and click “Go live”, you’ll have 24 hours to get your new account approved by YouTube official for live streaming. Once it’s approved, you’re ready to go!
Step 1. Find the Stream key and Server URL in your Youtube channel
Go to YouTube Studio by tapping on the “Go Live” icon > Stream > find the Stream key and Server URL
Step 2. Power on your YoloBox/YoloBox Pro/YoloBox Ultra and connect to a network
Step 3. Create a live event on YoloBox/YoloBox Pro/YoloBox Ultra
Step 4. Find the Custom RTMP link and click “LINK”
Step 5. Check the email and follow the link to add the Server URL and Stream Key of your YouTube channel.
Step 6. Fill in the Stream key and Server URL copied from your YouTube Channel
Skip the Authentication

In addition, YoloBox Ultra has also updated a new function – click “Fill In Manually” to directly paste the RTMP copied from the live-streaming destination
Step 7. Go back to YoloBox/YoloBox Pro/YoloBox Ultra and check if the name of the Custom RTMP shows up.
enable the switch button until it is red
Step 1. Find the Stream key and the Server URL in your Facebook page
Go to your Facebook page> find “Live video” > Go live now> Stream setup> Use stream Key.
Step 2. Power on your YoloBox/YoloBox Pro/YoloBox Ultra and connect a network
Step 3. Create a live event YoloBox/YoloBox Pro/YoloBox Ultra
Step 4. Find the Custom RTMP link and click “LINK”

Step 5. Check the email and follow the link to add the Server URL and Stream Key of your Facebook page.

In addition to sending the RTMP address to the mailbox, YoloBox Ultra has also updated a new function – click “Fill In Manually” to directly paste the RTMP copied from the live-streaming destination
Step 6. Fill in the stream key and Server URL copied from Facebook “Stream set up”.
Step 7. Go back to YoloBox/YoloBox Pro/YoloBox Ultra, the Custom RTMP you set will show up at the Platform tab
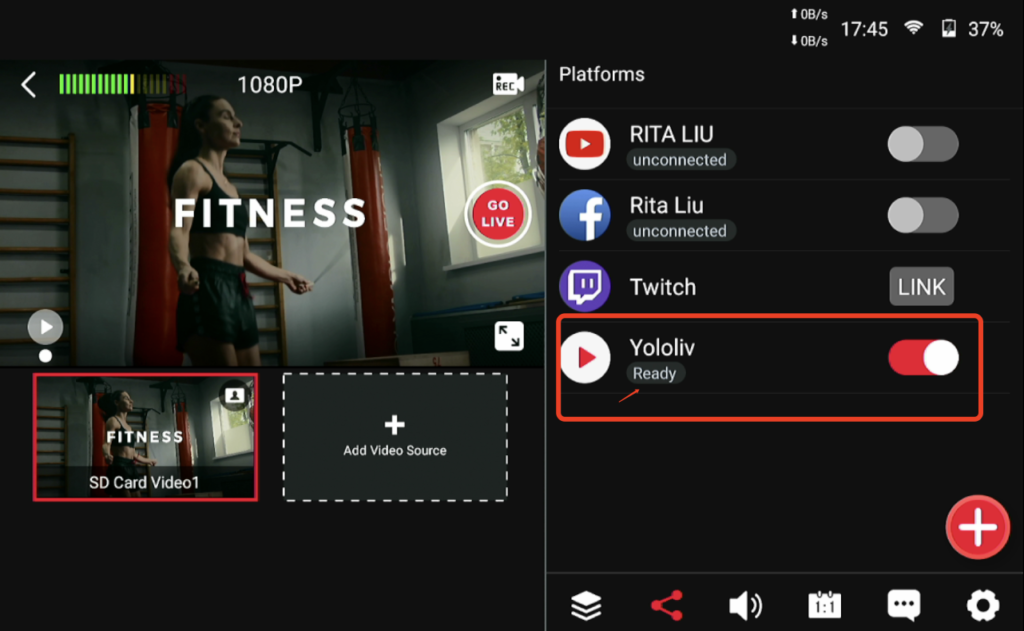
Step 8. Enable the switch button. When the status become “Ready”, that means you’re good to go.
TikTok
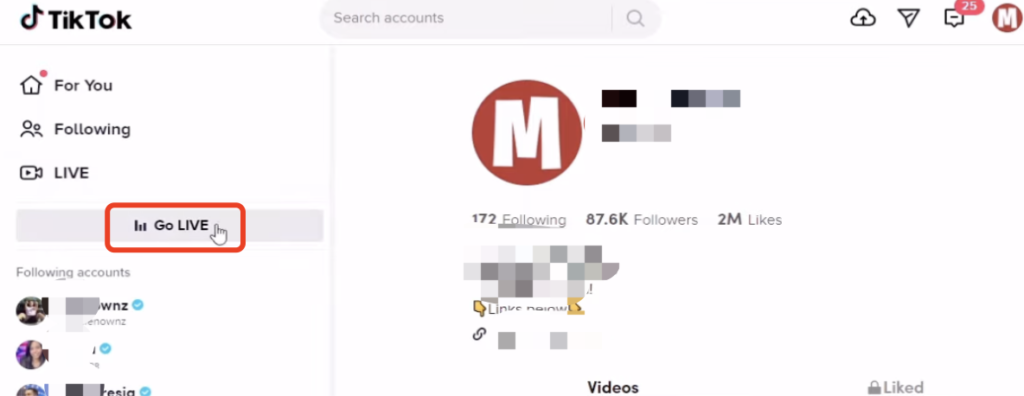
To go live on Tiktok, you have to be 16 years old and above, with more than 1000 followers. Click ‘ LIVE ’ on the upper left corner, then click ‘Go Live’
Step 1. Open TikTok on your desktop and find the Stream key and Server Url in your TikTok dashboard.
Step 2. Power on your YoloBox/YoloBox Pro/YoloBox Ultra and connect a network
Step 3. Create a live event on YoloBox/YoloBox Pro/YoloBox Ultra
Step 4. Find the Custom RTMP link and click “LINK”

Step 5. Check the email and follow the link to add the Server URL and Stream Key of your TikTok account.

In addition to sending the RTMP address to the mailbox, YoloBox Ultra has also updated a new function – click “Fill In Manually” to directly paste the RTMP copied from the live-streaming destination
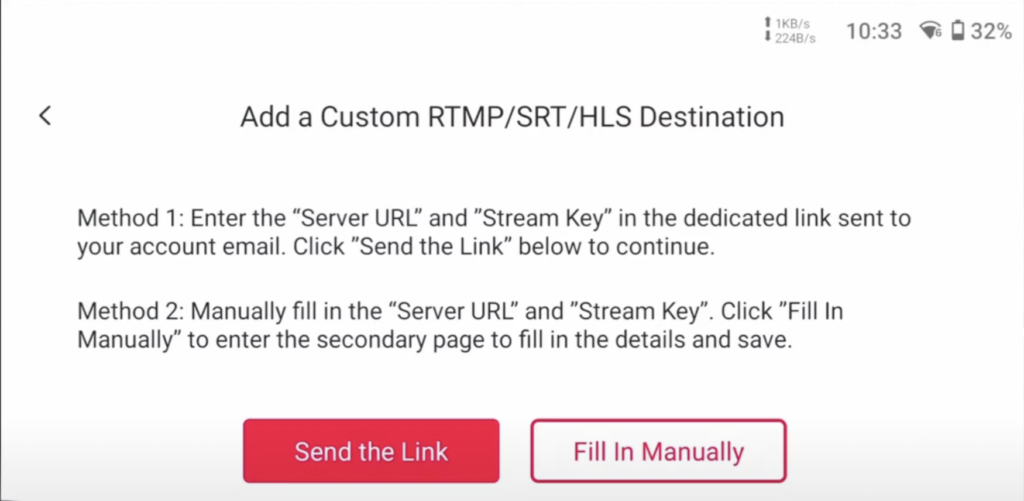
Step 6. Fill in the Stream key and Server URL copied from your TikTok dashboard

Step 7. Go back to YoloBox/YoloBox Pro/YoloBox Ultra and check if the name of you Custom RTMP shows up
enable the switch button until it is red
Step 1 Download the application “Yellow Duck” and Log Into it
- Yellow Duck gives you the ability to get your Instagram RTMP URL and stream key,which allows you to stream from external devices.
- First of all, download the application. Yellow Duck and log in with your Instagram account.
- Log in with your Instagram account.
Step 2. Power on your YoloBox/YoloBox Pro/YoloBox Ultra and connect a network
Step 3. Create a live event on YoloBox/YoloBox Pro/YoloBox Ultra
Step 4. Find the Custom RTMP link and click “LINK”

Step 5. Check the email and follow the link to add Stream key and the Stream URL.

In addition to sending the RTMP address to the mailbox, YoloBox Ultra has also updated a new function – click “Fill In Manually” to directly paste the RTMP copied from the live-streaming destination
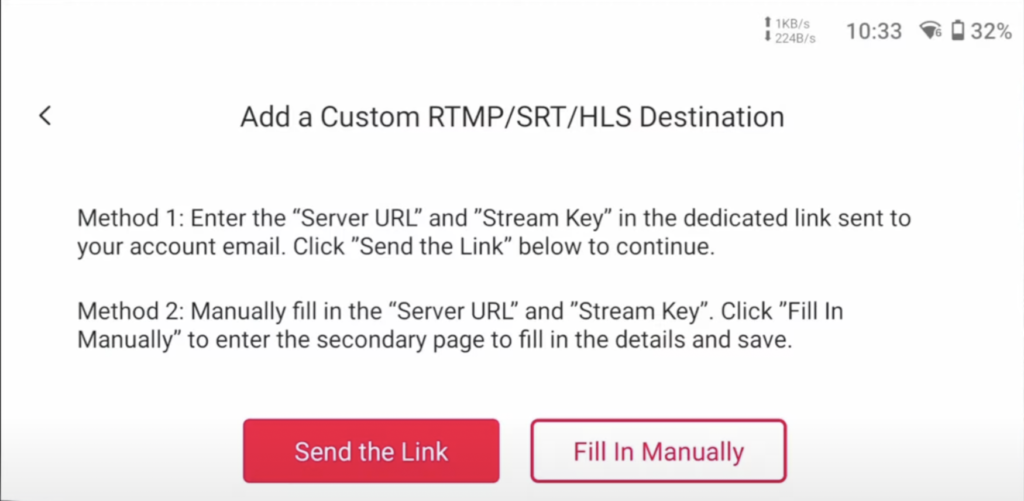
Step 6. Fill in the Stream key and Server URL copied from Yellow Duck
Now, get back to Yellow Duck.
Get your stream key and RTMP URL for the Instagram account.
Important: Keep in mind that as soon as your login passes you have a few minutes window to start your stream since your key will expire in a few minutes.
Step 7. Go back to YoloBox/YoloBox Pro/YoloBox Ultra and check if the name of you Custom RTMP shows up
enable the switch button until it is red
Vimeo
Step 1. Find the Stream key and URL in you Vimeo dashboard
Check this video for where to find your stream key and URL
note: start from 5’20”
Step 2. Power on your YoloBox/YoloBox Pro/YoloBox Ultra and connect a network
Step 3. Create a live event on YoloBox/YoloBox Pro/YoloBox Ultra
Step 4. Find the Custom RTMP link and click “LINK”

Step 5. Check the email and follow the link to add Stream key and the Stream URL.

In addition to sending the RTMP address to the mailbox, YoloBox Ultra has also updated a new function – click “Fill In Manually” to directly paste the RTMP copied from the live-streaming destination
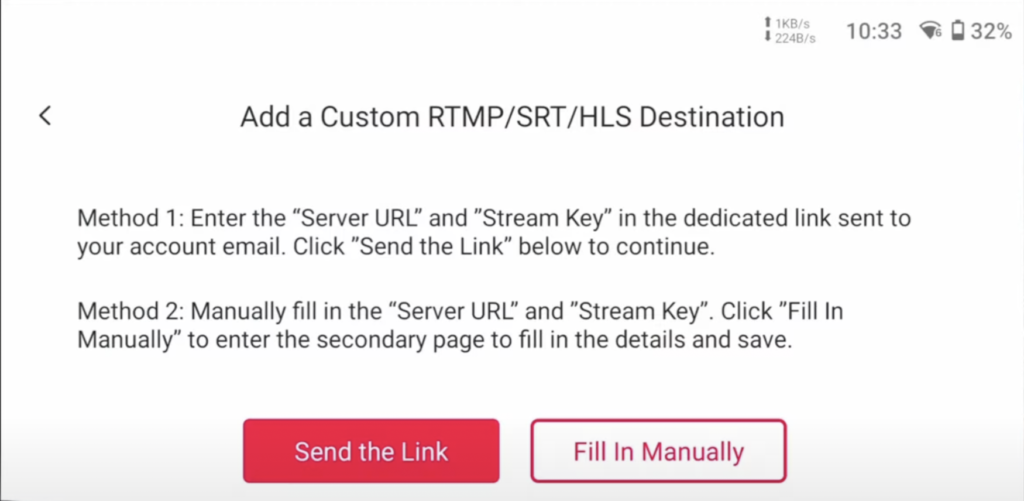
Step 6. Fill in the stream key and Server URL copied from your Vimeo dashboard.

Step 7. Go back to YoloBox/YoloBox Pro/YoloBox Ultra and check if the name of you Custom RTMP shows up
enable the switch button until it is red
Dacast
Step 1. Open Dacast on your desktop and find the Stream key and the Server URL in your Dacast dashboard.
Step 2. Power on your YoloBox/YoloBox Pro/YoloBox Ultra and connect to a network
Step 3. Create a live event on YoloBox/YoloBox Pro/YoloBox Ultra
Step 4. Find the Custom RTMP link and click “LINK”

Step 5. Check the email and follow the link to add Stream key and the Stream URL.

In addition to sending the RTMP address to the mailbox, YoloBox Ultra has also updated a new function – click “Fill In Manually” to directly paste the RTMP copied from the live-streaming destination
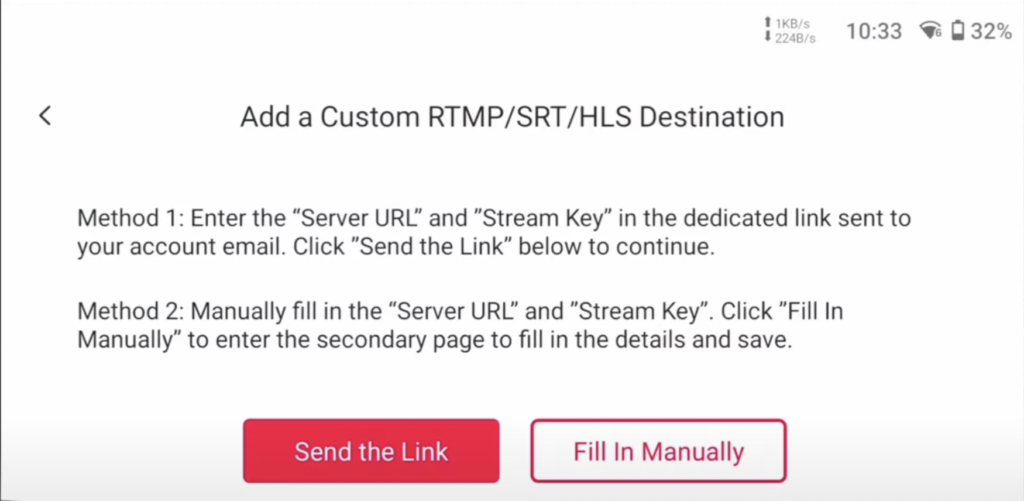
Step 6. Fill in the Stream key and Server URL copied from your Dacast dashboard

Step 7. Go back to YoloBox/YoloBox Pro/YoloBox Ultra and check if the name of you Custom RTMP shows up
enable the switch button until it is red
YoloCast
In addition to the above methods, you can also use YoloCast to perform multi-stream transmission on IG, YouTube Shorts and TikTok.
Step 1. Access your YoloCast account, and head to the Destinations page

Facebook, YouTube, and Twitch can be added directly. For other platforms, you’ll need to use an RTMP address. Here we take TikTok as an example.
Step 2. Click the GitHub link below to download a tool that can get TikTok RTMP address for free. Once it opens, it will ask you to log in to TikTok first
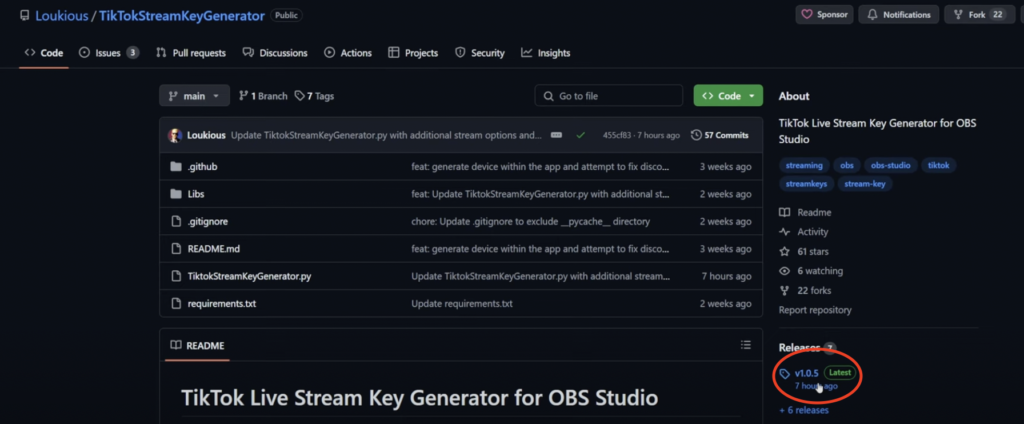
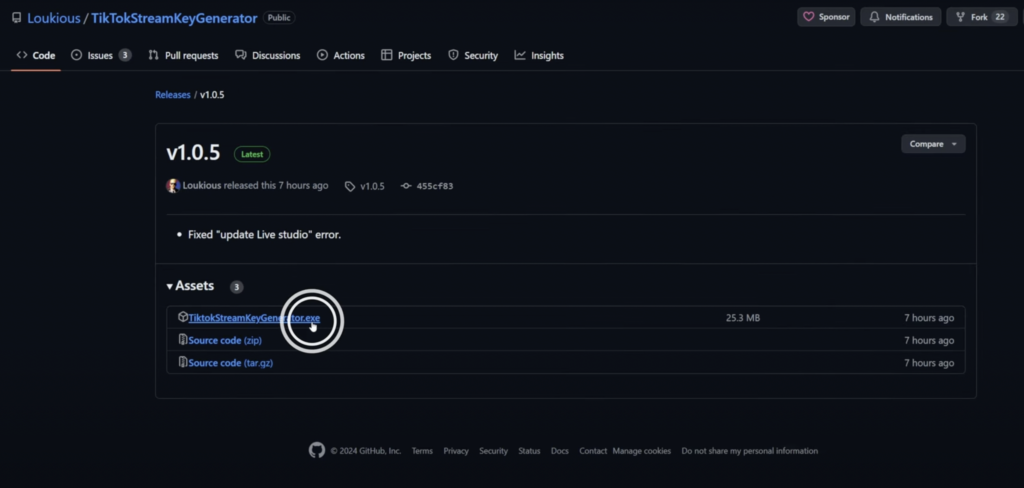
Step 3. log in your TikTok account, and input information such as your stream title, region, and category

Step 4. Hit “Go Live” button and it will generate a stream key and server URL, Copy the right RTMP address
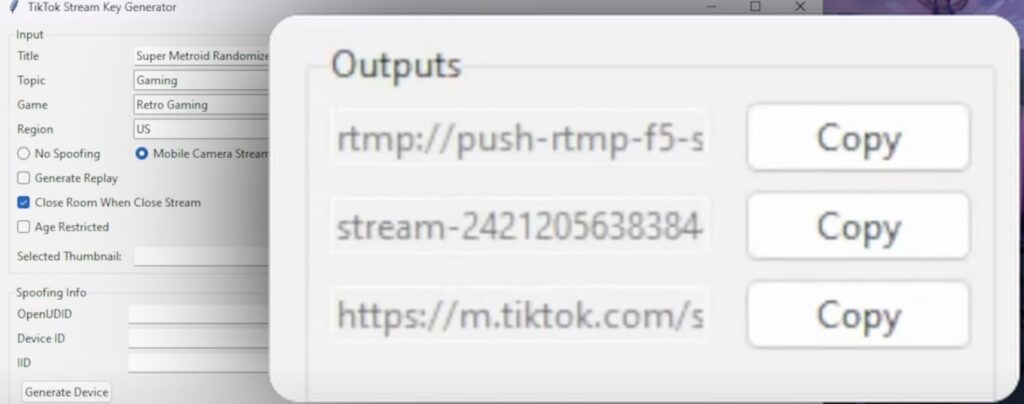
Step 5. Back to YoloCast and click on RTMP(s) to open a box where you can enter the RTMP address
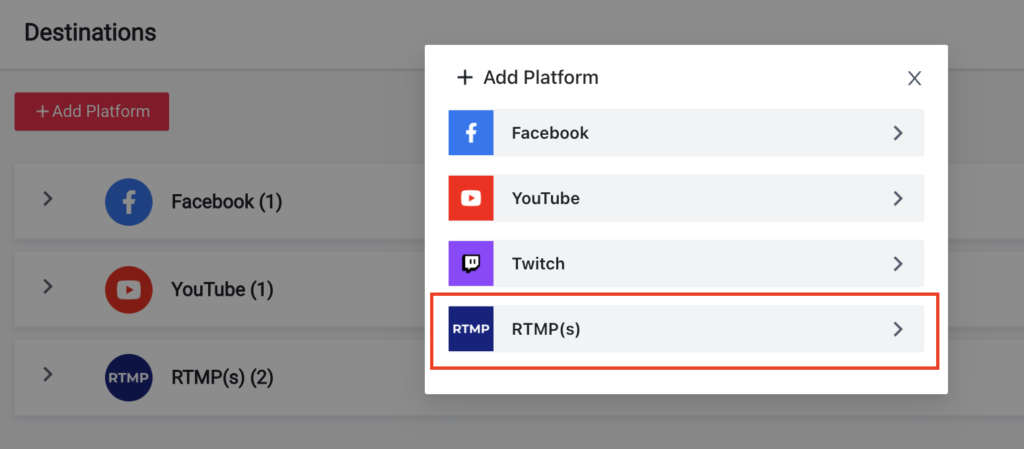
Step 6. Paste in the stream key and URL from TikTok, click on the “Add Platform” button

Step 7. Power on your YoloBox/YoloBox Pro/YoloBox Ultra and connect a network, and create a live event YoloBox/YoloBox Pro/YoloBox Ultra
Step 8. Find the the name of you Custom RTMP
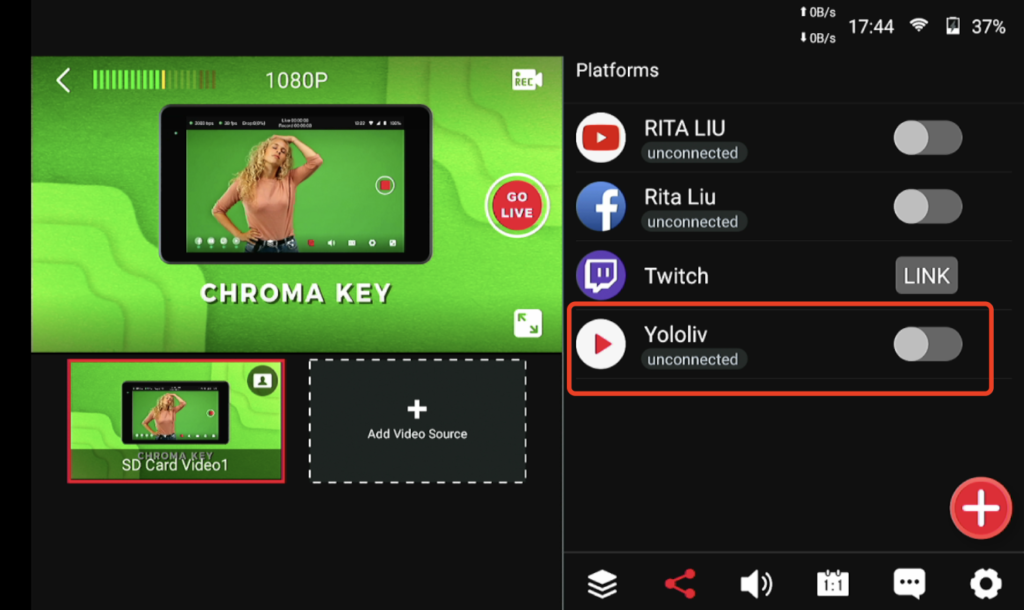
enable the switch button until it is red
97,687 total views, 15 views today

As a support specialist at YoloLiv, troubleshooting and resolving issues from customers is her daily routine. Whenever there is an issue, that’s the time Rita shows up. She analyzes and combs through questions, issues and requests from customers and make contents that are very practical for your live streaming.

