")
For any livestream, the content is obviously important—but the preparation beforehand is just as critical.
Proper setup and promotion ahead of time can significantly amplify the impact of your stream. That’s why scheduling a livestream is such an important feature for many users. It allows you to create a Live Studio in advance, where you can prepare elements like graphics, replay, and recording settings, and also share the livestream link with your audience before the event begins.
Schedule Time Limit
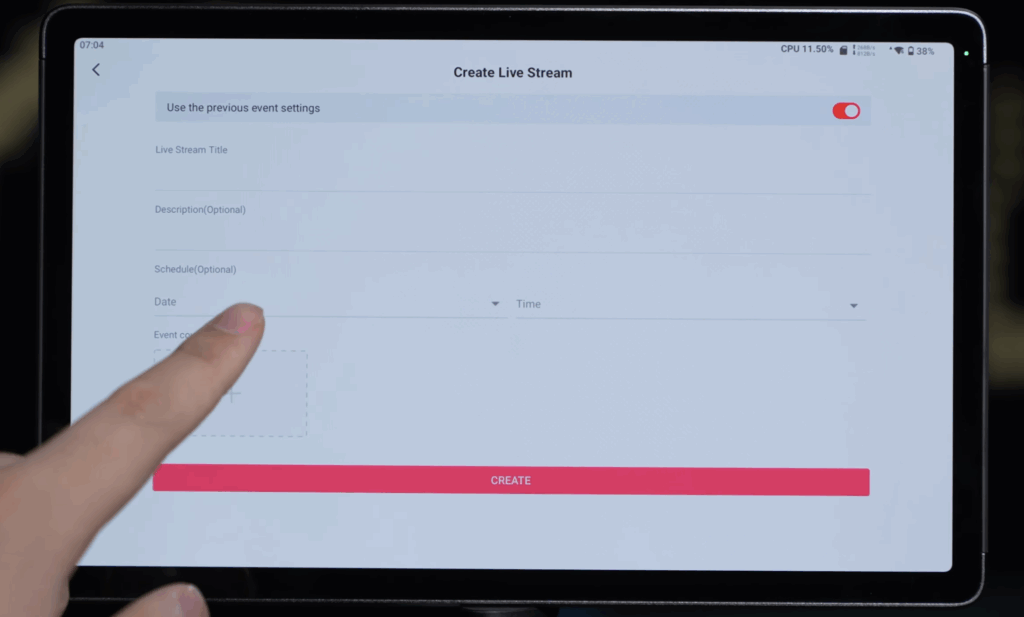
If you create a Standard Live Event on YoloBox, the earliest you can schedule your livestream is up to 7 days in advance.
If you’d like to schedule your livestream further ahead of time, I recommend using our cloud service, YoloCast, to plan your event. Simply go to Live Events, click Create Live Event, and then set the time under Start Date. You’ll notice that there is no limit on how far in advance you can schedule—you can even schedule a livestream up to a year ahead.
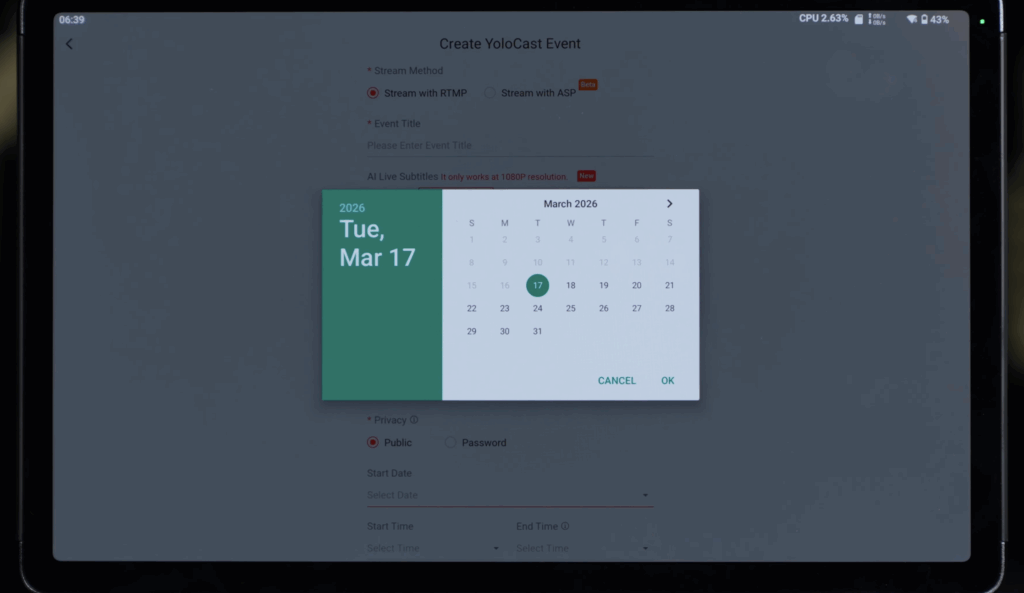
One thing to keep in mind is that Live Events created on YoloCast will not appear in the Standard Live Event list on your device. Instead, they will be displayed in the YoloCast Event list.
Create a Live Event on YoloBox/YoloCast
Before scheduling a livestream, please make sure your YoloLiv account is already linked to the streaming platforms.
You can bind your account by following the prompts in Account & Settings on the device, or by going to the Platforms page of an existing Live Event you’ve already created. If you encounter a “link failed” message during the process, we recommend trying to reconnect your account through YoloCast. For detailed steps, you can refer to one of our previous tutorial videos, which I’ve also included in the description of this video.
Once your account is successfully connected, simply go to the Standard Live Event page and tap the red plus button in the bottom-right corner to create a new Live Event. From there, you can select the scheduled time and fill in the basic event details. Please note that these details cannot be edited after the event is created, so make sure everything is correct before confirming.
After the event is created, you’ll be able to see the corresponding Live Event status update on Facebook, YouTube, or Twitch, and you’ll also receive a shareable link that you can send to your audience in advance.
Create a Live Event on YouTube Platform
Some users prefer to create their livestream directly on YouTube first, and then sync that event to their YoloBox. For this workflow, we recommend using YoloCast to bind the YouTube Live Event via RTMP.
On YouTube, click Create in the top-right corner and select Go Live. In the left sidebar, choose Stream, then click “Learn how to use encoders” in the middle of the page. Here, you’ll be able to see the Stream Key and RTMP URL.
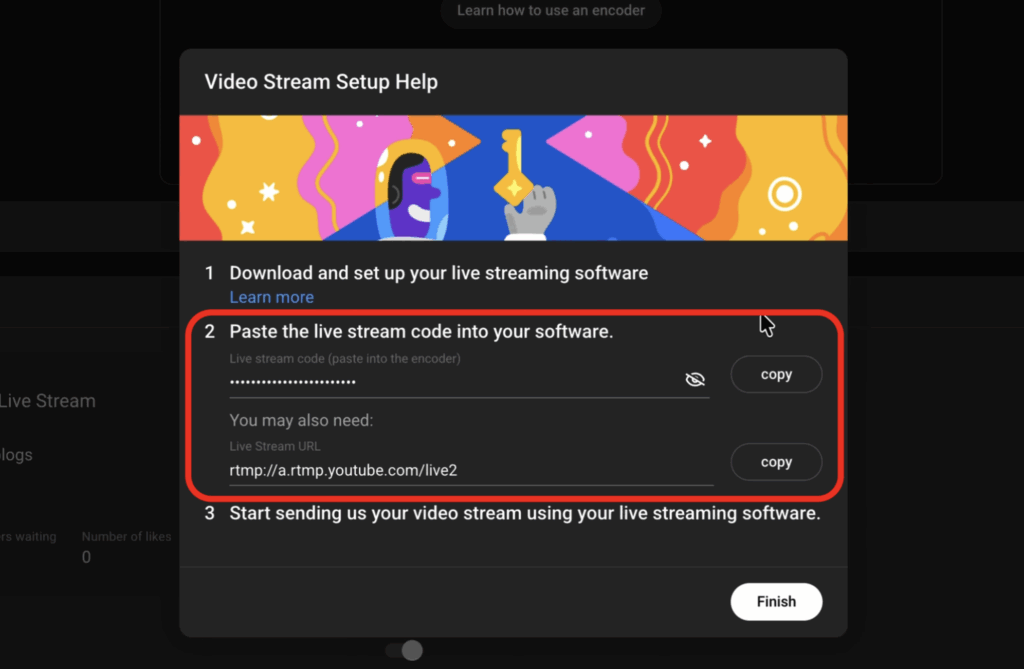
Next, log in to YoloCast and go to the Destinations page. Click Add Platform, choose RTMP/SRT, and fill in the basic information. Then copy and paste the Stream Key and RTMP URL from the YouTube page into the corresponding fields and confirm the binding. Please note that YouTube’s Stream Key has a time limit of about 10 seconds when being validated.
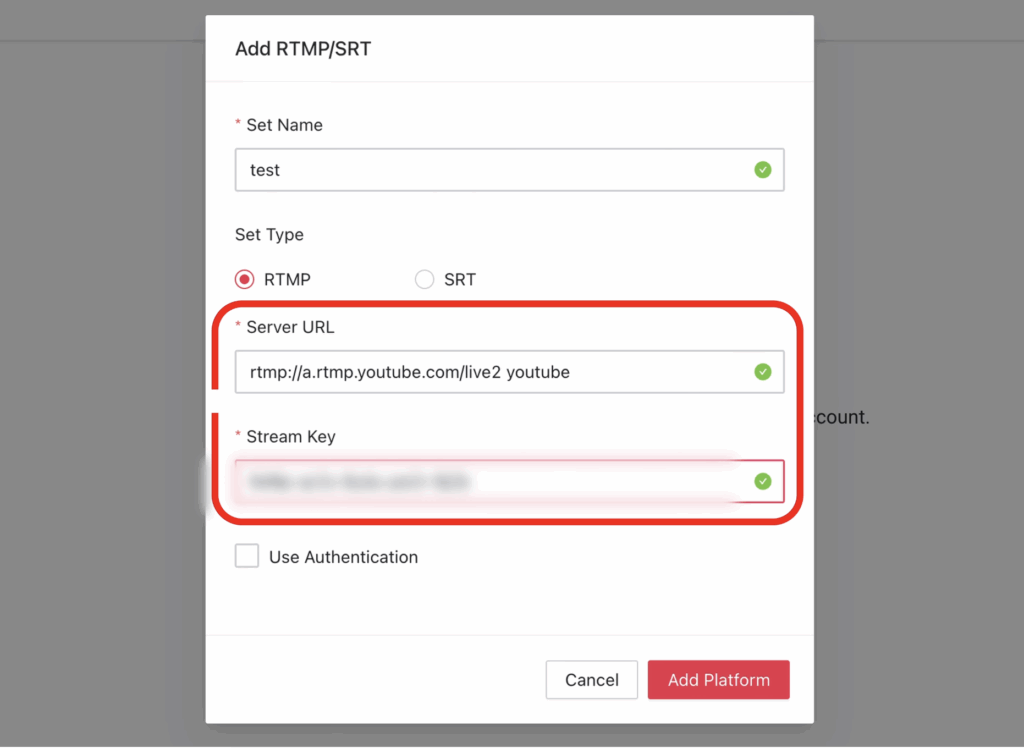
Once this step is completed, the YouTube Live Event will be successfully bound via RTMP.
With this setup, the RTMP stream configured on your device will point directly to that YouTube Live Event. You’ll also be able to see the upcoming livestream on YouTube in advance and share the event link with your audience ahead of time.
One important step to remember is that starting the RTMP stream on YoloBox and pressing “Go Live” is necessary to synchronize the livestream status between YoloBox and the YouTube Live Event.
51 total views, 51 views today