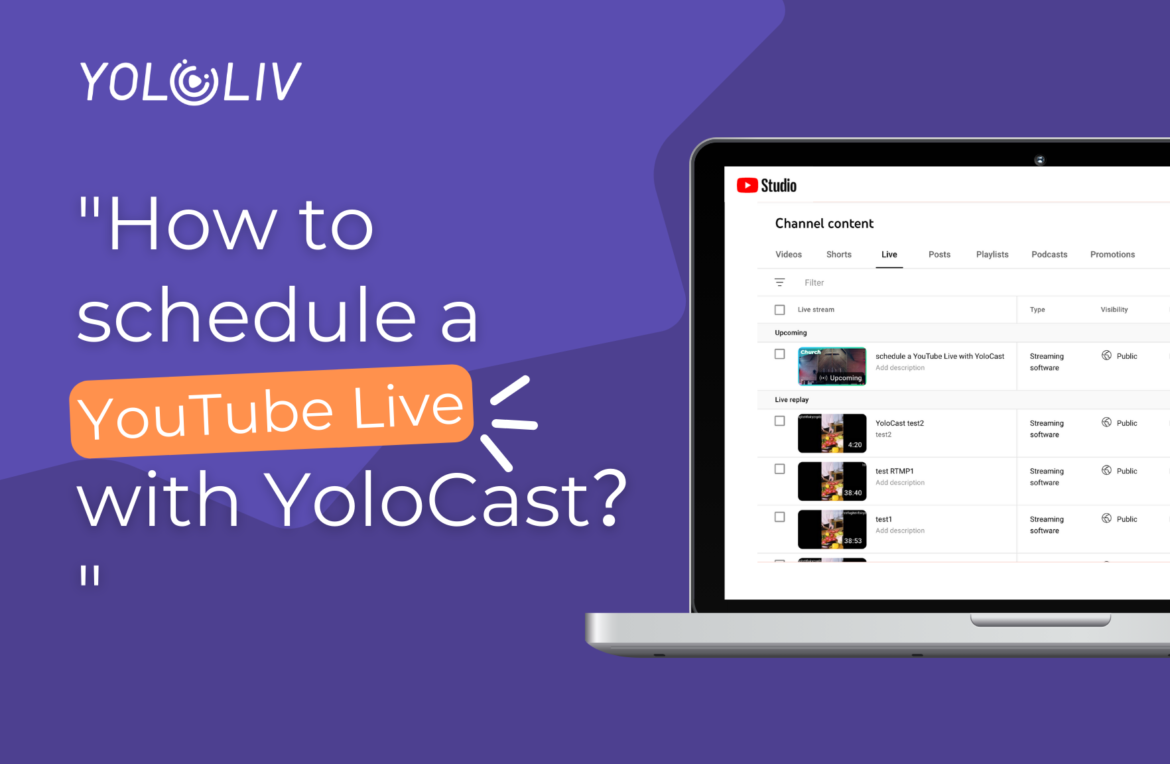
In the digital age, live streaming has become an indispensable tool for content creators, businesses, and anyone looking to connect with an audience in real time. YouTube Live stands out as a powerful platform for live broadcasts, offering immense reach and engagement opportunities. YoloCast, as an all-in-one live streaming platform, simplifies the process of scheduling and managing YouTube Live broadcasts. This blog post will guide you through the reasons for scheduling a YouTube Live, what preparations are necessary, and a step-by-step process on how to schedule it with YoloCast.
Why Schedule a YouTube Live?
Scheduling live streams on YouTube in advance can help you create a sense of anticipation among your audience, provide more opportunities for the viewers to be present at the upcoming event, and give you enough time to promote your upcoming event. This will not only help you attract a wider audience but also provide a means for you to rehearse, resulting in a dynamic and entertaining viewing experience for your viewers.
What Do I Need Before I Schedule a YouTube Live?
Before you embark on scheduling a YouTube Live, there are essential prerequisites to ensure a seamless experience:
Enable Live Streaming on Your YouTube Channel:
To schedule live streams on YouTube, you first need to enable live streaming capabilities on your channel. This process may take 24-48 hours as YouTube reviews your request, but it’s often instantaneous. Once YouTube approves your channel for live streaming, you can then connect your YouTube channel as a destination within YoloCast.
Register for a YoloCast Account:
Simultaneously, you’ll need to sign up for a YoloCast account if you haven’t done so already. YoloCast’s exclusive and business plans support streaming with pre-recorded videos on YouTube, making these options particularly appealing. We recommend subscribing to the exclusive package for starters, offering a comprehensive set of features tailored to enhance your live streaming endeavors on YouTube.
Check out this blog to explore all YoloCast Plans: Your Ultimate Guide to YoloCast Plans
Prepare an Optimal Thumbnail:
Crafting a thumbnail with the recommended dimensions of 1280×720 is crucial. Including a thumbnail in your scheduled stream offers your audience more insight into the content of the stream while simultaneously serving as a powerful branding tool. A well-designed thumbnail not only catches the eye but also conveys the essence of your live stream, encouraging more viewers to tune in.
How to Schedule a YouTube Live on YoloCast:
Add YouTube as A Destination
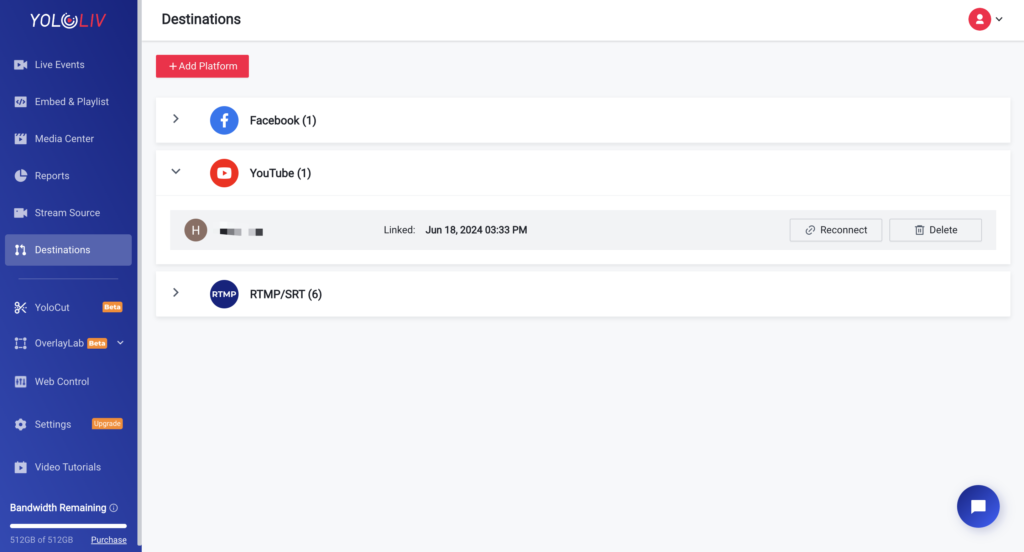
First, log into your YoloCast account and navigate to the ‘Destination’ page found in the left sidebar. Add YouTube as your live-streaming destination.
Please note: During the process, when the “Select what YoloLiv can access?” prompt appears, ensure all required accesses are enabled. This action permits YoloCast events to stream on your YouTube channels seamlessly. Failure to grant necessary permissions may result in an unsuccessful connection to your YouTube account.
Create a Live Event
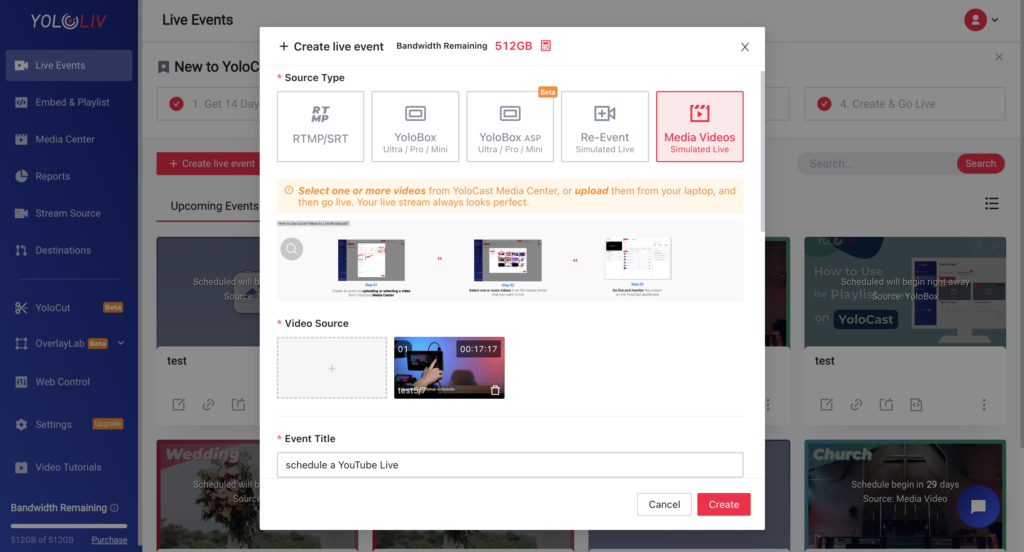
1)Proceed to create a new live event. YoloCast supports choosing pre-recorded videos as the source of your live stream(Note: only available on the Exclusive or Business). Enter details: such as the name, description, and thumbnail. Upon completion, these details will be directly synchronized with YouTube.
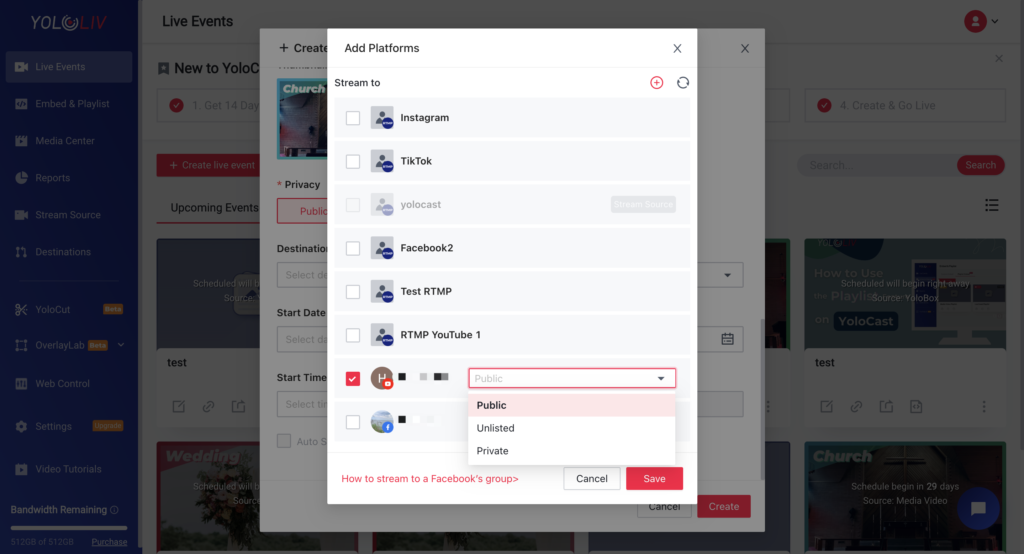
2)When selecting YouTube as your streaming destination, you are presented with three privacy options:
- Private: Only you or people you invite can view this stream. It will not be visible on your channel or searchable.
- Unlisted: Only individuals with the direct URL link can view the stream. Similarly, it won’t appear on your channel or be searchable.
- Public: The stream is viewable by everyone, appears on your channel, and is searchable.
To achieve the highest viewer engagement, we recommend streaming publicly. This way your live content can reach more viewers.
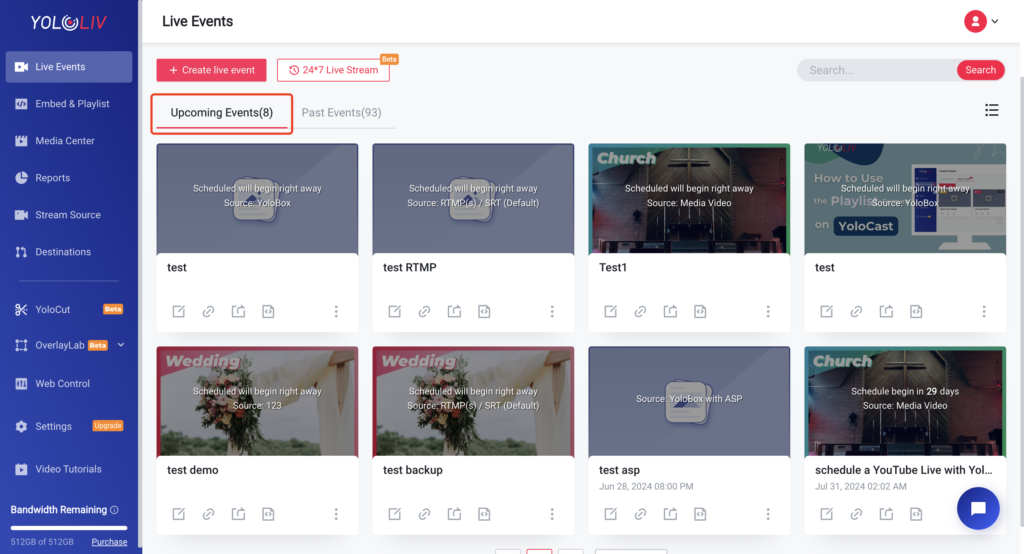
3)Specify the start time of your live stream and click to complete the creation. You can then find your upcoming stream under “Upcoming Events” on the YoloCast dashboard.
Schedule the Event Time
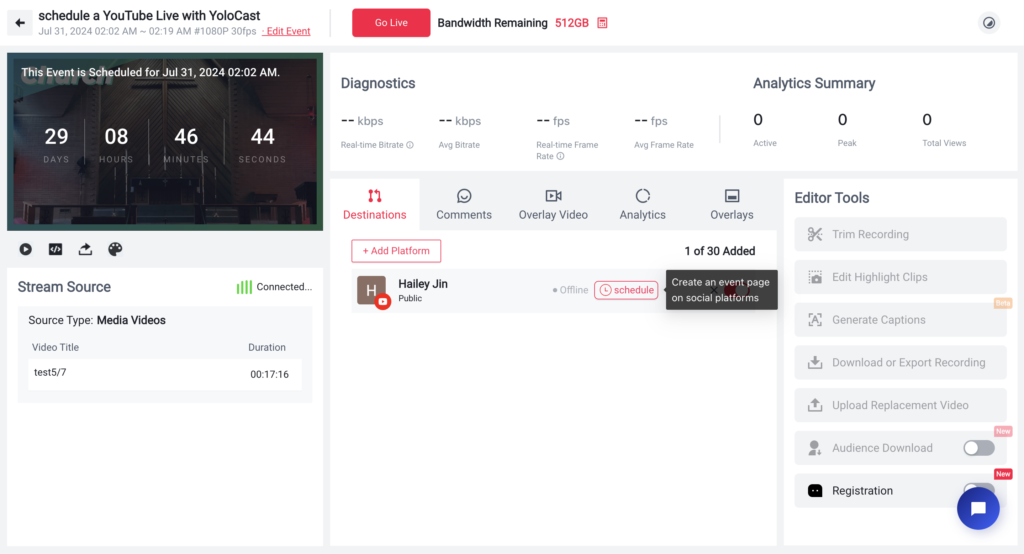
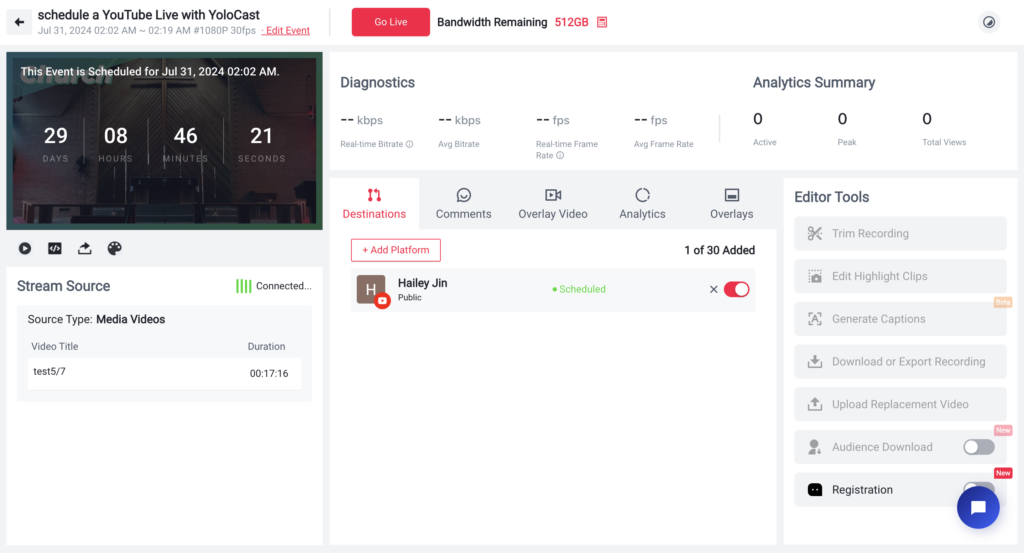
To finalize the scheduling, enter the live event on YoloCast. Navigate to the ‘Destination’ and click on ‘Schedule‘ to book your event. And then the event will be successfully scheduled on your YouTube.
Check on YouTube
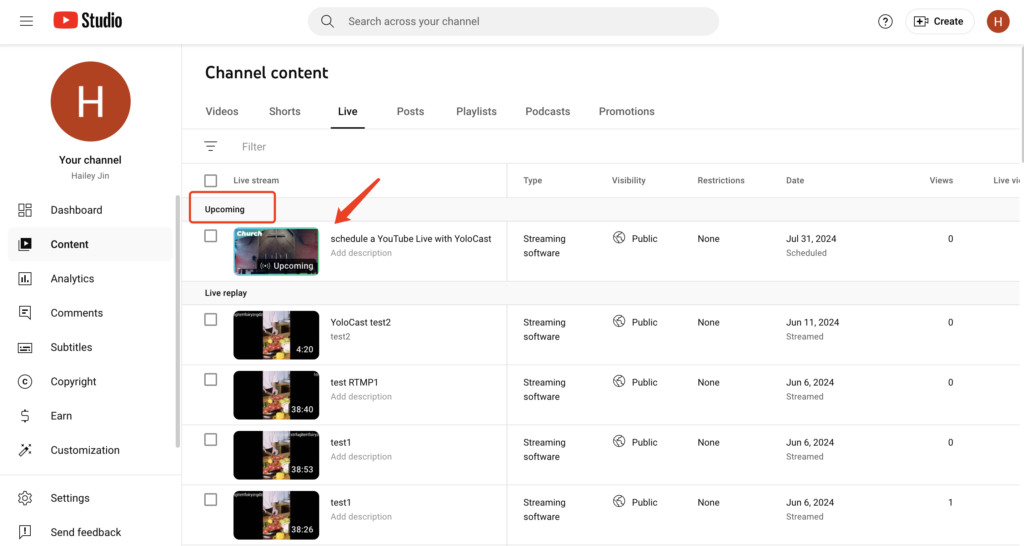
visit the YouTube Studio and select your content channel to see your scheduled livestream listed under upcoming events. At this point, you have the option to share the direct YouTube link with your audience or return to YoloCast to copy the live stream link.
By following these steps, you are now equipped to schedule and conduct a YouTube Live Stream through YoloCast, allowing you to connect and engage with your audience in a more impactful way.
Conclusion
Scheduling a YouTube Live with YoloCast not only simplifies the broadcasting process but also enhances the overall experience for both the broadcaster and the audience. By planning, promoting effectively, and leveraging YoloCast’s robust features, you’re setting the stage for a successful live event that resonates with your viewers. Dive into the world of live streaming with YoloCast, where efficiency meets engagement.
19,606 total views, 19 views today

Hailey, a Customer Success Specialist at Yololiv, she brings immense enthusiasm to assisting users in understanding the various features of YoloCast and resolving any usage-related issues they may encounter. Alongside her support efforts, she also curates articles sharing tips, troubleshooting advice, and other helpful insights to enhance users’ experience with YoloCast.

