Video Follows Audio is a powerful automation feature, many people also call it VFA. If you need to conduct an interview or a multi-camera live stream with just one person, VFA might help alleviate some of the backstage control pressure. In this blog, we will guide you on how to set up Video Follows Audio on YoloBox Ultra.
Where to find
Before using VFA, ensure each video source has its own audio channel in Ultra’s mixer. If using an external audio mixer, equip each camera with a mic and assign separate audio inputs.
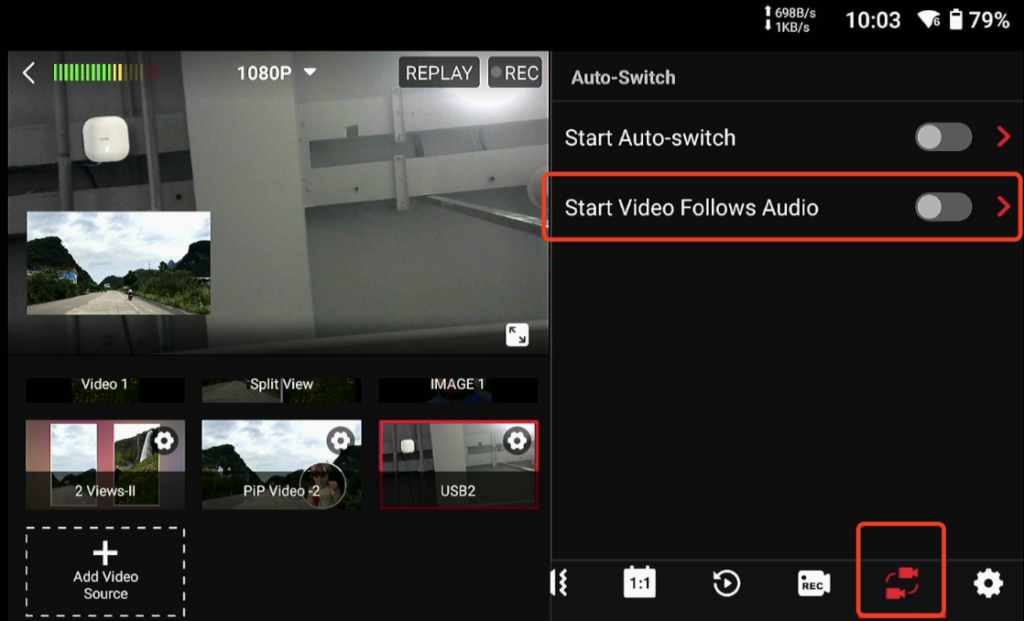
VFA is in the Auto-Switch area, marked by an icon with two cameras in the bottom right of the toolbar. If it’s missing, check your Tools Order in Settings.
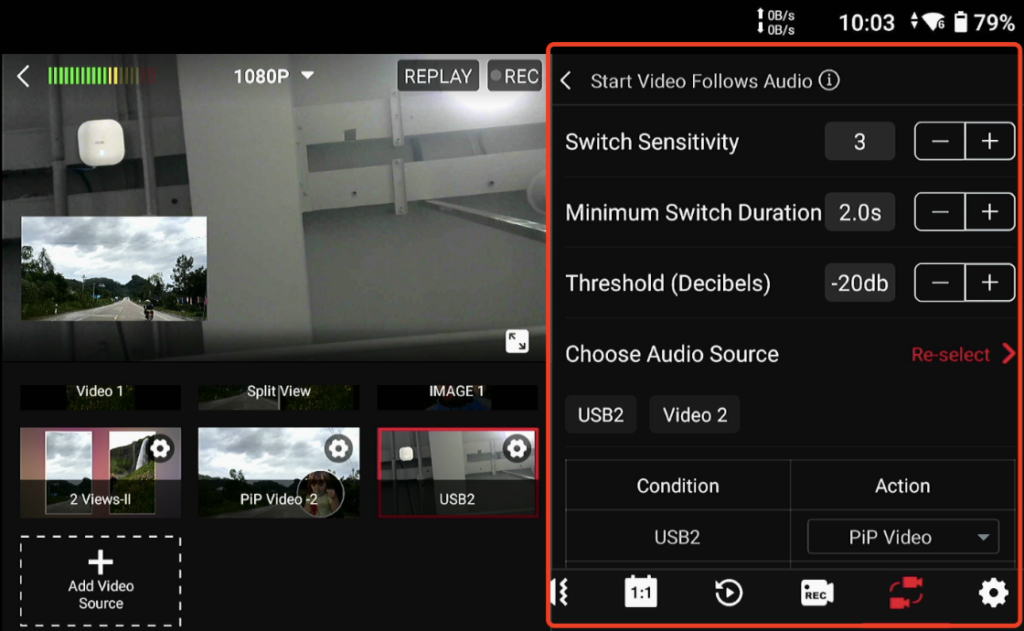
Inside the Auto-Switch console, tap the red arrow next to “Start Video Follows Audio” to access settings. You’ll find three parameters: Switch Sensitivity, Minimum Switch Duration, and Threshold.

We’ll explain these in order, followed by two preset solutions you can apply to your stream.
Parameters Explanation
Minimum Switch Duration
Frequent scene switching can indicate a live stream is getting out of control. While Switch Sensitivity and Threshold can cause unpredictability, the Minimum Switch Duration helps reduce this risk since it takes priority.
For example, if you set Minimum Switch Duration to 4 seconds, the video won’t switch immediately when a sound is made; it will stay on screen for 4 seconds first. Typically, a 2-second duration is ideal, but if your live stream is faster-paced, consider a shorter duration.

Switch Sensitivity
Switch Sensitivity adjusts how responsive the system is to audio changes. Higher sensitivity means even small sound variations will trigger a switch, while lower sensitivity reduces unnecessary switching, responding only to significant audio changes.
When setting sensitivity for a live stream, consider the content type, background noise, and desired switching frequency. For interviews, a lower sensitivity is ideal to ensure switches occur only during noticeable audio changes. In fast-paced scenes, higher sensitivity is necessary for quick responses.
In quiet environments, you can increase sensitivity slightly, but in noisy settings, it’s best to lower it to avoid issues. Testing beforehand is recommended to find the optimal settings.
Threshold
In simple terms, the threshold defines the exact decibel level required to trigger a switch.
Let’s put this into practice. I’ll set the Threshold to -20 dB. For example, the live stream is showing A’s shot right now. Since neither A, B, nor C are talking, their volumes are all below the -20 dB threshold.
When B starts talking and her volume exceeds -20 dB, you’ll see that the live stream automatically switches from A’s shot to B’s shot. The live stream will stay on B’s shot as long as B is talking, and A and Hazel are C.
Additionally, I would not recommend adding local video sources to the VFA system.
How to Use
For more information about how to use it, I recommend directly watching this tutorial video. This will be more intuitive. If you only want to see the practical demonstration, I suggest starting to watch from 8:18.
16,034 total views, 19 views today

Meredith, the Marketing Manager at YoloLiv. After getting her bachelor’s degree, she explores her whole passion for YoloBox and Pro. Also, she contributed blog posts on how to enhance live streaming experiences, how to get started with live streaming, and many more.


