In sports events, church services, or any broadcast where dynamic overlays and graphics are essential. Using an alpha channel can bring a professional look to your stream. Whether they are lower-thirds or replay stingers, you can easily use them via NDI to input video sources with YoloBox Ultra.
In this blog, we will guide you on how to use alpha channels with YoloBox Ultra.
Prepare Your Alpha Channel
First, you need to have a alpha channel video file. The background may look black, but it’s transparent. To import an animation with a transparent background into YoloBox, make sure your animation’s output channel is set to RGB+Alpha.
For example, if you’re exporting this animation from After Effects, you need to first add the project to the render queue. Then, in the output module settings, choose QuickTime format, select Apple ProRes 4444 as the video codec, and set it to RGB+Alpha. This will ensure the animation is exported with a transparent background.
Set Up NDI as Your Input Source
Next, let’s add this video to OBS. Before sending the animation from OBS to YoloBox, you need to take care of two things.
First, Make sure that OBS is equipped with the NDI tools. OBS doesn’t have NDI Output functionality by default, so we’ll need to download an additional NDI Output plugin, which is free.
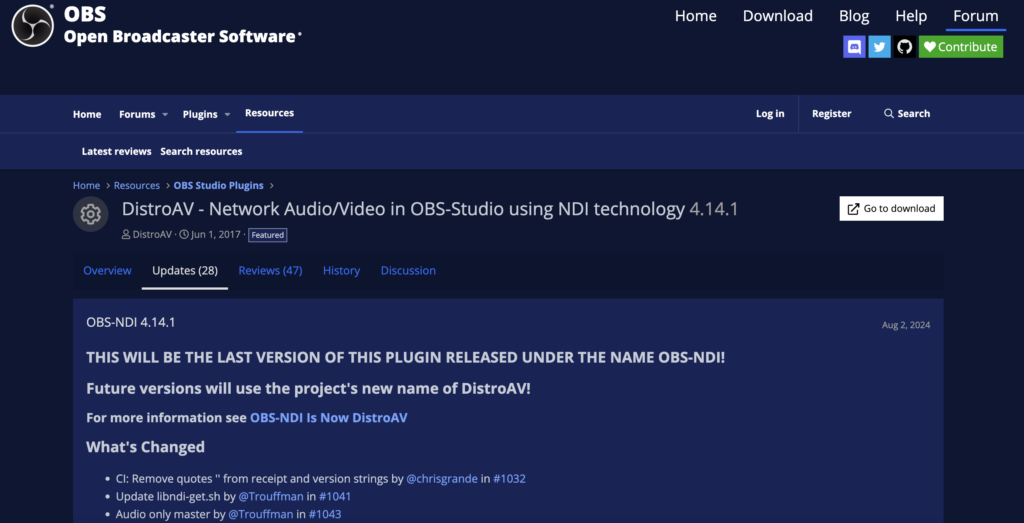
Search for “OBS NDI Output” on Google, and the first result should be the download page. Then, scroll down to the Installation section, click, and download the plugin. Note that only OBS version 30.0.0 and above support this plugin. Once installed, you’ll see the NDI Output option in OBS’s toolbar.

Input the NDI Source into YoloBox Ultra
Before using OBS’s NDI feature, you need to change some settings in OBS.
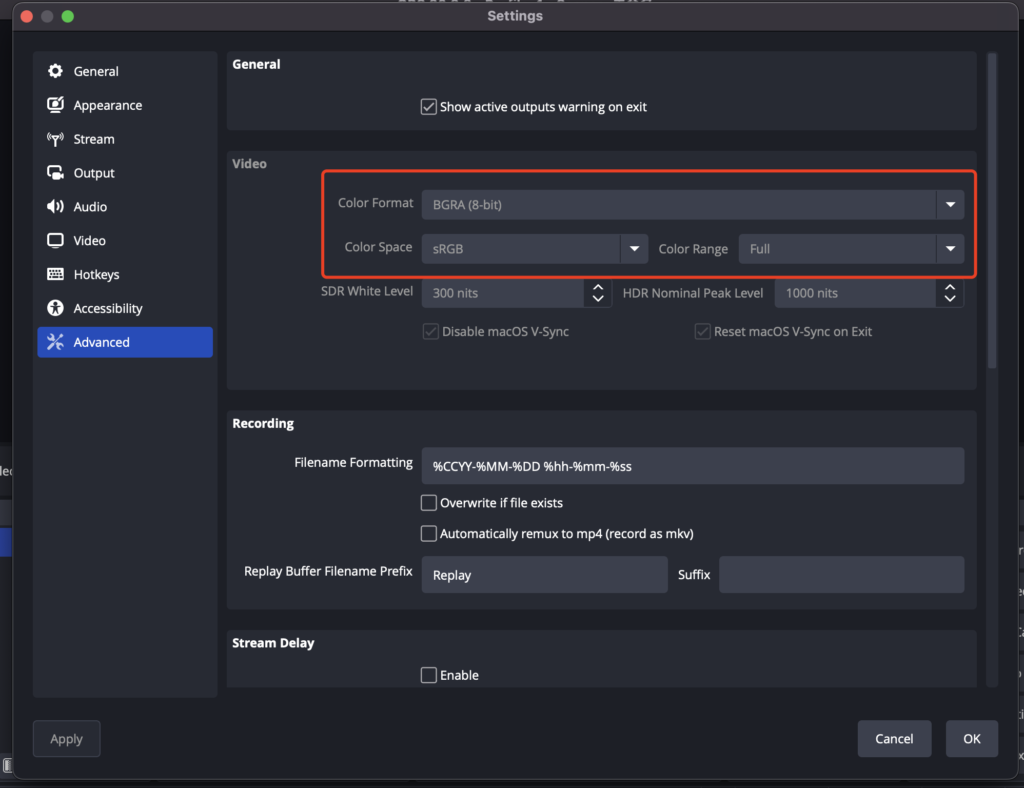
In OBS’s main interface, click on Settings in the bottom right corner to open the Advanced panel. In the video section, set Color Format to “BGRA, 8-bit,” Color Space to “sRGB,” Color Range to “Full,” SDR White Level to 300 nits, and HDR Peak Level to 1000 nits.

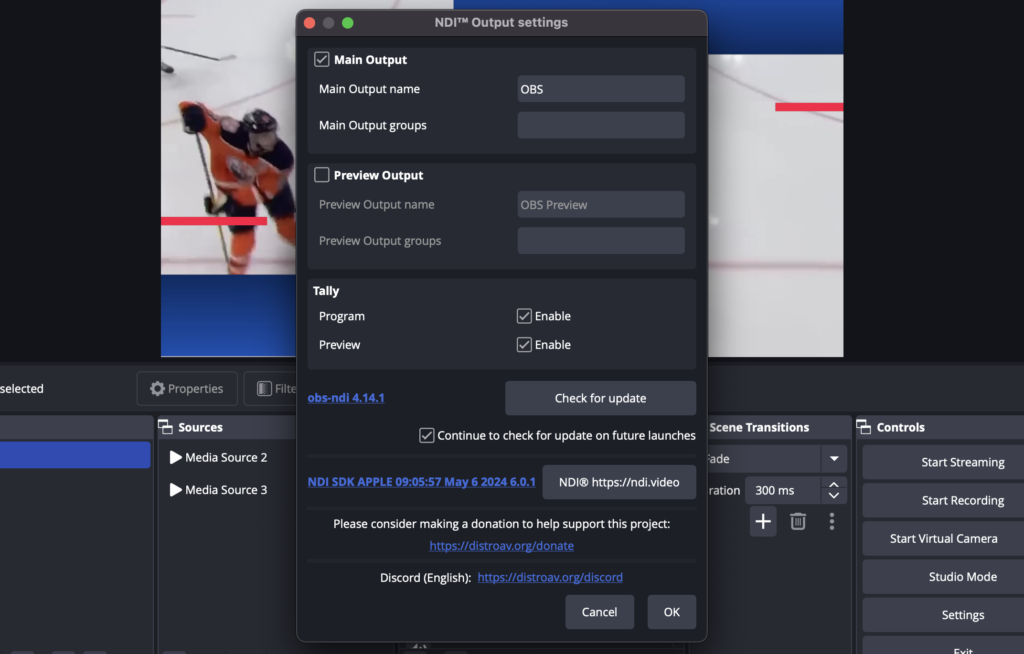
After adding the animation to OBS, I need to enable NDI output. Back in OBS’s main screen, go to the “Tools” menu, open NDI output settings, check only the Main Output box, and click OK.

On YoloBox Ultra, open the video source menu, select NDI, and you’ll see the NDI source coming from OBS. Also, make sure the devices are under the same network.
Now, you have successfully added the transparent background animation as an NDI source to Ultra. Now, you can use the PiP or video overlay to let the alpha channel display when streaming.
Final Thoughts
Alpha channels can add a professional edge to your live streams. With YoloBox Ultra’s NDI support, it’s never been easier to integrate alpha channel video sources and elevate your production.
14,907 total views, 7 views today

Meredith, the Marketing Manager at YoloLiv. After getting her bachelor’s degree, she explores her whole passion for YoloBox and Pro. Also, she contributed blog posts on how to enhance live streaming experiences, how to get started with live streaming, and many more.


