")
Today, I’m going to walk you through how to replace the battery on your YoloBox Ultra and YoloBox Pro yourself. This task is very simple and doesn’t require much technical skill.
Let me walk you through how to purchase the battery.
The YoloBox Pro battery is priced at $150, and the YoloBox Ultra battery is $200. You can purchase them directly through this link.
If you’re in North America or Europe, we can ship to you normally. For users in other regions, if you encounter any shipping issues, you can reach out directly to YoloLiv Support or Contact.
Prepare Your Tools
First, let’s take a look at the tools we’ll need.
I will use the YoloBox Pro as an example here. Please note that the internal component layout of the battery differs slightly between the Ultra and Pro, and replacing the battery on the Ultra is a bit easier. I will mention this during the explanation.
Besides the YoloBox and the battery, you’ll need a screwdriver, a glass slide—if you don’t have one, you can use a thin flat object instead—tweezers, and some 3M double-sided adhesive. I recommend using the 9448A model.
Removing the Battery
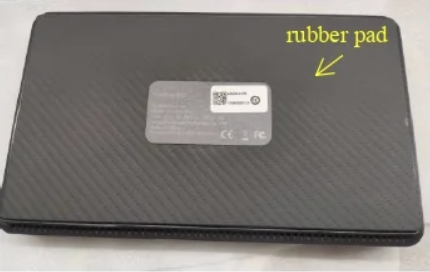
Flip the device over so we’re looking at the back. Now we need to start taking the back panel apart. First, carefully peel off this rubber pad. The Ultra does not have a rubber pad, so you can skip this step entirely.
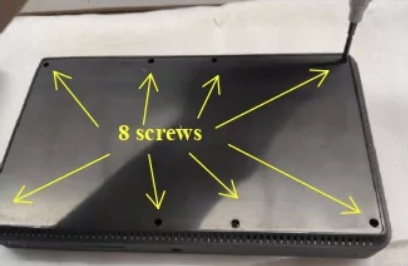
Once that’s removed, you’ll see 8 screws along the edges of the device. Grab a screwdriver and remove these 8 internal screws. Please note that the eight points on the YoloBox Ultra are not screws but rubber plugs. You will need to use tweezers to remove them, rather than a screwdriver.
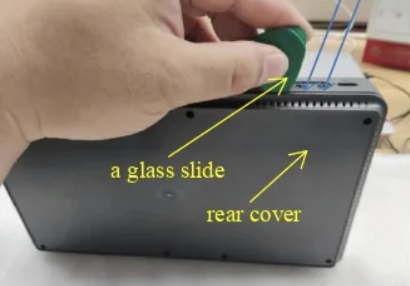
Next, check where the back panel meets the screen and locate a small gap. Take a glass slide and insert it into the gap, then rotate it along the edges all the way around to pop open the back cover.
Once it’s open, you’ll be able to see the “insides” of the device.
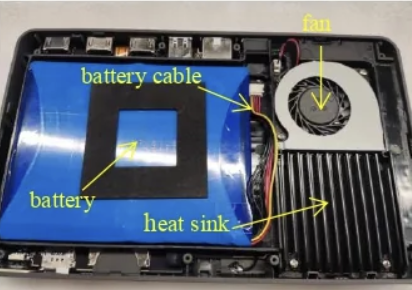
In fact, if you are a YoloBox Ultra user, replacing the battery is extremely simple. You can carefully and gently peel off the blue battery, then apply 3M double-sided tape to one side of the new battery and stick it onto the original battery’s placement points. After that, reinstall the back panel in reverse order, and you’re done!
However, if you are a YoloBox Pro user, the battery replacement process is slightly more complex, so please follow the detailed steps carefully and proceed slowly.
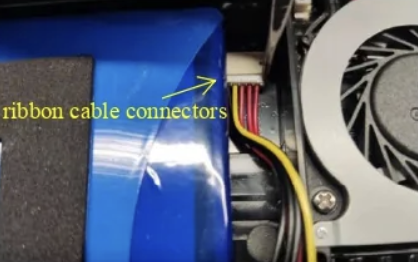
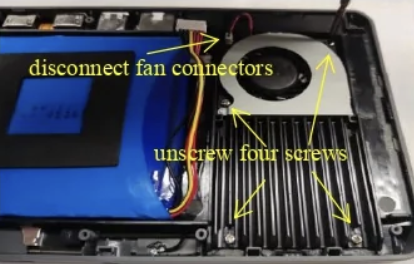
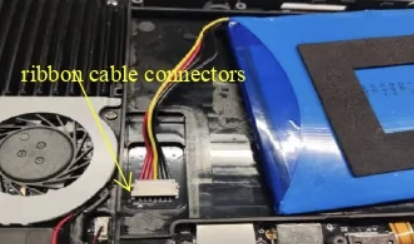
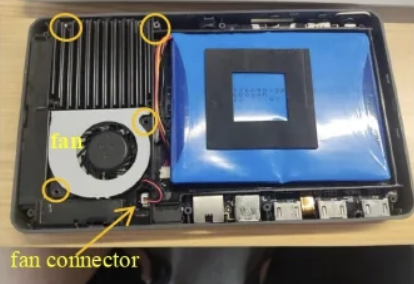
Use tweezers to carefully disconnect the ribbon cable connectors here. Up top, you’ll find a lone red wire connector — that’s the fan connector, so we need to disconnect it first.
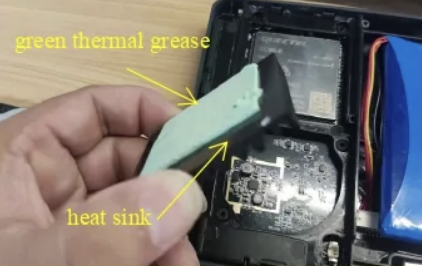
Then unscrew the 4 screws that hold the fan and heat sink in place.
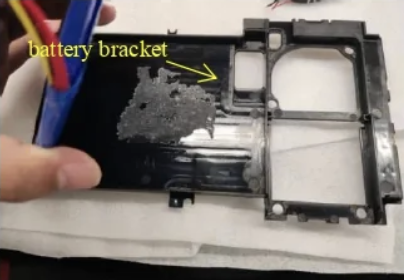
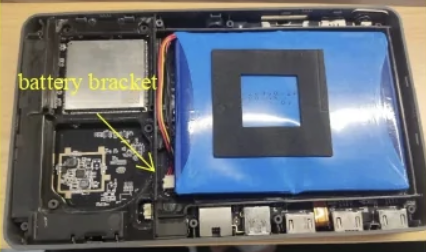
The battery is secured in a bracket, so carefully remove the battery bracket first.
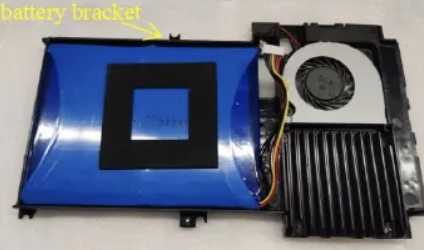
To make sure nothing else gets in the way during reinstallation, also remove the fan and heat sink.
Now comes the key step: gently but firmly remove the battery with your hands. Take your time here — the adhesive on the bottom is very strong, so it can be tricky to get it out.
Install the Battery
First, start with the prep work. Apply 3M double-sided tape to the back of the new battery.
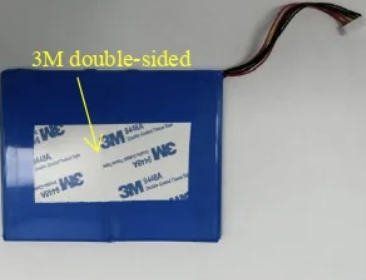
Next, connect the ribbon cable first, then peel off the protective layer from the double-sided tape and carefully place the battery in the same position as the old one.
After that, put the battery bracket back into its original spot.
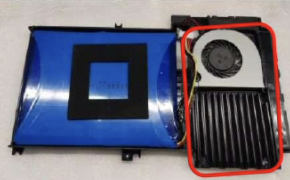
Now it’s time to restore the other components. Place the heat sink into the battery bracket, being careful not to disturb the green thermal paste.
Then install the fan into the battery bracket and plug the fan connector back into the motherboard. Finally, secure the four screws.
All done! Close the back cover and screw it in place. Reattach the soft rubber pad, and if the adhesion isn’t strong enough, you can add a new layer of 3M double-sided tape.
And that’s it — the complete steps to replace your device’s battery.
1,445 total views, 19 views today