")
XML files and Timecode are some of the key new features in the latest update. In version 2.2.0, XML files now include Timecode, which makes this feature even more complete.
What are XML Files
First, it’s important to point out that XML files are neither video files nor audio files. They don’t contain the actual video or audio—they act more like a “road map.” You can think of them as a checklist with coordinates: they record the file names, storage locations, the time ranges used, and where everything sits on the timeline. The actual video and audio files stay safely on your hard drive.
For this demo, I recorded a composite clip that includes the Program and multiple Video Sources. If you check your disk, you’ll see that the recorded files include the XML file, MP4 files, and AAC files—these are all very important.
When you import the XML into your editing software, it looks at the XML to find the corresponding MP4 files and then rebuilds the timeline according to the instructions. The imported XML creates a complete Project, including the order of all the different Video Sources, their Timecode, and audio. If any of the MP4 files are missing or their paths have changed, the XML won’t import correctly, or you’ll get offline media warnings.
This is why XML files are so small and easy to transfer, but they still rely on the original media—they’re meant to recreate your edit, not carry the media itself.
YoloBox Extreme XML File
The XML Files feature on the YoloBox Extreme is really easy to use. Basically, during a Live Event, you just open the ISO Recording control panel, turn on Generate Timeline FCPXML file, and then do your ISO recording as usual. Once that’s done, you can import the XML file into your editing software for much smoother post-production.
Where it gets a little more complex is the logic of how different video sources and Program clips are placed on the timeline during ISO recording. I’ll use Source 1 and Source 2 to explain.
First, if I record both Program and Source 1, but not Source 2, then the timeline will fill Source 2’s spots with Program footage. But if I only record Source 1, and neither Program nor Source 2, then Source 2’s spots on the timeline will remain empty.
On the audio side, you’ll see a single audio track on the timeline, which corresponds to the Program audio. The YoloBox Extreme automatically mutes all other video source audio tracks and uses the AAC audio from Program as the main track. It’s a very clear and logical setup.
So that’s an overview of the XML Files feature on the YoloBox Extreme. If this is your first time using XML files and you’re still a bit unsure, don’t worry! Next, I’ll walk you through how to use XML files step by step in four stages: applying LUTs, ISO recording, transferring files, and importing XML into different editing software.
LUTs
LUTs are also one of the key features in this update. I’m sure most of you are already familiar with them—many filmmakers consider LUTs an essential tool. That’s why I included this feature in the demo. And of course, if you don’t need to use LUTs, you can just skip this part.
First, you’ll need an SSD or SD card with your .cube LUT files stored on it. Insert the SD card into the YoloBox Extreme, then find the Video Source you want to apply the LUT to. Tap the gear icon in the top right corner of that source to open the menu, and you’ll see the LUT option. Tap Add LUT Cube File, find and select the LUT file on your SD card, then tap Done—you’ll see the LUT added to the list.
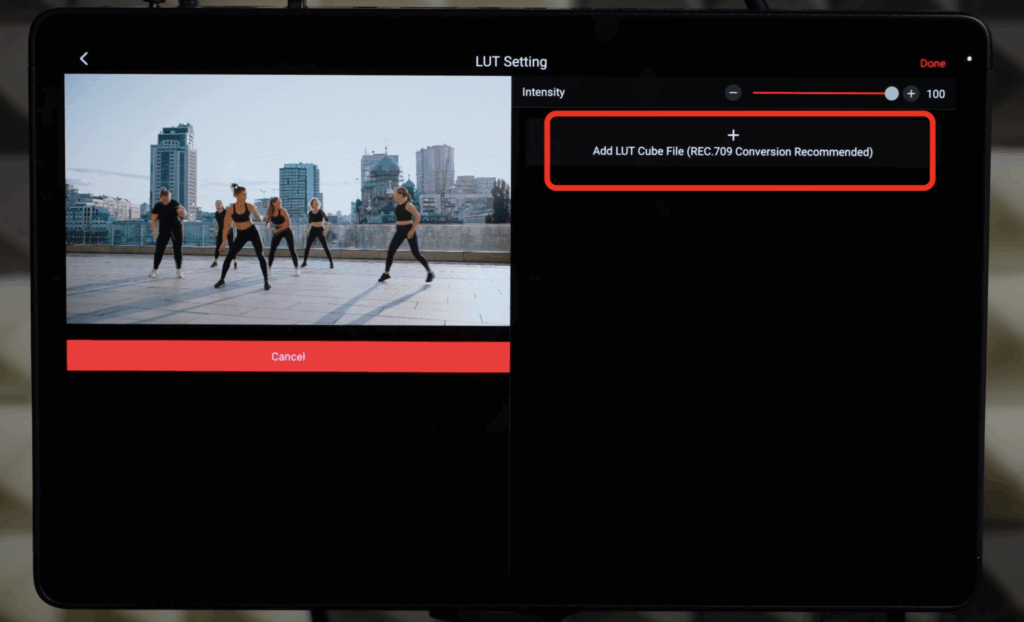
Next, tap the toggle button next to the LUT file to apply it to your Video Source. You’ll see the preview window on the left update in real time. If the colors look too strong or the effect isn’t noticeable enough, you can adjust the LUT intensity using the Intensity slider at the top to control the strength of the effect.
In fact, LUTs don’t just give your live video more vivid, stylized color—they can also help fine-tune color consistency between the YoloBox Extreme and different cameras. When you connect a camera and notice slight color differences between the camera’s feed and what shows on the Extreme, you can use LUTs to make precise color adjustments and get everything looking just right.
ISO Recording
Now, I’ve added multiple Video Sources to the device. First, I open the Recording settings on the YoloBox Extreme. Since I’m doing an ISO recording, I check both Program and all the video sources I want to record.
Here, you’ll see an option called Generate Timeline FCPXML file.
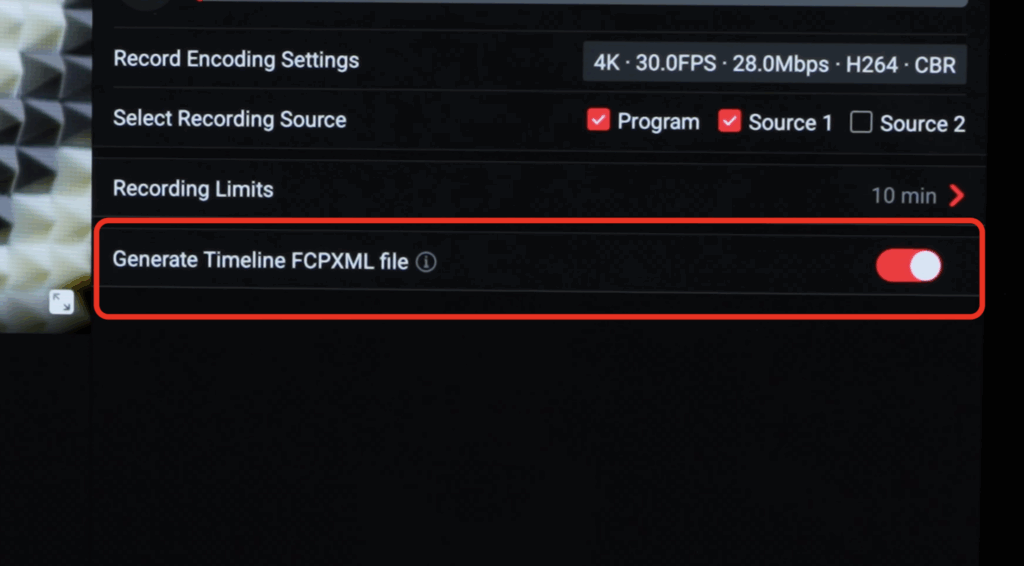
I turn this on, and now I start recording. The device is recording normally. During the recording, I’ll switch freely between different video sources, and then stop the recording. Once it’s done, a success message pops up on the screen, showing exactly where the recorded files are saved.
If you check the disk on your computer, you’ll find the XML file, the MP4 files for each Video Source and the Program, and the AAC files. All of these files are very important—make sure not to delete any of them.
File Transfer
If you want to transfer your recorded files to a computer, the YoloBox Extreme gives you two main options.
The first, and most common, method is to record or move the files to an SD card or SSD, and then connect that storage device to your computer to transfer the files.
One thing to watch out for: if you accidentally recorded the files to the Internal Storage, you can go to Account & Settings, open Storage Management, then tap Google Files in the top right corner. At the bottom, open Internal Storage, find your recorded files, tap the icon next to each file, choose Move to, and select your SD card or SSD. This will move the files from Internal Storage to your external storage.
The second method is even simpler: you can transfer files directly between the YoloBox Extreme and your computer. For this, you’ll need to have software installed on your computer, like OpenMTP or MacDroid, to receive the files. For detailed instructions on installing and using these programs, check out our previous videos—the links are in the video description for your convenience.
Import into Final Cut Pro
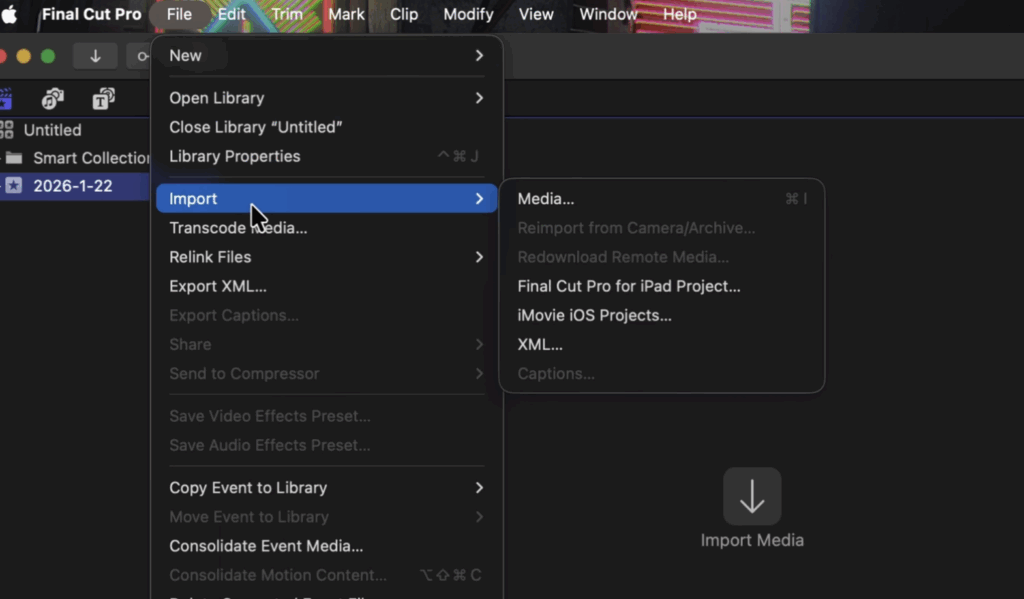
First, let’s take a look at Final Cut Pro. The YoloBox Extreme generates a .fcpxml file, which is Final Cut Pro’s native format and can be imported directly into FCP.
Just click Import in the top left corner of the settings to bring in the XML file. You’ll see a new project created based on the XML—just double-click to open it.
Once it’s opened, you’ll notice that each video source is recorded as a separate file, but they all retain the exact same Timecode as the live Program. Thanks to the Timecode, even though these video sources were recorded separately, when you import them into your editing software, they automatically align perfectly with the Program timeline, appearing in the correct spots without almost any manual adjustments.
Import into DaVinci Resolve
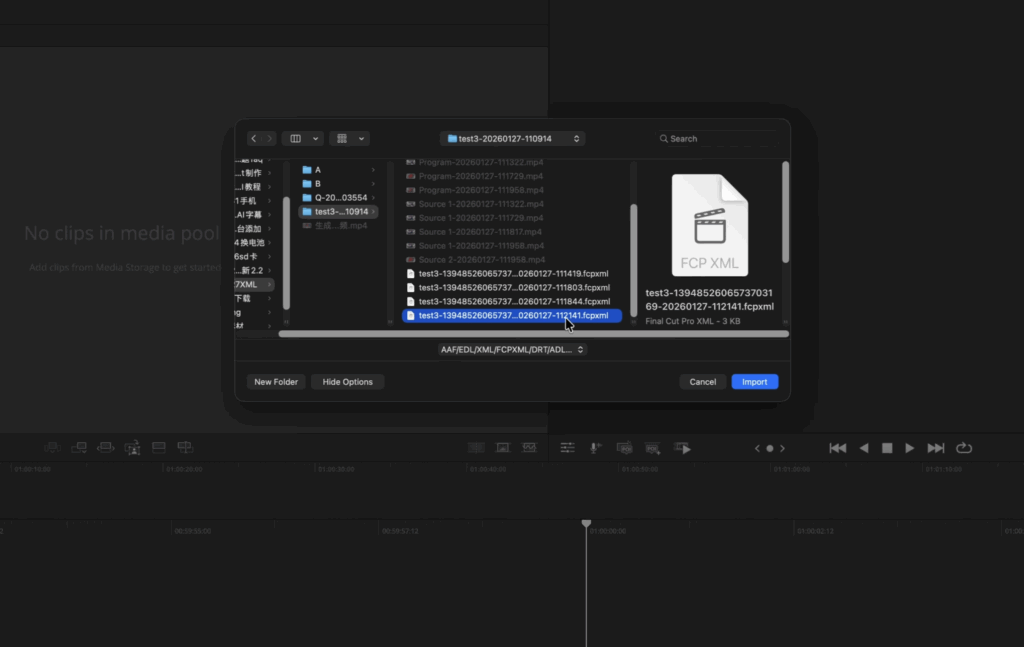
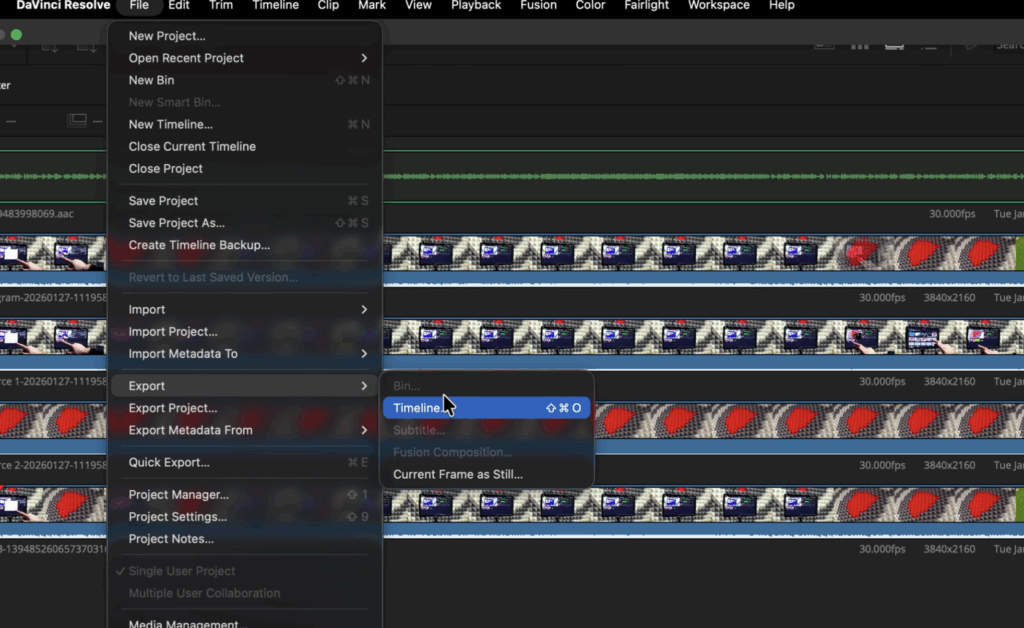
DaVinci Resolve also supports .fcpxml files, and it’s very stable. Open the File menu in the top right, choose Import, then select Timeline, and locate the .fcpxml file you generated.
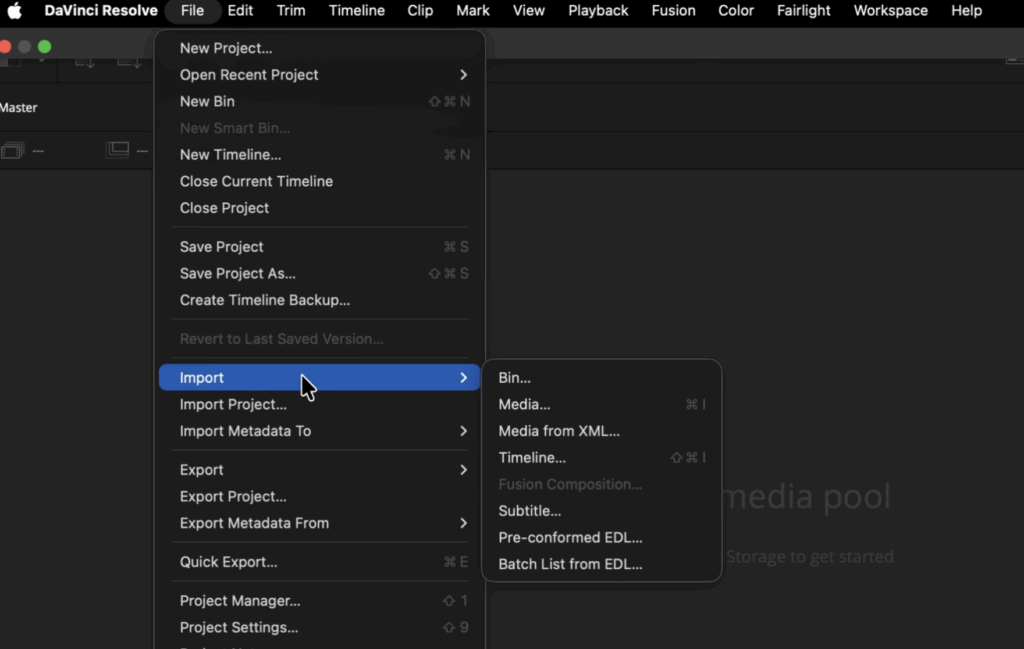
One extra step compared to Final Cut Pro: DaVinci Resolve may prompt you that some clips are missing. These “missing clips” are all the MP4 and AAC files referenced by the XML. After clicking Yes, you’ll need to locate the folder containing all the MP4 and AAC files, select it, and click OK.
After a short wait, Resolve will load all the media, timeline structure, transitions, and graphics exactly as planned.
Import into Adobe Premiere
Since Adobe Premiere doesn’t fully support .fcpxml files, we need to use DaVinci Resolve as a middle step. Basically, you first import the .fcpxml into DaVinci Resolve, then export a new file in FCP 7 XML V5 format, and finally import that new file into Premiere.
In DaVinci Resolve, click File in the top left, choose Export, and select Timeline. Switch your FCPXML 1.8 file (*.fcpxml) to FCP 7 XML V5 (*.xml) and save it to your desktop. One thing to watch out for: sometimes the file name doesn’t automatically change from .fcpxml to .xml, so you might need to manually rename it. Then click Save, and the exported file will appear on your desktop.
Now, open Adobe Premiere, click File, then Import, navigate to your desktop, and double-click the exported XML file. This will successfully import it as a project in Premiere.
2,954 total views, 35 views today