What is NDI?
NDI – which stands for Network Device Interface, was developed by NewTek that allows video to be transmitted over IP networks such as LANs and WANs in high quality and low latency. By utilizing NDI, you can seamlessly transmit video and audio between NDI-enabled devices, eliminating the need for complex cabling setups.
The Advantages of NDI
1. High-Quality Video
NDI delivers high-quality video with low latency, allowing for real-time video transmission over standard IP networks. It supports various video resolutions, including HD and 4K, ensuring excellent visual fidelity.
2. Low Latency Transmission
NDI offers low latency transmission, ensuring minimal delay between the source and destination. It also provides frame-accurate synchronization between multiple video sources, essential for live production environments.
3. Multi-Source Support
NDI enables the transmission of multiple video sources over a single network connection. This means you can easily incorporate multiple cameras, computers, and other devices into your production without the need for complex video routing.
4. Bi-Directional Communication
NDI supports bidirectional communication, allowing for the exchange of video and audio between NDI-enabled devices. This enables advanced features like remote camera control, tally signals, and synchronized audio.
5. Scalability
NDI is scalable, allowing you to expand your video production capabilities as needed. You can add more NDI sources or destinations to your network without significant infrastructure changes, providing flexibility for future growth.
6. Cost-Effective Solution
NDI eliminates the need for expensive and complex video infrastructure, such as dedicated video routers and lengthy cable runs. By leveraging existing IP networks, it provides a cost-effective solution for video production and streaming.
NDI Integration on YoloBox Ultra
YoloBox Ultra, the newly launched product by YoloLiv, comes equipped with powerful NDI integration capabilities. We’ll explore how YoloBox Ultra leverages NDI technology to streamline your live streaming workflow. From capturing NDI sources to integrating them seamlessly into your live streams, to outputting videos from YoloBox Ultra to NDI-enabled devices.
How to Use the NDI on YoloBox Ultra?
NDI currently is only available on YoloBox Ultra. Below is a step-by-step guide on how to use NDI on YoloBox Ultra.
YoloBox Ultra NDI Input
Step 1: Download and Install the OBS NDI Plugin
To ensure the NDI source video is received by OBS Studio, you need to install the OBS NDI plugin first.
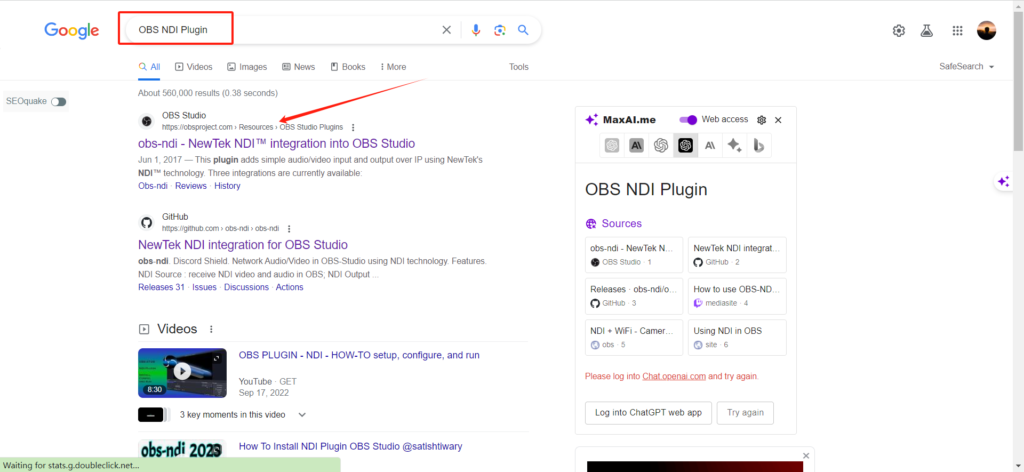
- Google search “OSB NDI plugin” and select the first result with the link from OBS Studio. Download and Install the OBS NDI plugin to your laptop.
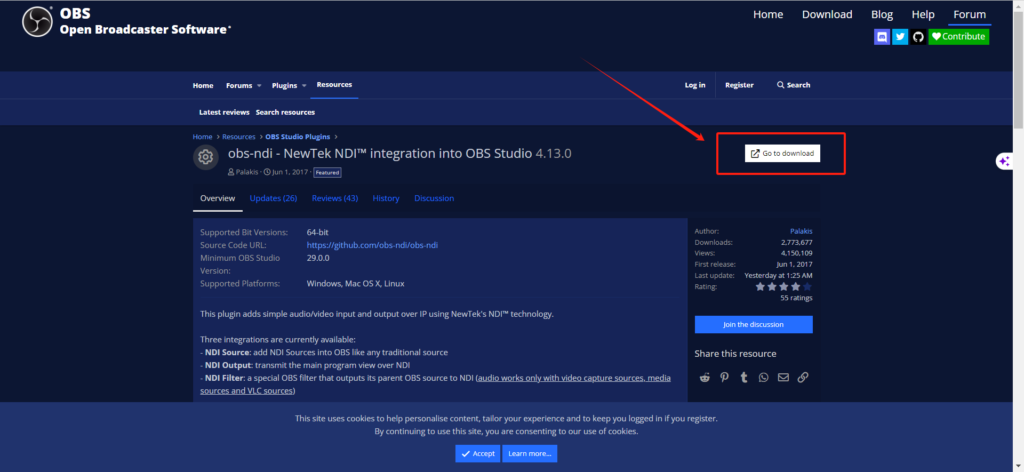
- Once installed successfully, you will see the “NDI Output Settings” option under “Tools” in OBS Studio.
Step 2: Connect NDI Sources
- Ensure the YoloBox Ultra you want to connect to is on the same local network.
- Launch the OBS Studio > Tools > NDI Outputting Settings.
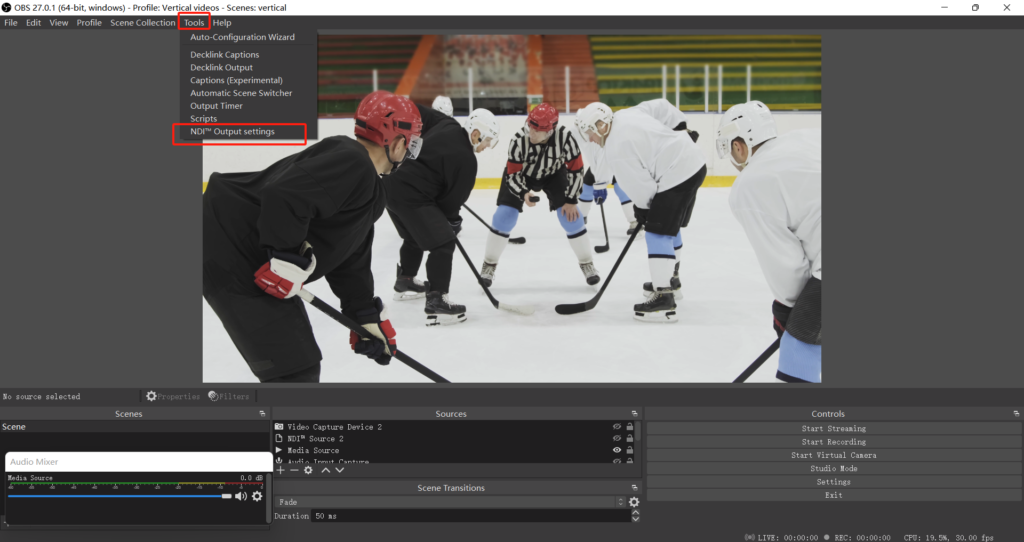
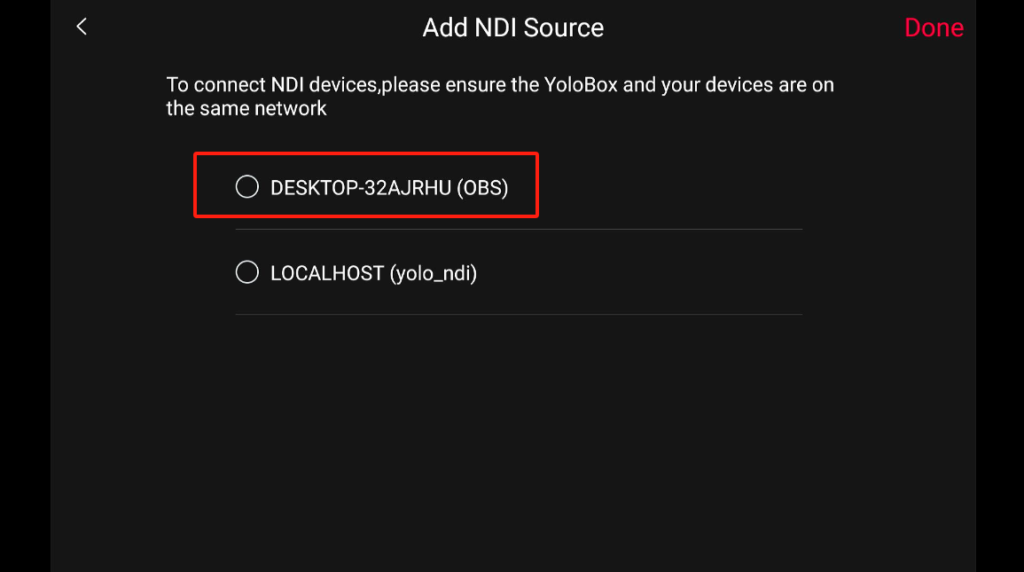
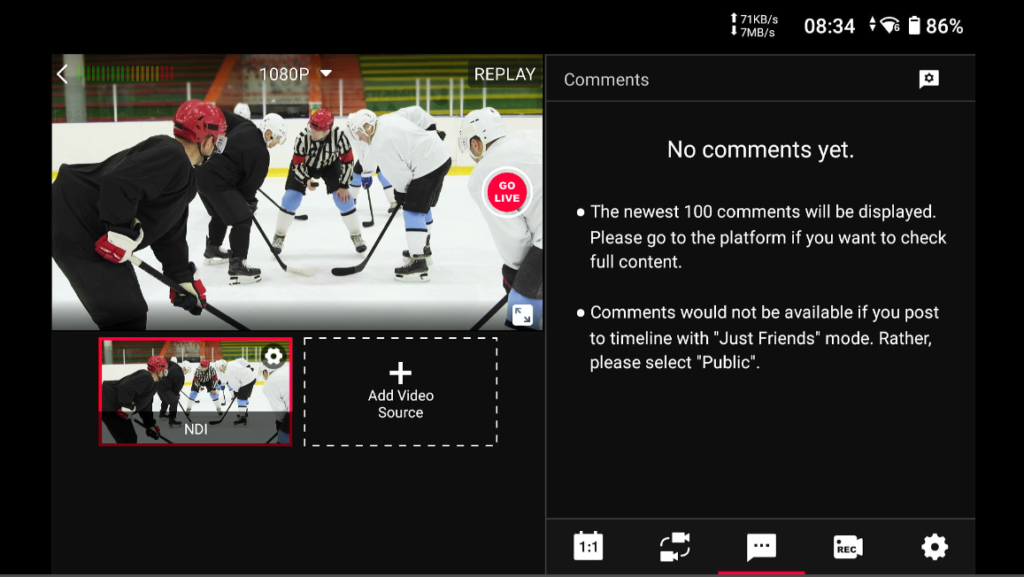
- Create and enter a live event on YoloBox Ultra > Add Video Source > NDI > Connect the matched source feed from OBS.
YoloBox Ultra NDI Output
1. Outputting NDI video to NDI Tools
Step 1: Download and Instal NDI Tools
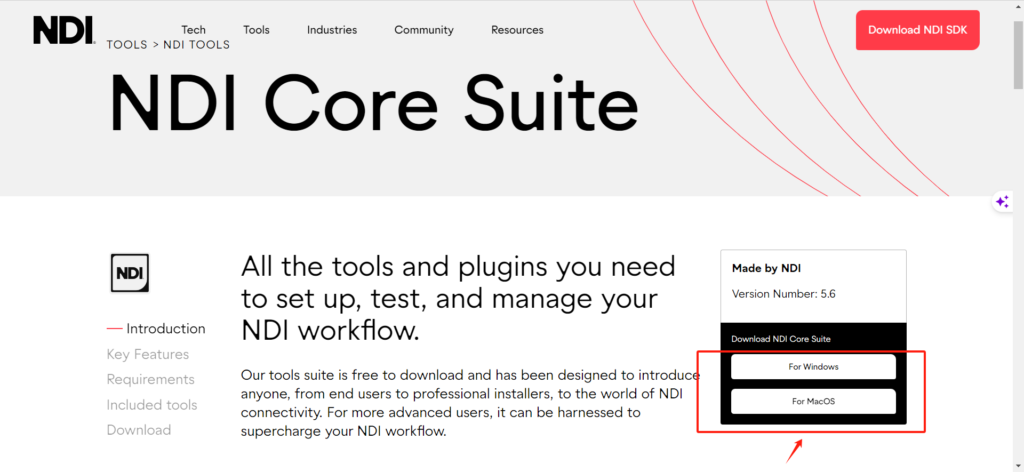
- Go to https://ndi.video/tools/ndi-core-suite/.
- Download NDI Core Suite, and choose between “For Windows” or “For MacOS”.
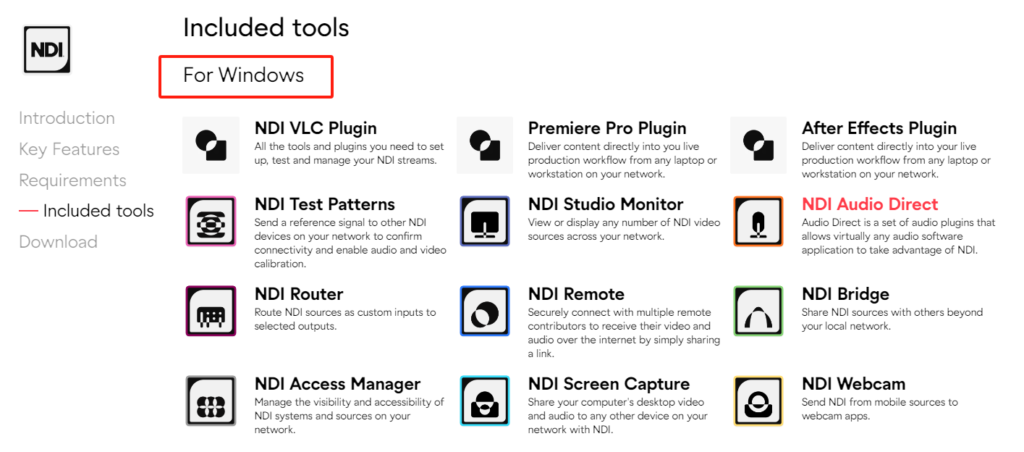
- Install the NDI Tools on your computer. This will include all the NDI tools and plugins for NDI workflow.

Step 2: Connect NDI Sources
Once you have NDI Tools installed, you can now output video from YoloBox Ultra to NDI Tools.
- Ensure the YoloBox Ultra you want to connect to is on the same local network.
- Create and enter a live event on YoloBox Ultra, navigate to “Settings“, and enable”NDI OUT“. (Note: You can select either the Program or other video sources for NDI output. But please note that graphic overlays are only available with the Program video.)
- Launch the NDI Studio Monitor app on NDI Tools.
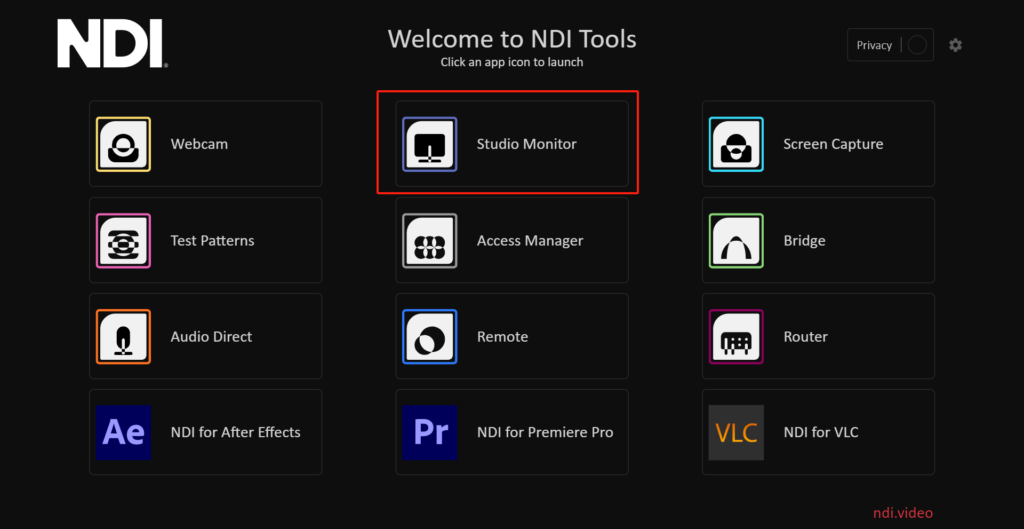
- You will then see the NDI source video feed. Select the matched device, you will now see the real-time video feed from YoloBox Ultra.
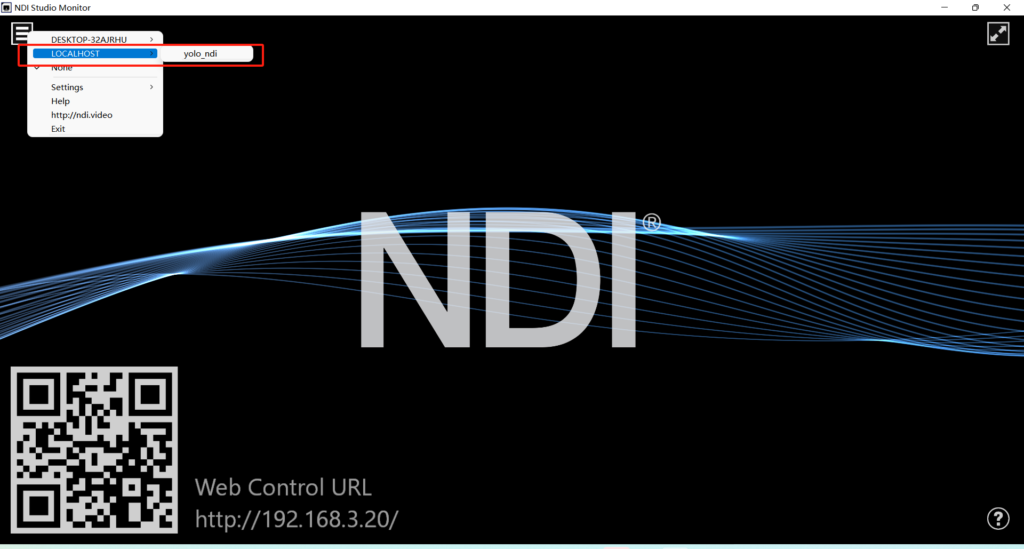
2. Outputting NDI video to OBS Studio
Step 1: Download and Install the OBS NDI Plugin
To ensure the NDI source video is received by OBS Studio, you need to install the OBS NDI Plugin first.
- Google search “OSB NDI plugin” and select the first result with the link from OBS Studio. Download and Install the OBS NDI plugin to your laptop. (Same as above)
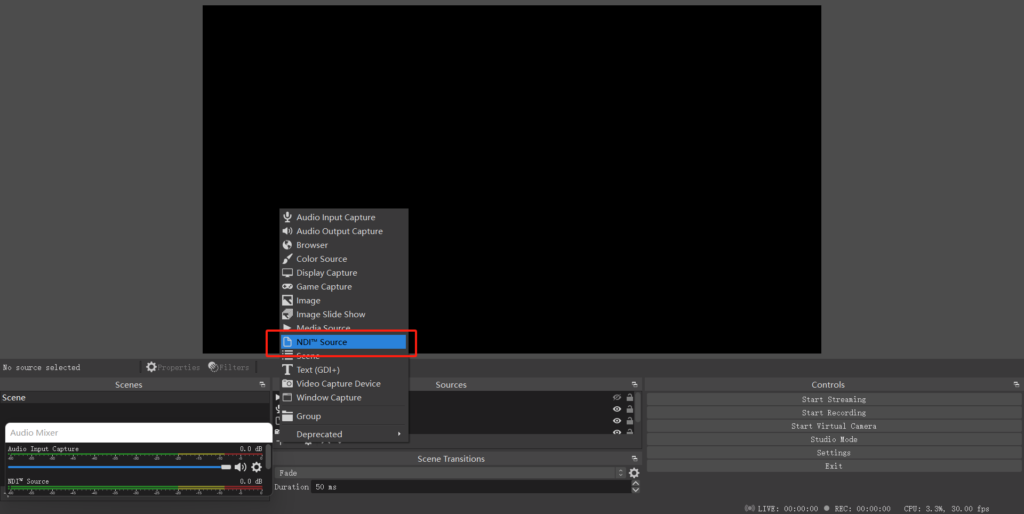
- Once installed successfully, you will see the “NDI source” in OBS Studio.
Step 2: Connect NDI Sources
- Ensure the YoloBox Ultra you want to connect to is on the same local network.
- Create and enter a live event on YoloBox Ultra, navigate to “Settings“, and enable”NDI OUT“. (Note: You can select either the Program or other video sources for NDI output. But please note that graphic overlays are only available with the Program video.)
- Launch the OBS Studio > Add video source > NDI Studio > Select “LOCALHOST (yolo_ndi)” for the source name.
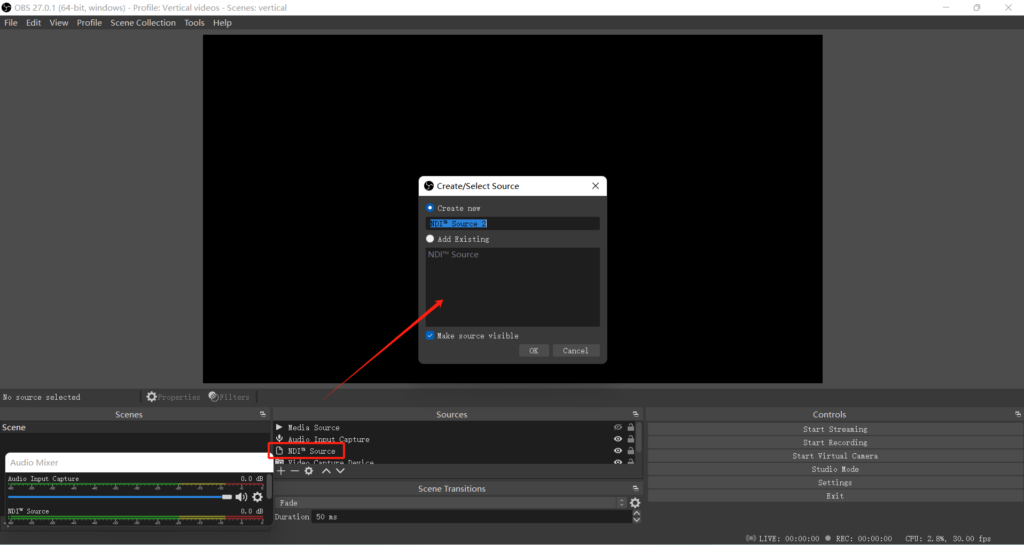
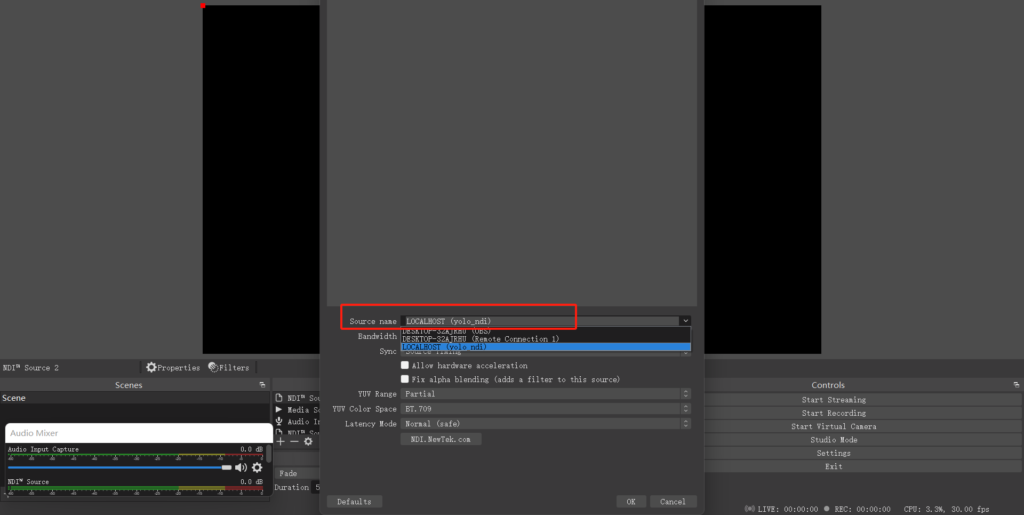
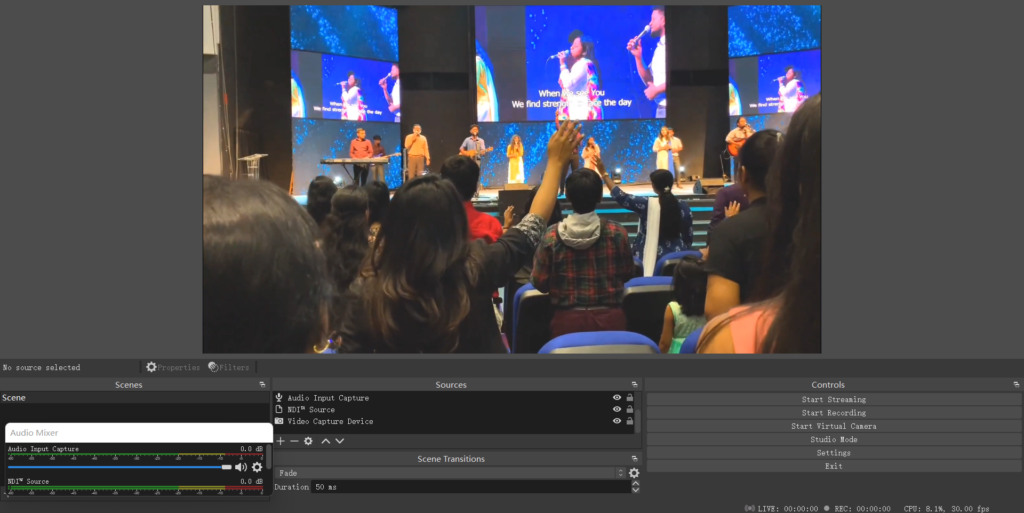
- You will see the NDI source feed from YoloBox Ultra appear on OBS Studio.
43,946 total views, 3 views today

As product operation manager at YoloLiv, Esther and her team stay focused on our customers’ needs and constantly push forward new updates for YoloBox and Pro. Also, she contributed some blog posts from perspectives on how to enhance live streaming experience, live streaming sop for newbies, and more.

