Setting a fixed MAC address on your YoloBox can help maintain a consistent network connection, especially in environments where device identification is essential. Follow these simple steps to configure a fixed MAC address on your YoloBox.
Step-by-Step Guide
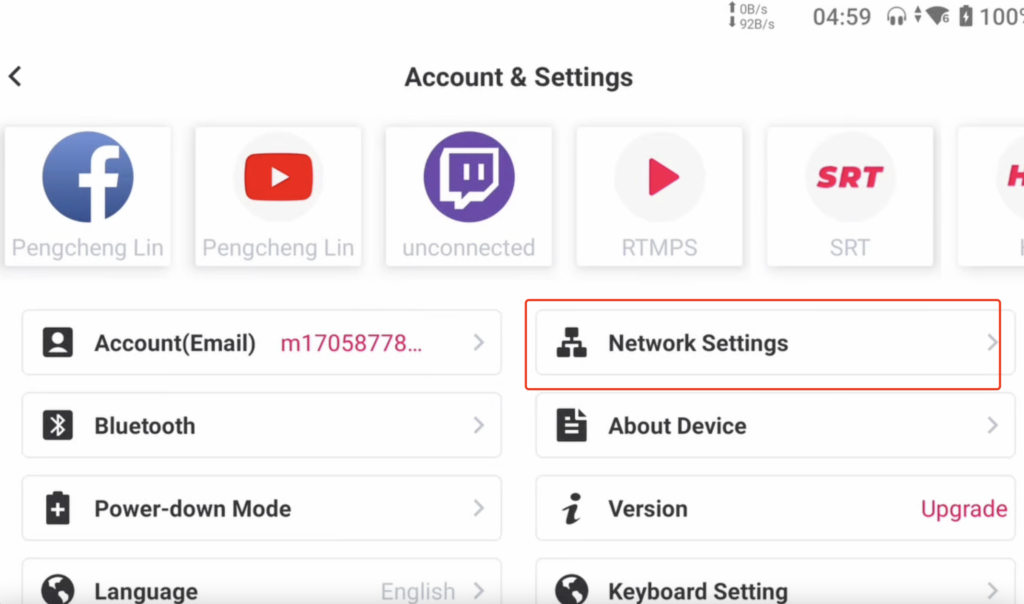
Access YoloBox Settings: Navigate to the ‘Account & Settings’. From there, go to the Network Settings option.
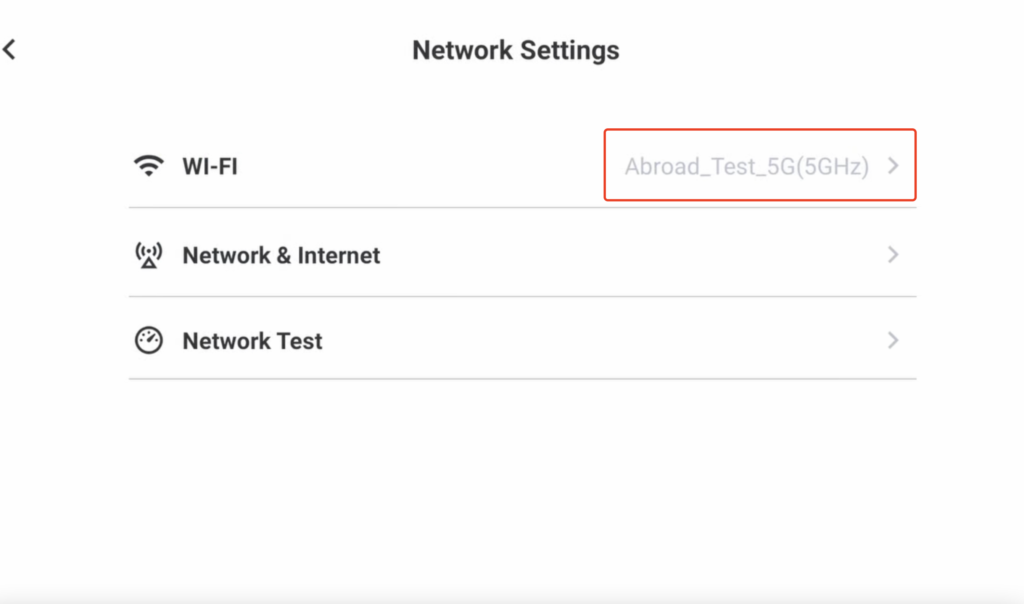
Open Network Settings: In the Settings menu, select Wi-Fi. This will display your current network connections.
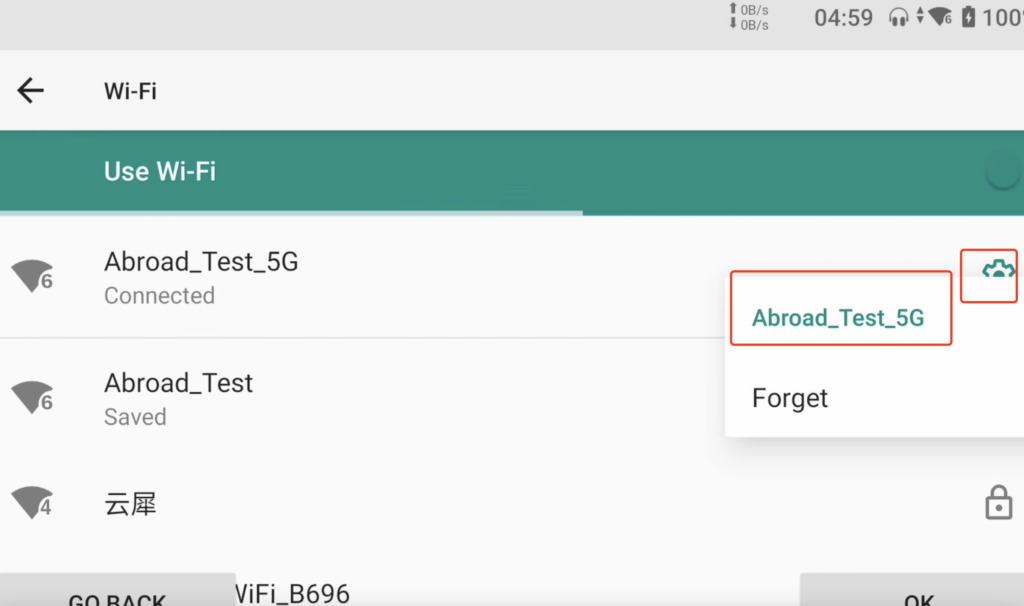
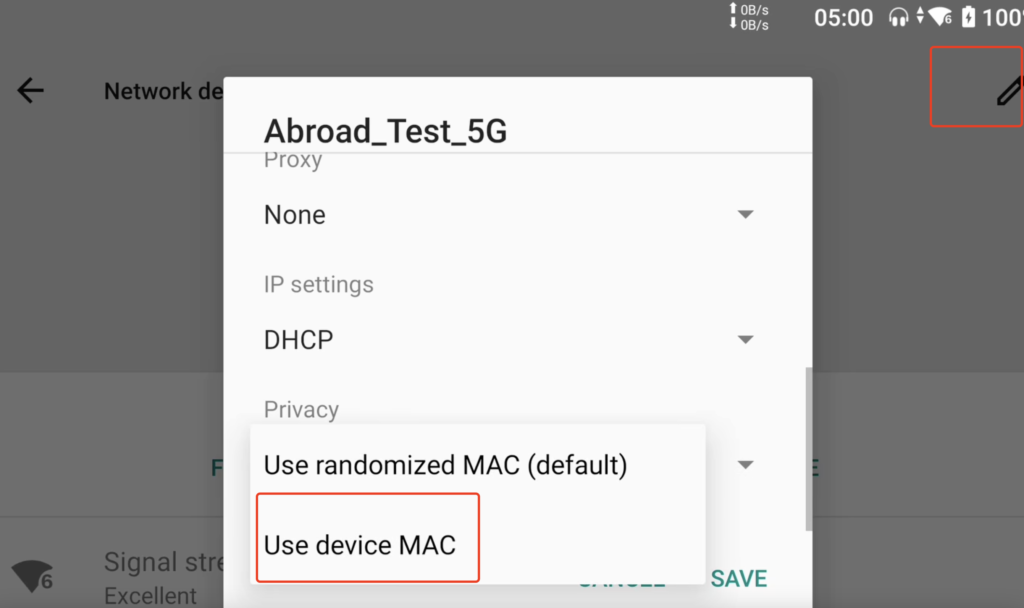
Find the MAC Address Option: Within the Network settings, look for an option Use Device Address. So, this is where you’ll set your fixed address.
Save the Settings: After changing the MAC address, save your changes. Tap a Save button at the bottom of the screen.
Note
Please note that if you reboot YoloBox Ultra, the MAC address will revert to a dynamically assigned one. A fully fixed MAC address is still being optimized and is expected to be available in a future version.
Conclusion
By following these steps, you can easily set a fixed MAC address on your YoloBox. This configuration can help in managing network connections more effectively, especially in multi-device environments. If you encounter any issues during the process, refer to the user manual or support resources for additional assistance.
8,492 total views, 7 views today

Meredith, the Marketing Manager at YoloLiv. After getting her bachelor’s degree, she explores her whole passion for YoloBox and Pro. Also, she contributed blog posts on how to enhance live streaming experiences, how to get started with live streaming, and many more.

