The YoloCam S3 is one of the most capable webcams you can connect to OBS Studio — but getting the most out of it requires knowing a few things that aren’t obvious from the factory defaults. This guide walks through the complete setup: connecting the S3, configuring it in the Compose app, adding it to OBS, and dialing in the settings for your specific streaming situation.
What You Need Before Starting
- YoloCam S3
- USB 3.0 cable (included with the S3)
- USB-C 3.0 port on your computer (or USB-C to USB-A adapter with USB 3.0)
- YoloLiv Compose app (download from yololiv.com — free, no account required)
- OBS Studio (latest version recommended)
The Compose app should be running before you open OBS. Compose applies your S3 settings at the driver level, so OBS receives the configured video rather than the raw default output.
Step 1: Install the Compose App and Connect the S3
Download and install the YoloLiv Compose app from the official YoloLiv website. Launch it before plugging in the S3.
Connect the S3 via USB 3.0. The camera powers on with a blue LED indicator around the lens ring. Compose will detect it automatically and display a live preview.
Important: Use the included cable or a certified USB 3.0 cable. Using a USB 2.0 cable will limit your video output and prevent 4K capture. If you’re not sure what you have, check that the port on your computer has a USB 3.0 symbol (the SS — SuperSpeed — mark) or blue color coding. Some brands like Insta360 only provide a USB 2.0 cable.
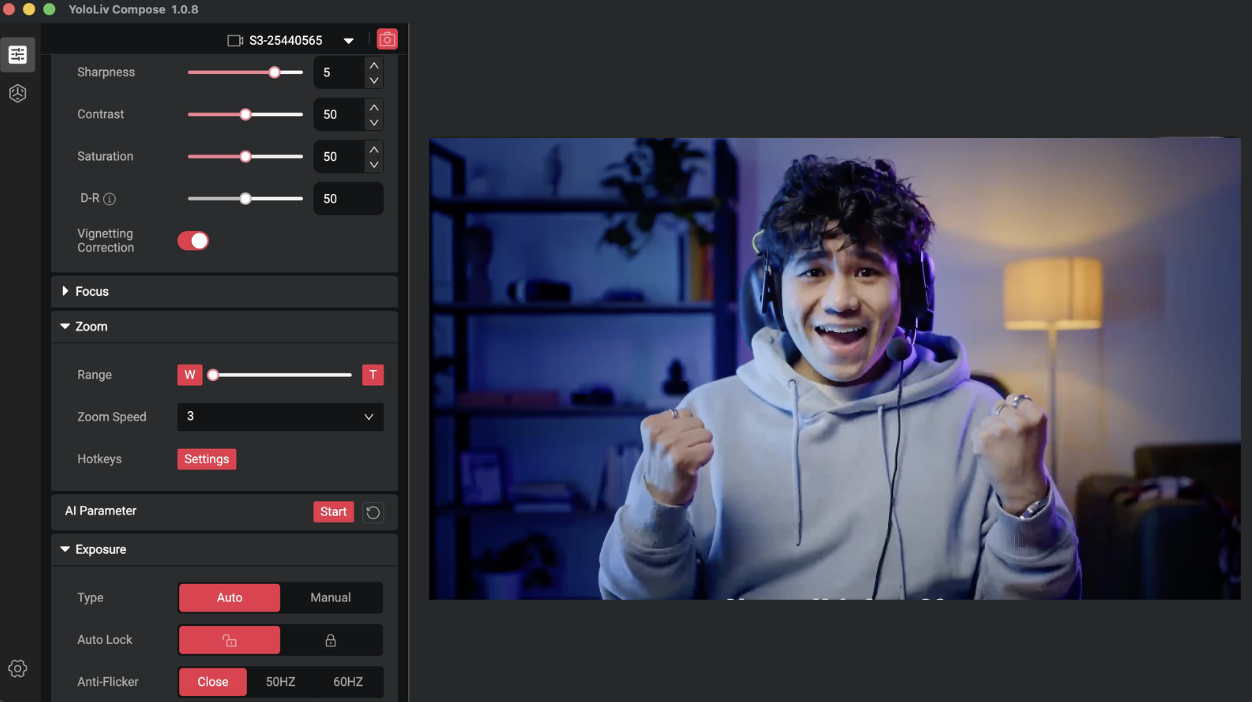
Step 2: Configure Your Settings in Compose
This is where you set the S3’s behavior before OBS even enters the picture. The settings you dial in here are what OBS will receive.
Autofocus Mode
Navigate to Camera Settings → Focus.
- AF-C (Continuous AF) — Recommended for most streamers. The camera tracks your position continuously.
- AF-S (Single AF) — Focuses once, then locks. Good if you sit in a fixed position and don’t want any focus adjustments during the stream.
- Face Priority — The S3 identifies faces and prioritizes them for focus. Recommended for multi-person setups or if you move around the frame.
Set your preference and it saves to the camera.
Exposure
For streaming, you generally want consistent exposure rather than auto-exposure that adjusts to room changes mid-stream.
Go to Camera Settings → Exposure.
Start with Auto Exposure and check the preview. If your image looks good and your room lighting doesn’t change significantly during a stream, auto is fine. If you stream in conditions where lighting varies (window light, multiple light sources), locking exposure is worth doing:
- Set ISO and shutter speed manually
- For 60fps: set shutter speed to 1/120s (double your frame rate) to avoid motion blur
- For 30fps: 1/60s shutter speed
- Adjust ISO until the preview looks properly exposed
Lock these values and they’ll hold throughout your stream.
White Balance
Auto white balance works for most setups. For consistent color across a long stream, or if you have mixed light sources (daylight from a window + tungsten desk lamp), manual white balance gives you a locked look:
Go to Camera Settings → White Balance → Manual.
Point the camera at a white piece of paper or wall and use the white balance picker to set a reference. The colors will lock to that reading.
Step 3: Add the YoloCam S3 as a Source in OBS
With Compose running and the S3 configured, open OBS Studio.
Adding the Video Source
- In the Sources panel, click the + button
- Select Video Capture Device
- Name it (e.g., “YoloCam S3”) and click OK
- In the device dropdown, select YoloCam S3
Resolution Settings in OBS
In the Video Capture Device properties:
- Set Resolution to match what you configured in Compose (either 4K or 1080p)
- Choose FPS to match (30 or 60)
- Set Video Format — select MJPEG or H.264 or YUY2. For 4K, MJPEG is typically required as it uses less USB bandwidth.
Click OK. You should see your live camera feed in the OBS preview.
Positioning and Cropping
Right-click the S3 source in the scene and select Transform → Edit Transform to fine-tune position, size, and crop.
For a full-frame face cam: scale the source to fill your desired area in the scene.
For a corner overlay on a gaming stream: resize to your preferred size and position in the corner.
Step 4: OBS Output Settings for Streaming
The S3 delivers high-quality source video — but how well that translates to your viewers depends on your OBS output settings.
Canvas and Output Resolution
Go to Settings → Video.
- Base (Canvas) Resolution: Set this to your monitor resolution (typically 1920×1080 or 2560×1440)
- Output (Scaled) Resolution: 1920×1080 for most streaming setups
- Common FPS Values: 60fps for gaming streams, 30fps for talk/face-cam focused streams
Encoder Settings
Go to Settings → Output → Streaming.
For platforms like Twitch and YouTube:
– Encoder: Use hardware encoding (NVENC for Nvidia GPUs, AMD VCE for AMD, Apple VT for Mac) if available. This offloads encoding from the CPU and preserves image quality.
– Bitrate: Twitch recommends 6000 Kbps for 1080p/60fps. YouTube accepts higher — 8000-10000 Kbps for 1080p gives the S3’s output more bitrate to work with.
– Keyframe Interval: 2 seconds (required by most platforms)
Higher bitrate gives the encoder more headroom to preserve the detail and color quality from the S3’s source. If you’re streaming at a low bitrate, some of the S3’s quality advantage is lost in compression.
Step 5: Lighting Recommendations for the S3
The S3 is capable in low light, but it performs at its best with intentional lighting. A few approaches:
Key light from the front: A single softbox or LED panel at 45° above eye level, positioned in front of you, is the simplest lighting setup that produces professional results. It fills your face evenly and the S3 handles the exposure without needing to push ISO.
Window light: Natural light from a window in front of you (not behind) is excellent. The S3 handles the color temperature shifts of natural light well, especially with manual white balance set.
No ring light required: One of the S3’s advantages is that it doesn’t need a ring light to look good. Its large sensor collects enough ambient light that a simple desk lamp or ceiling light produces acceptable video. Ring lights can be used, but they’re not a requirement the way they are with smaller-sensor cameras.
Avoid backlight: A bright window or light source behind you creates silhouette problems for any camera. If your desk faces a window, use a curtain or blind to control the backlight during streams.
Common Issues and Fixes
S3 not appearing in OBS device list:
Make sure Compose is running before opening OBS. Restart OBS after launching Compose if needed.
Image freezing at 4K in OBS:
Switch from 4K/30fps to 1080p/60fps in both Compose and OBS. 4K streaming places high demands on USB bandwidth; if you have other USB devices active, bandwidth contention can cause freezes. Also verify you’re using a USB 3.0 port.
Colors look different from the Compose preview:
Check that OBS is receiving the correct color space. In the Video Capture Device properties, ensure the color space matches your Compose output (typically Rec. 709 for streaming).
Autofocus hunting during stream:
Switch from AF-C to Face Priority AF in Compose, or switch to AF-S if your position is fixed. If the hunting happens in low light, adding a front-facing light source will help.
Compose settings not applying:
Ensure Compose is set to launch at startup and is running before OBS. If you open OBS before Compose, the camera may load with default settings. Close OBS, launch Compose, confirm the S3 preview looks correct in Compose, then reopen OBS.
Quick Setup Reference
| Setting | Recommended Value |
|---|---|
| Resolution (streaming) | 1080p @ 60fps |
| Resolution (local recording) | 4K @ 30fps |
| Autofocus Mode | AF-C or Face Priority |
| Shutter Speed | 2× frame rate (1/120s for 60fps) |
| White Balance | Auto (or lock manually for consistency) |
| OBS Encoder | Hardware (NVENC / AMD VCE / Apple VT) |
| OBS Bitrate | 6000–10000 Kbps |
| Video Format in OBS | MJPEG (4K) / YUY2 (1080p) |
Final Notes
The YoloCam S3 + OBS combination gives you one of the best webcam setups available for live streaming. The S3’s PDAF, large sensor, and Compose software handle the camera side. OBS handles the encoding and delivery. Getting the settings right on both ends ensures you’re getting the full benefit of the hardware you have.
Once configured, the S3 saves its settings internally — so the next time you plug it in, Compose loads your configuration automatically and OBS picks it up. The setup work you do once stays done.
The YoloCam S3 is available at $199 from the YoloLiv official store, Amazon, and B&H.
47 total views, 47 views today

Meredith, the Marketing Manager at YoloLiv. After getting her bachelor’s degree, she explores her whole passion for YoloBox and Pro. Also, she contributed blog posts on how to enhance live streaming experiences, how to get started with live streaming, and many more.