What do you think builds the view of the stream? If you check the photography in Wiki, the definition shows “practice of creating durable imagines by recording light”. You cannot escape the lighting whatever you want to stream to. But how you can use the lighting is a lesson that would never end.
The aim of this blog is to provide some fundamental cognition for what and how you can do with light. After reading this blog, we hope you can try some of the tips in your stream. That might bring you a little magic after the steps.
Some Lighting Factors You Need to Know
Do you know that colors in the lighting have the mood? For example, what would you think when having red color in front of you? Chili? Bullfight? Blood? This is how the common impression of certain color would affect you. So be patient to choose the type of color with your streaming theme.
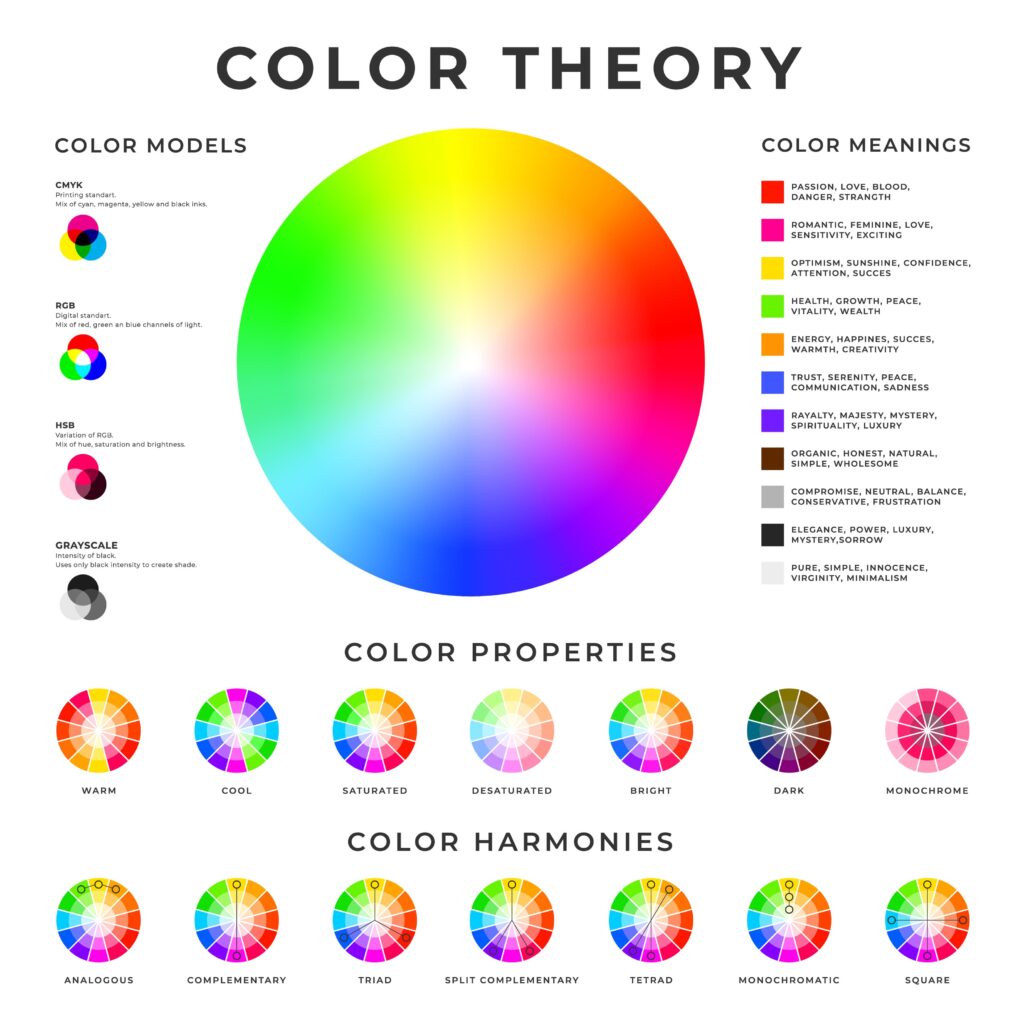
Here comes the question: how you can adjust the color of the streaming? We actually have many factors in the camera. For example, the color temperature, WB(white balance), exposure compensation, ISO(photo sensibility) and etc. Let’s just start with some common options used to adjust the type of color in the view.
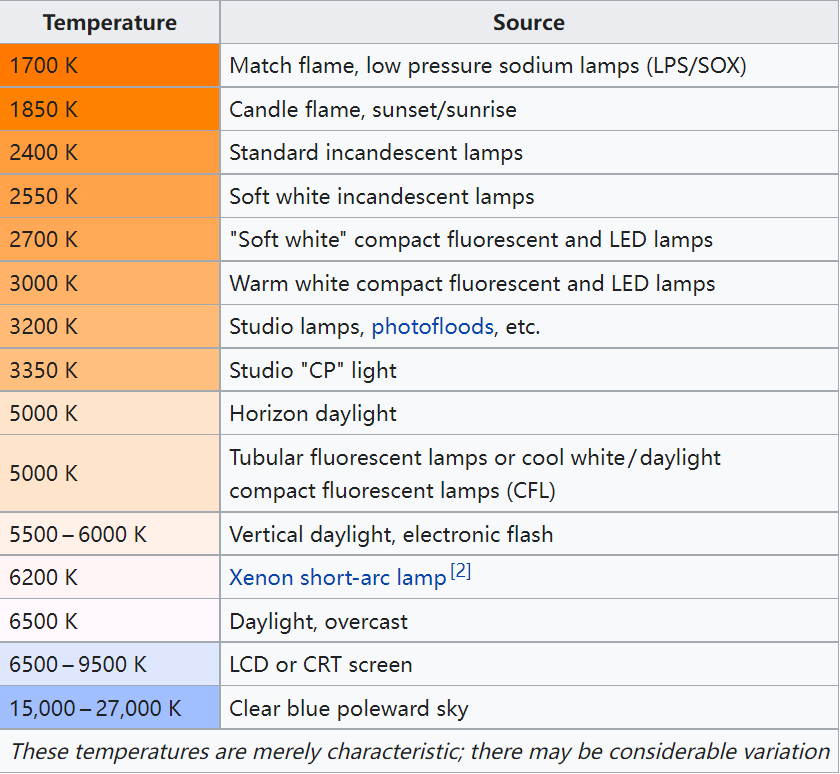
What is the color temperature? Actually, light is measured on a Kelvin scale from the lowest 1000K to the highest 10,000K. And the higher reading leads to the change from warm orange to cold blue. If you want the original color with no preference for warm or cold, you can choose 4000K to have a natural view. While the commonly used period for color temperature would be from 3200K to 5600K. You do not want to go too far to damage the view.
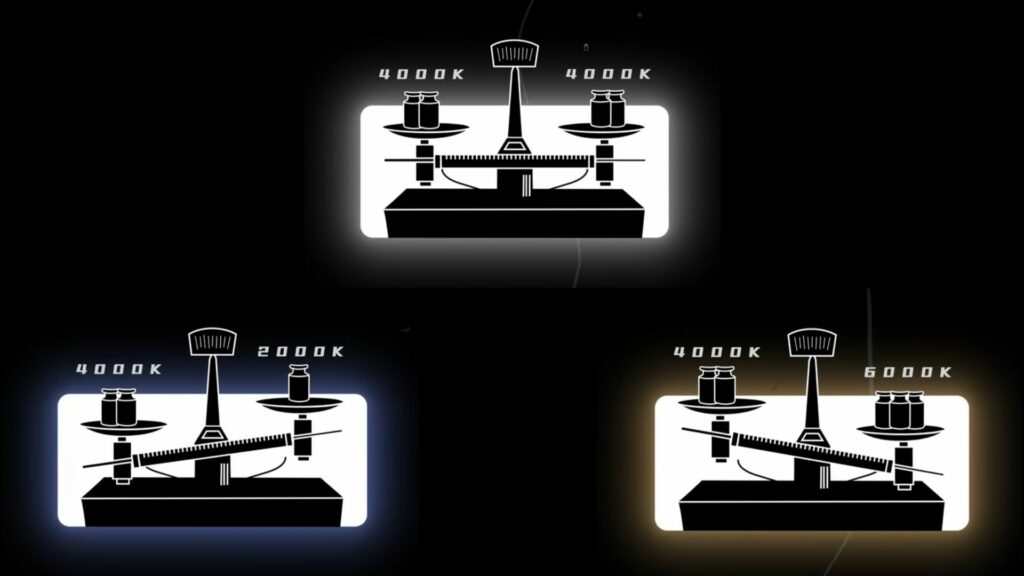
WB has the same unit with the color temperature. But they are not the same factor in adjusting. WB balances the color temperature in your image. It adds the opposite color to the image in an attempt to bring the color temperature back to neutral. If WB is bigger than the color temperature, the view would be warmer than it should be. And same colder change would happen when WB is less than color temperature.
Before The Startup: Turn off The lights
What really helps is to turn off any pre-installed lights in your room if you are doing indoor streaming.
If you’re in a home office, you may have a ceiling fan or some other type of light directly in the center of your room. That light is really meant to illuminate the entire space, but sometimes that can do more harm than good and ruin your shot. Just turn it off and restart with a clean slate. You can then build your lighting one by one to create a better look that you’re going for.
Soft Light? Or Hard Light?
Hard light comes from a single-point source. Imagine you are using a water pipe to wash the car. Only part of the dust would be taken away and your car would have a dividing line when moving the pipe. This is also described as “harsh” lighting and gives strong separation in brightness.
Soft light is produced by a diffuse light source. It goes down like little rain and illuminates evenly in the area. It would balance the average view and provide a gentle look in your camera.
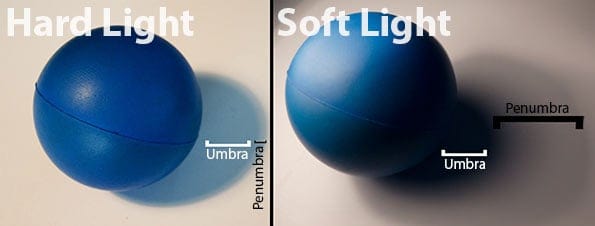
Knowing the difference between soft and hard light allows you to make choices and changes to your video lighting mood. As a simple example, you could close the drapes and use small, powerful lights to create dramatic images for serious moments. Or, you could use lights filtered through a commercial light diffuser (sometimes called a “lightbox”) to achieve the opposite mood.
Three-point Lighting System
A three-point lighting system is a common-used lighting setup that taps into three different light resources to build the lighting in the view. This setup makes a measurable difference in the video quality with less effort, ensuring your videos (live or pre-recorded) are well lit.
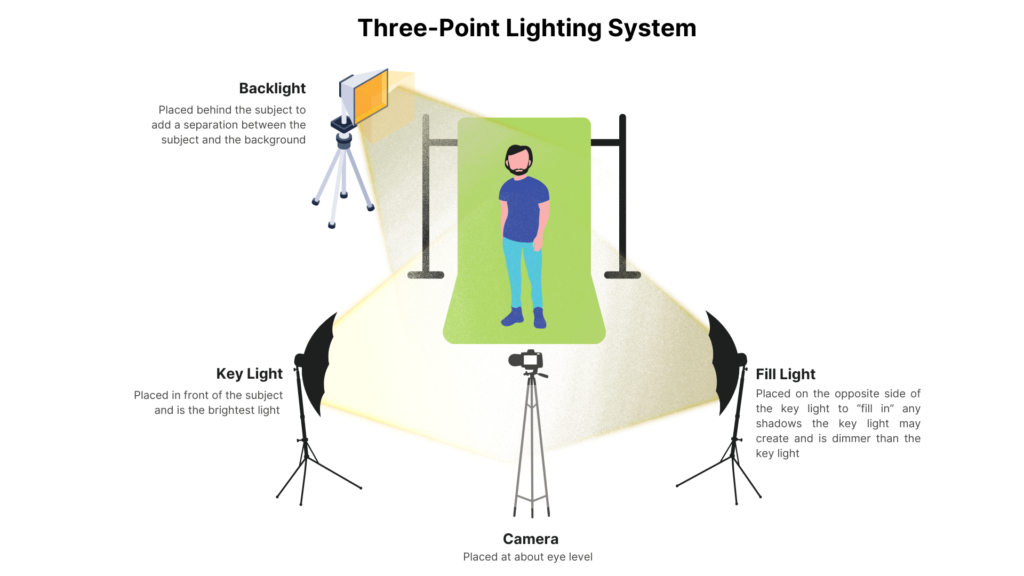
- The Key Light is the strongest light you have. It provides most of the illumination. It should be positioned pointing down at your subject at an angle, and located about 45 degrees to their right or left.
- The Fill Light is usually half as strong as the key light. It should be positioned to the opposite side of the subject, also at a 45-degree angle. The purpose of the fill light is to fill in the shadows on the subject’s face.
- The Back Light is the final element. As the name implies, you should place this light above and behind the subject, usually off to one side. This light will help make your subject stand out from the background and create more depth.
How does the three-point lighting system benefit your stream? Three-point lighting makes the video or live stream look more professional and polished. And It helps to reduce shadows and makes the subject’s face more visible. If you’re using a green screen or virtual background, it will be easier to replace because there will have a better separation between you and the background. Using this setup, you can monitor your lighting mood and choose the appropriate lighting setup to render the emotion. That makes your picture more attractive compared with a no-lighting setup.
One thing that most people don’t mention in the Blog, but has become increasingly relevant as fluorescents and then LEDs have replaced traditional filament/incandescent “tungsten” lights, is color purity.
Tungsten lights inherently have a smooth distribution of light intensity across the visible spectrum, with only very limited variation in color temperature (nominally ~3200K) when dimmed. Standard fluorescent tubes tend to have a big spike in the green part of the spectrum and cheaper LEDs can be similar, often with a dip in part of the red spectrum, both of which result in less-than-ideal reproduction of skin tones which no amount of color correction (live, or in post-production) can compensate for.
Of course, there are techniques to manufacture tubes and LEDs with better color purity and produce excellent results on video, but such items cost more to manufacture, so video producers should be wary of buying the cheapest lights if they may get used as the main source of illumination (ie the key light). Colour purity is not so important for any of the other lights – indeed it can be desirable to introduce different color tints, for effect, as already mentioned.
So if putting together a kit of lights on a budget, my tip is to get one very good light for the key light, and then economize with cheaper ones for the others. There is a rating called TLCI (developed by a BBC engineer called Alan Roberts) which is widely used, so if you see a light with a TLCI rating of 90+ then it is good to buy/use. https://yujileds.com/what-is-tlci-television-lighting-consistency-index/
Martin Kay, an expert in video production who works at ZEN Computer Services – PC Video Products & Consultancy
Outdoor Lighting Setup
So what about if you’re outdoors? In addition to the right mobile live streaming equipment setup, you can create a simple 3-point video lighting setup using the Sun. It is the strongest light resource available everywhere.
You can start by placing the sun in the position of the key light, just offset from your subject to one side or the other. To do this, you’ll have to record in the morning or afternoon, when the sun isn’t directly overhead.
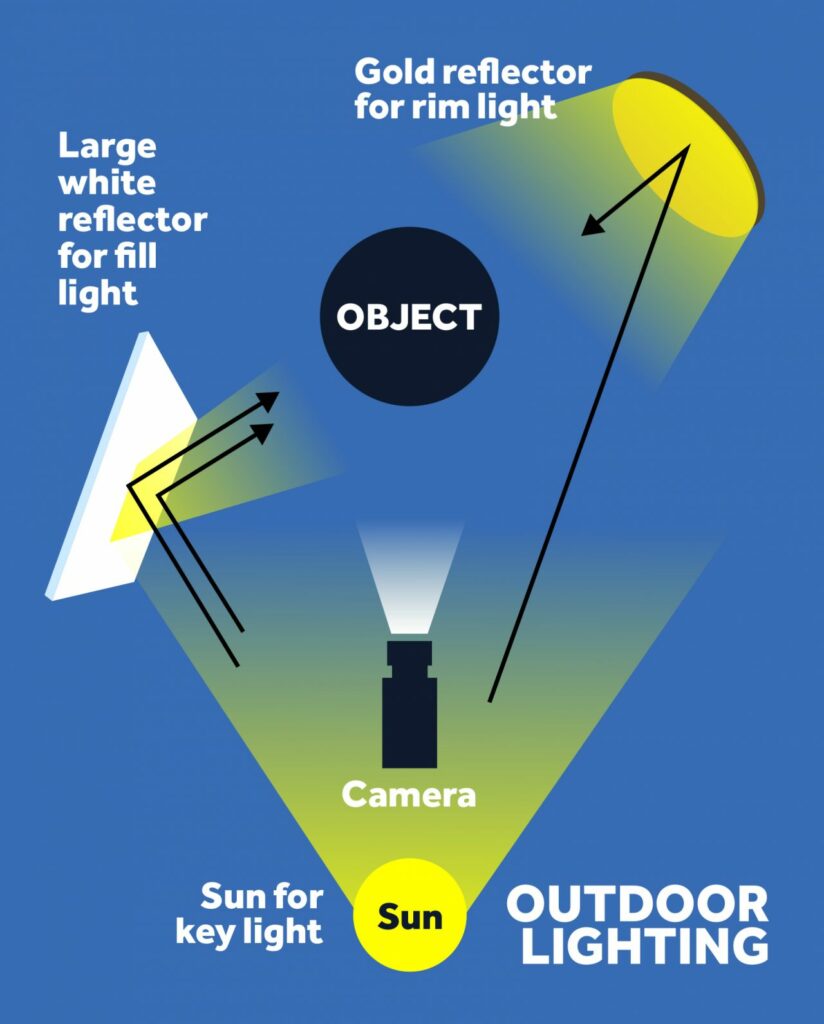
You can create a fill light and a backlight using reflectors to redirect (or “bounce”) sunlight onto your subject. A reflector could be a commercial product or even a large sheet of white cardboard. Sometimes, a gold reflector is useful to enhance the sun’s natural color. This is most relevant for the backlight setup.
Of course, this is all much harder when it’s cloudy and the sunlight is entirely diffuse. Three-point outdoor lighting depends on having some direct sun. And the weather is unpredictable, which is why many videographers use artificial lights.
Some Other Accessories You Might Need
We’ve talked a lot about the theory of lighting and how to build it up. And in the accessory collecting list, we do introduce the Aputure MC RGB Light as one of the common lighting lit found by our users.
Besides having RGB light resources, there are more accessories aimed to modify the lights. Modifiers go between the light source and your subject, with the goal of changing the quality or intensity of the light. Umbrella creates a much larger, softer light source. Softbox shapes and softens the light to become more flattering. It also tends to be quite directional and is easy to control. You can even add modifiers (such as grids) for it. Reflectors allow you to reflect light back onto your subject.
You can search the kits below on the markets to meet your needs. But you can also DIY some hand-made lighting kits using the available materials like sheets, shower curtains, umbrellas, and lampshades.
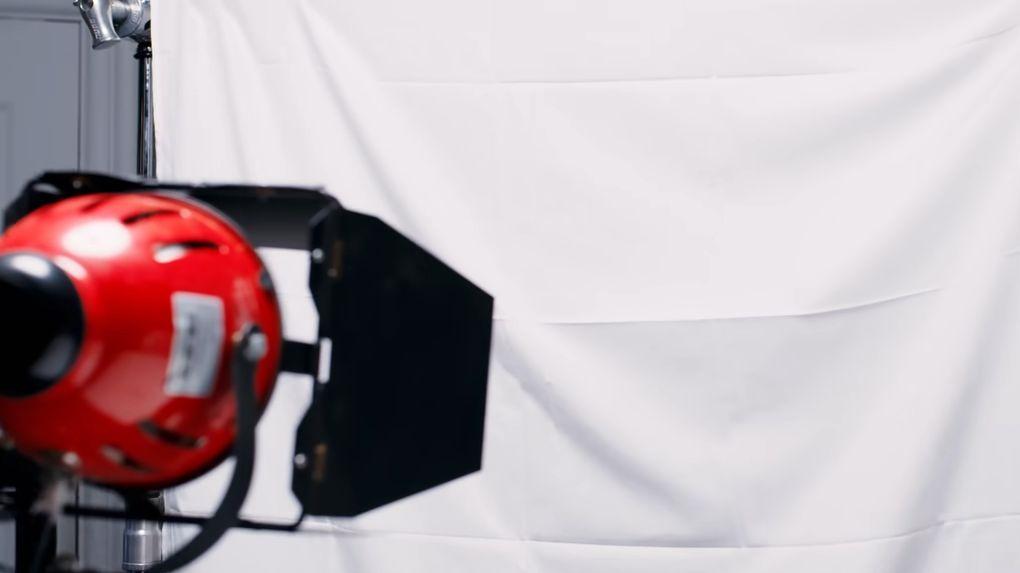
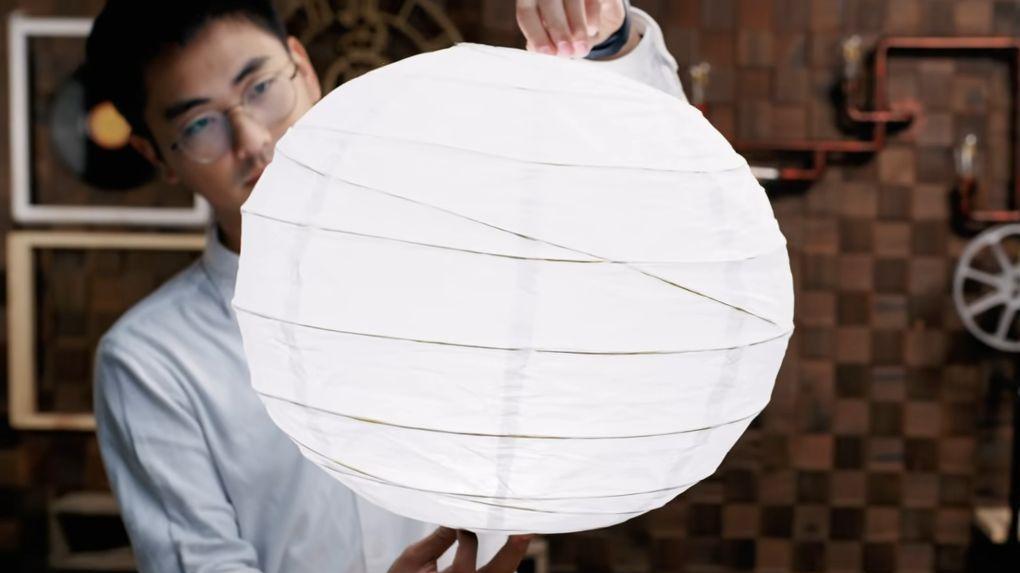
For example, a floor hanger hanging with a white bed sheet would be a good way to create soft light. Add an RGB panel inside the paper lantern cover to build the mobile soft light ball. Large pieces of plastic foam can be used as low-profile reflectors. Expand your imagination with the available tools you have.
Conclusion
Studying is a long-term work for people who want to photograph. But it is always simple to have the first step. Join the Official YoloLiv Users Group to learn more tips and tricks, tutorials about live streaming, get help from live streaming peers, and more.
To level up your video productions? Check these tips and tricks out!
Cerise is a support specialist at YoloLiv with three years of experience working as a Customer Support Specialist in the consumer electronics industry. She also produces articles including video productions, tips and tricks and expert knowledge in the audiovisual industry.

