AFV
Today we are going to talk about Audio mixing. There are different methodologies for the different devices and we would take about the one for Yolo Box Pro.
From my overhead camera, you can see that I have my Yolo Box Pro and an audio mixer.
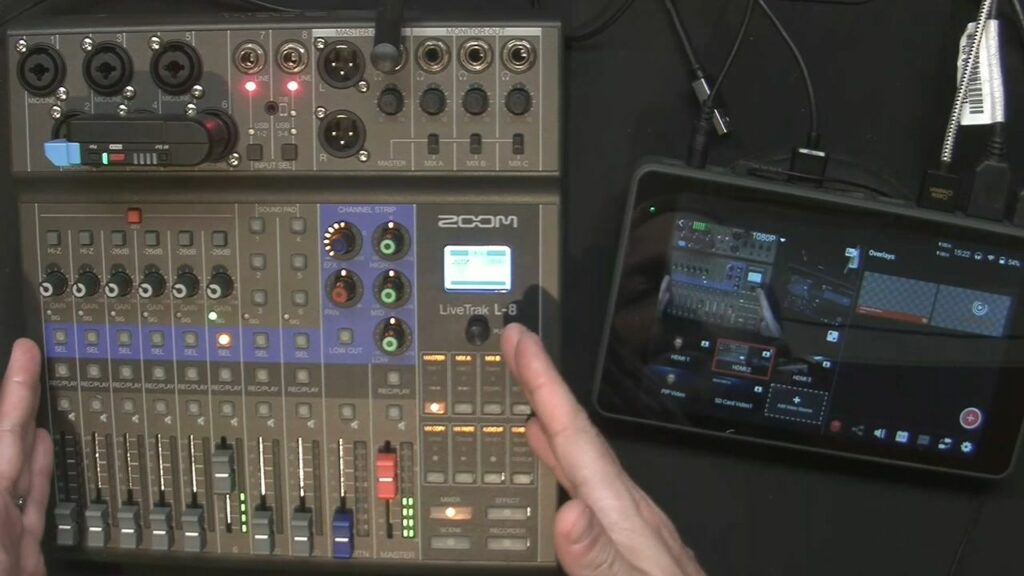
- What I also have is a boom microphone here which you can hear. And this goes directly into my camera which comes into my Yolo Box Pro.
- I also have a lavalier mic which you can find the meter move on the audio mixer. The lavalier microphone is coming wirelessly into the audio mixer and also into the line-input of the Yolo Box.

After switching, you can see the full display with the Audio option on the right side of the page. You can see here the Audio Follow Video is off.
- What this means is if you had different cameras, it would automatically switch to follow whatever you selected. So different sources would play different video/audio and the Yolobox would switch to whatever audio source is you have selected at that time. It is very useful if you’ve got cameras in different locations, like a sports event.
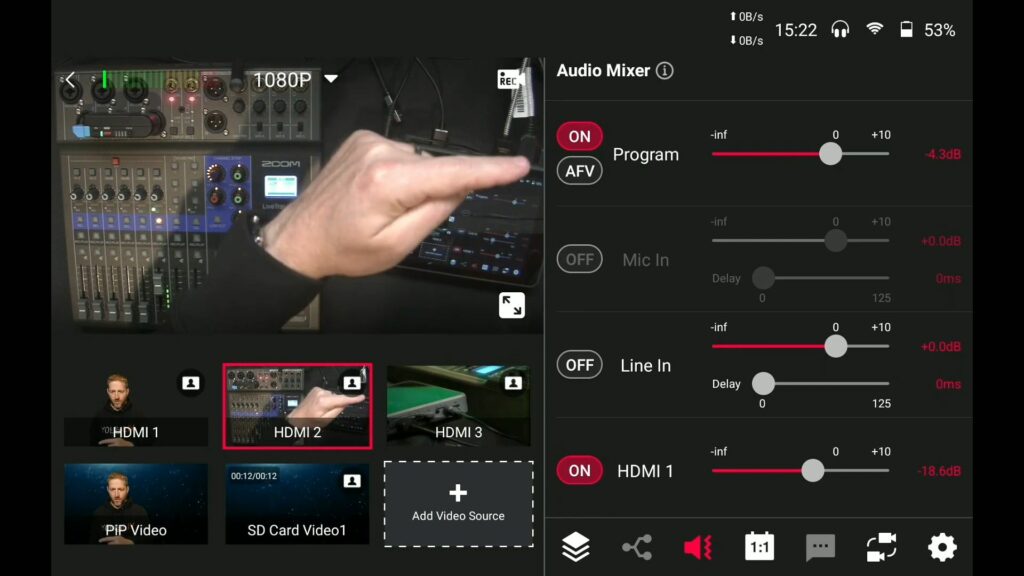
But if you are doing something where you are switching a lot of different things in one place, and you want to control the audio yourself, that is where the built-in audio mixer pays off in the Yolo Box.
Analog Inputs
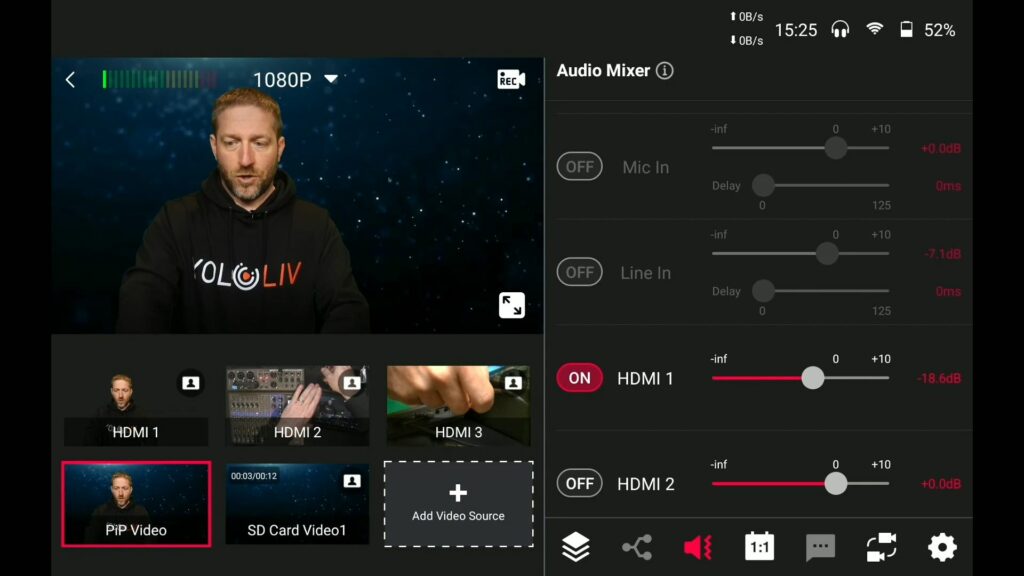
Here we have mic-input and line-input on the side of the Yolo Box. And the line-input is from the mixer over here. In the screen display, you can see there are two different Mic in and Line in options.
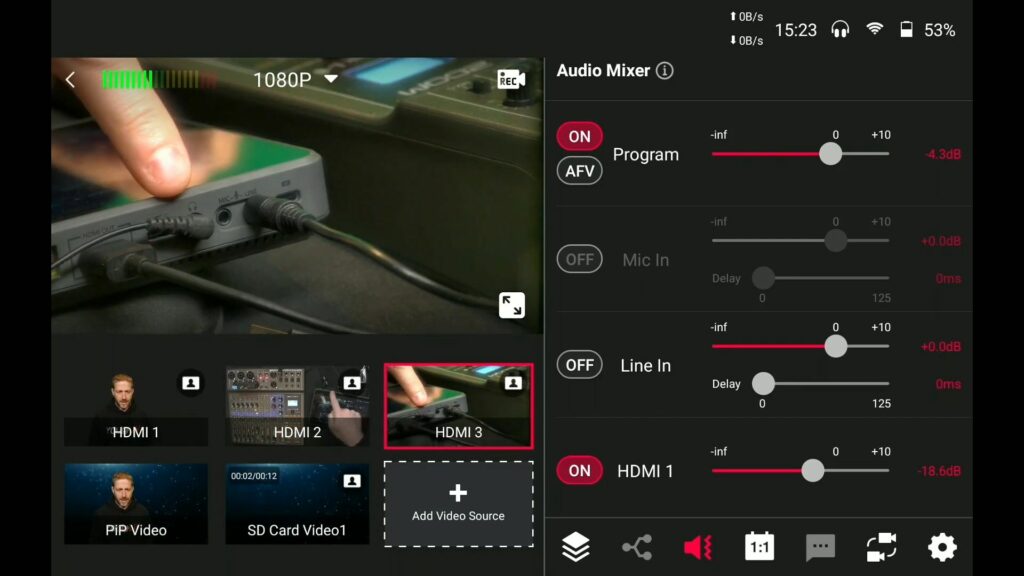
Next up is the HDMI 1/2/3. Actually, you cannot have three different HDMI inputs at the same time. It is limited to two different HDMI mixing.
You can also find the USB audio via a USB capture. SD card video is like the audio from the SD card resource. For example, if I want to play some ethereal kind of soft background music and loop it automatically. And of course, you would have the SD card video 2 and live stream audio so there is a lot of capability.
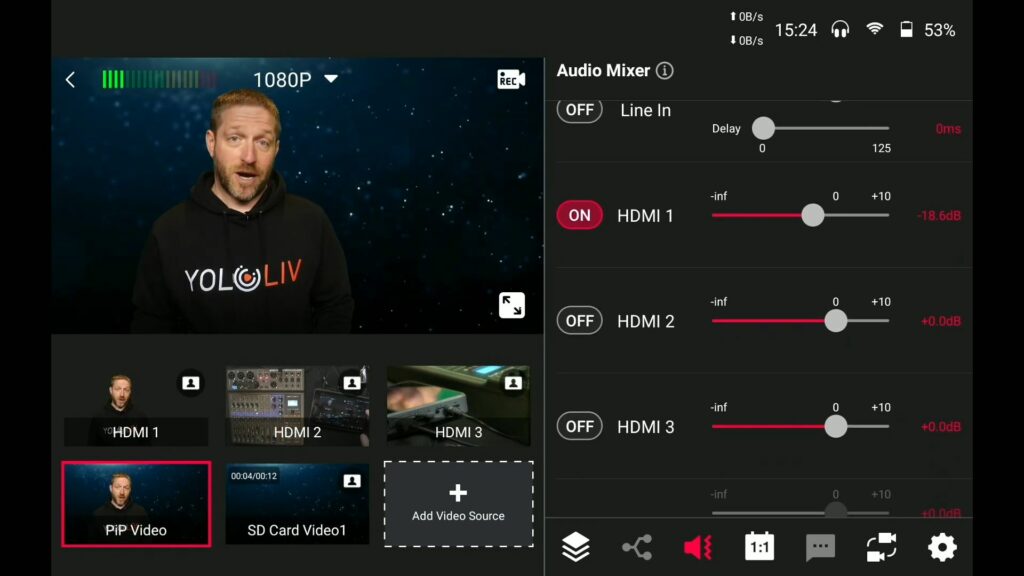
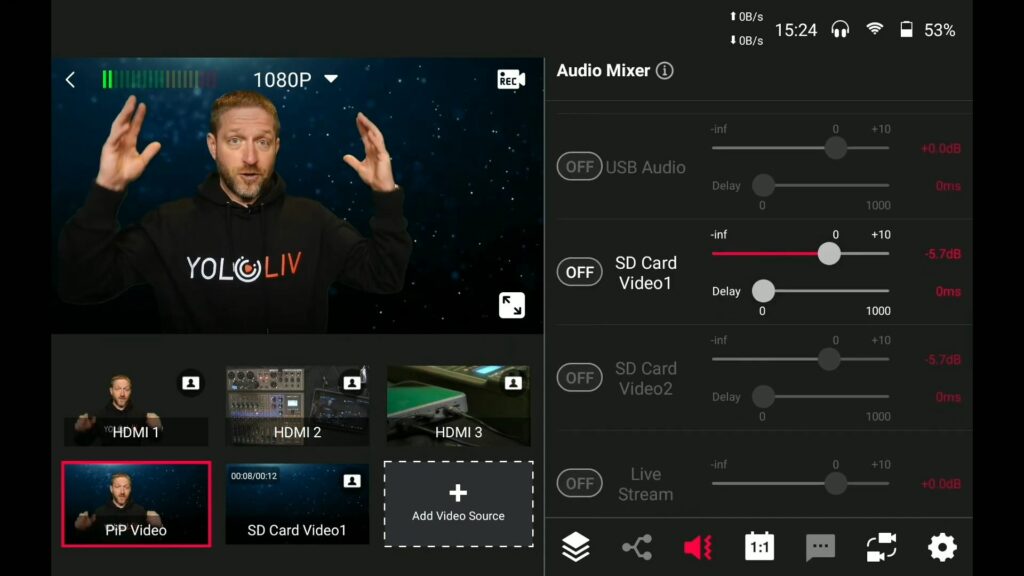
And these inputs only turn on when something is plugged in. So the reason that you cannot see the mic in active mode is that there is nothing plugged in like the line-in do right here. With the input connected, you would be able to adjust the levels. But after physically unplugging, you will see it is greyed out. That is an important differentiation.
Second Audio
Right now I am coming via the HDMI.
I have a wireless microphone on me which is the AVX series. I will show you the little angled receiver here. They also do the same thing on their handhelds with the little bevel on them. These are digital microphones and have a little bit of delay.
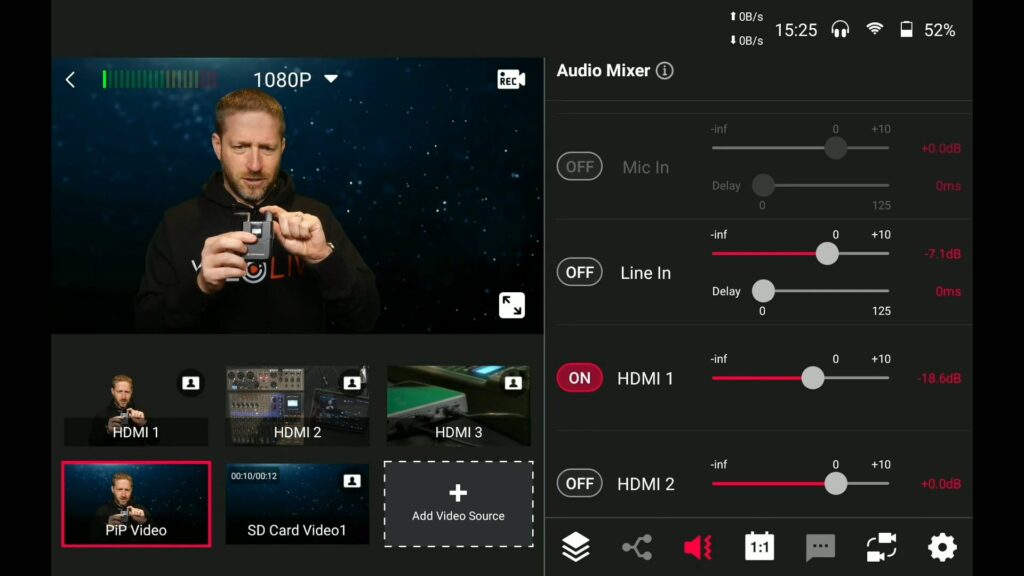
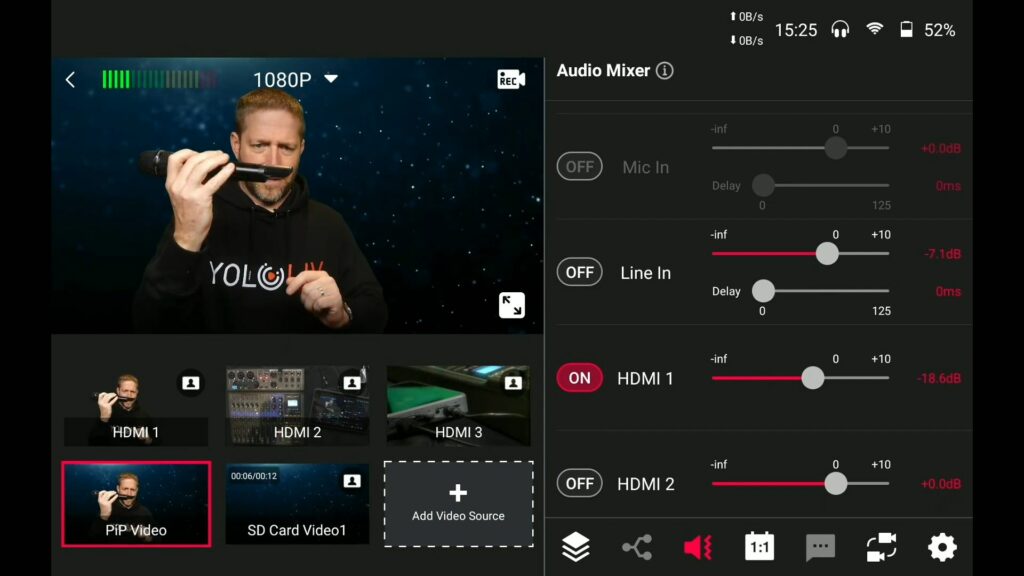
So when I turn both the HDMI on and the line input on you’re actually going to hear a little bit of echo. Because there is just a fraction of a delay through the AVX and the audio is digitally compressed in the transmitter and then uncompressed in the receiver.
Setting levels
Next I want to talk about the Setting levels. There is a gain for the microphone in the transmitter itself. That is your first level in the transmitter itself which you can set how loud you want. So when somebody is really talking quietly, or if you are using it for a very quiet instrument, you can increase the gain before it is compressed and transmitted.
Then on the receiver, you can see there are three leads lit out of four.
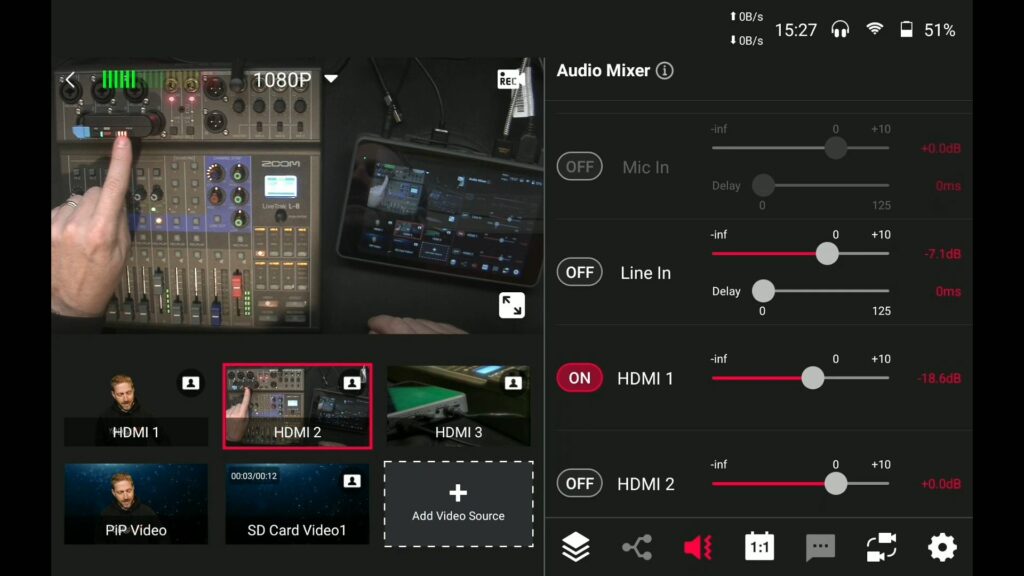
There is a volume output on the receiver and that is another place where your levels get set. On the input of the mixer, there is a gain setting so I can increase the gain.
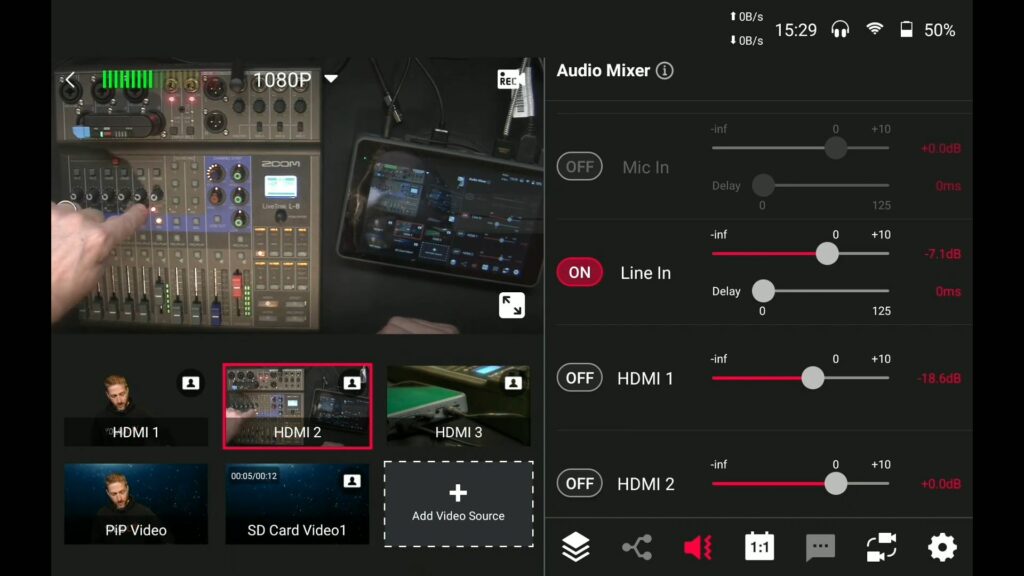
Now you can see it is red, and if I bring it down it turns green. That is another place where the level can be set. In total, there are 5 different places right now to set the audio before we even go into the Yolo Box.
At the same time, you’ve got the level set from the input in the Yolo Box and the program Audio. So right now there are seven different places where the audio can be set. And it is why the audio is so hard.
Two microphones
The audio could be clipping or distorting at any one of those seven places and it is really hard to figure out where it goes wrong. One of the key things with Audio is understanding where your levels are set and where things would possibly go wrong. So that you can always make sure the levels are set good all the way through in case of a distorted signal.
- The one we are listening to is the HDMI from the microphone up on the top. And we know what level it is while it goes into the camera with a level adjustment.
- It then comes into the Yolo Box with another level adjustment following with the program level. In general, there are four adjustments on one input.
- Now let’s switch to the line-input which kind of sounds the same. It has a little bit different environment sound and if I listen to it on my headphones, it is hard for me to talk with a slight echo. So I cannot listen to the audio that I am doing live. I could listen to it on the mixer but every step adds a little bit of delay which makes it also hard to set.
Here is how I have my audio coming into the mixer. Now we are actually listening to this audio so if I turn it down, you can hear by Audio go down at the same time. If I take the gain and bring the gain up, I am distorting the audio. But if I am compensating the mixer here by bringing this level down, it is recorded on the Yolo Box but that is not where the distortion is.
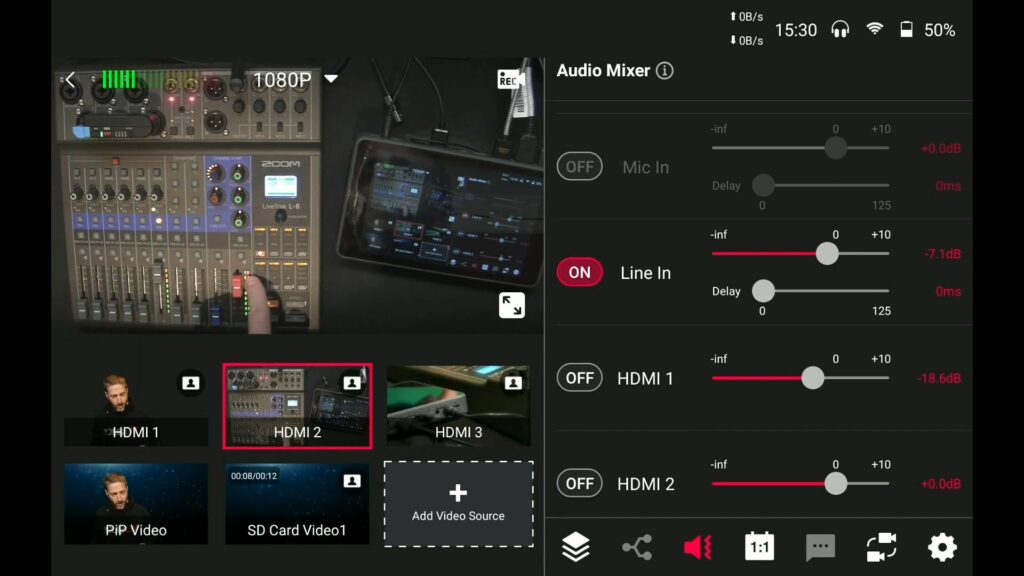
The other thing is your channel can become too hot. You can see it is going into the red in the mixer so that when they come into the Yolo Box, they can distort. So you’ve got a lot to manage in terms of making sure that your source audio is clean. You can listen to your mixer through the headphone jacks and try it again when it comes into your Yolo Box. You can adjust the line-input in the isolated Line in option or Program Audio on the top of the screen of Yolo Box.
What to listen for
Listening is critical with audio. It is very important to understand the multiple steps that the audio goes through to get into the Yolo Box.
Using multiple sources
There are two more places to adjust the audio levels.
If you are mixing two or three different sources in the Yolo Box, all of the sources adds up. You need to make sure that it is not clipping, not only with the little meter at the top of the screen(in the below screenshot) which is part of the interface.
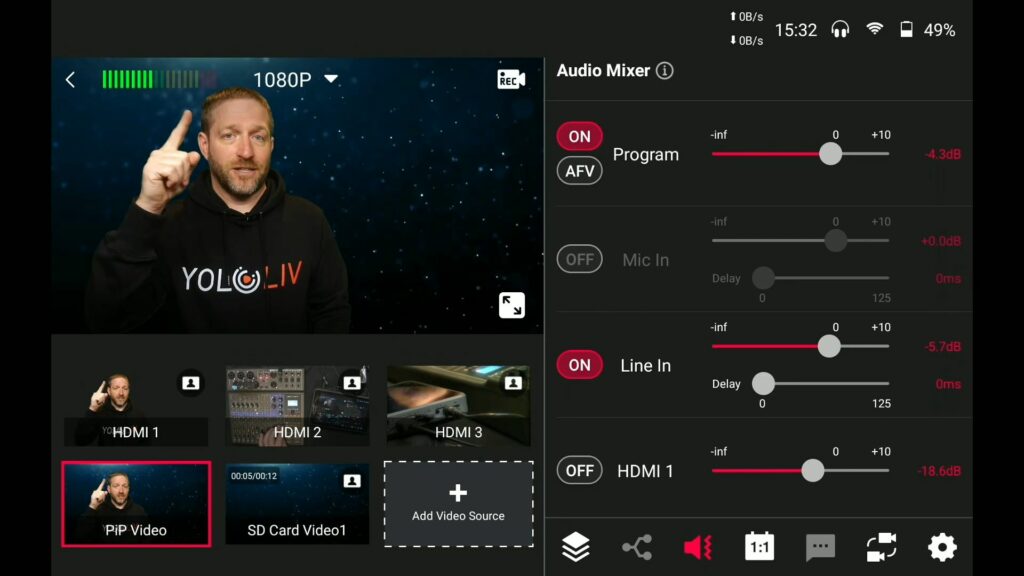
You need to listen to the headphone jack of the Yolo Box, even recording and playing back a little bit on a computer to make sure that the recorded file is properly reflected to the audio level. Because if the meter indicator is in the yellow color, you will get some clipping and then you need to back it up to keep in the green area. With the testing, you would know where is the breaking point with your gear.
What does Audio Delay do?
The delay is because if you are coming with a line-input that is not already delayed from the digital system, it is going to be ahead and fast compared tp an HDMI source(which might be slightly delayed compared to your analog input). You would want to push that back a frame or two which would be 30ms or 60ms.
Right now I have it at zero and there is still a little bit of delay because of this microphone source.
- Normally if there is only single source, there is no difference.
- And if you use a bunch of these microphones, they all match so you have all your audio i sync which is not a issue. But because I have two different microphones going two different paths, then you notice that there is a timing difference between the two sources.
To solve that, I would pick one of the delay and adjust the level here. Moving the slider for the delay would make you see that my mouth does not quite match the video. To be more distinct, I am going to make a clicking sound to show the difference between the HDMI(room microphone) and the lavalier microphone.
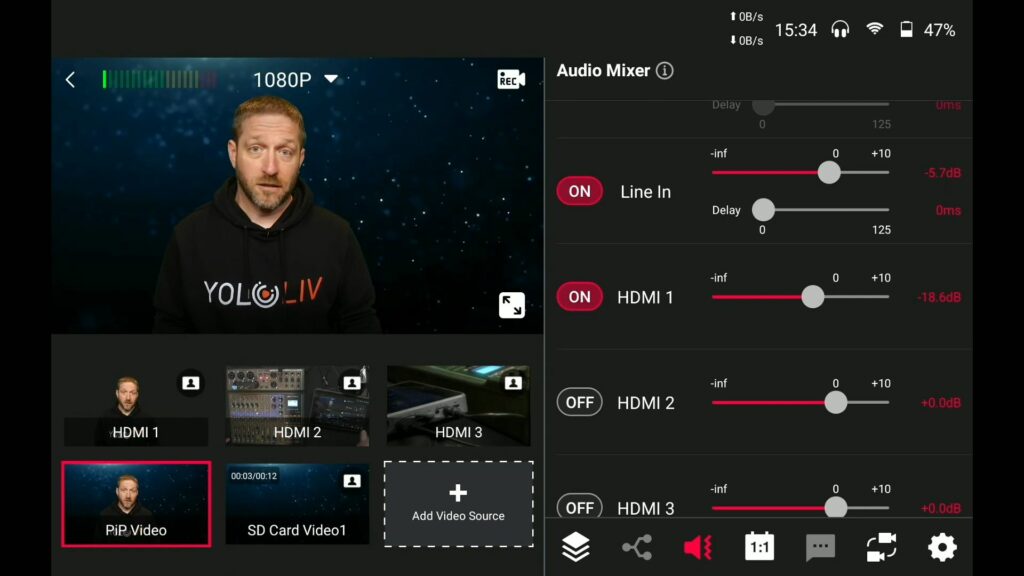
You can clearly hear what the delay does. It pushes one source back in time so you would hear different time periods between the clicking when I adjust the delay slide. So if you have some sort of symc issue, that audio delay is where you can adjust and fix it.
This delay function works in Line-in and Mic-in slides with USB input and SD card resources. Because you want to keep your HDMI audio in sync with the picture. You do not want to push that around. The delay slide can go up to 1000 ms so that is quite a substantial delay.
I won’t get into the audio follow video because it is going to be hard to demonstrate as I switch around things for you to know which audio you are hearing/seeing. But I want to really cover the fact that your audio is complex including seven places to adjust, where the audio can be too loud or too quiet.
Listening for noise
And here is one last thing I will bring up. Now you may hear a buzzing sound but that is not from my Yolo Box. It is a buzzing sound from this digital receiver.
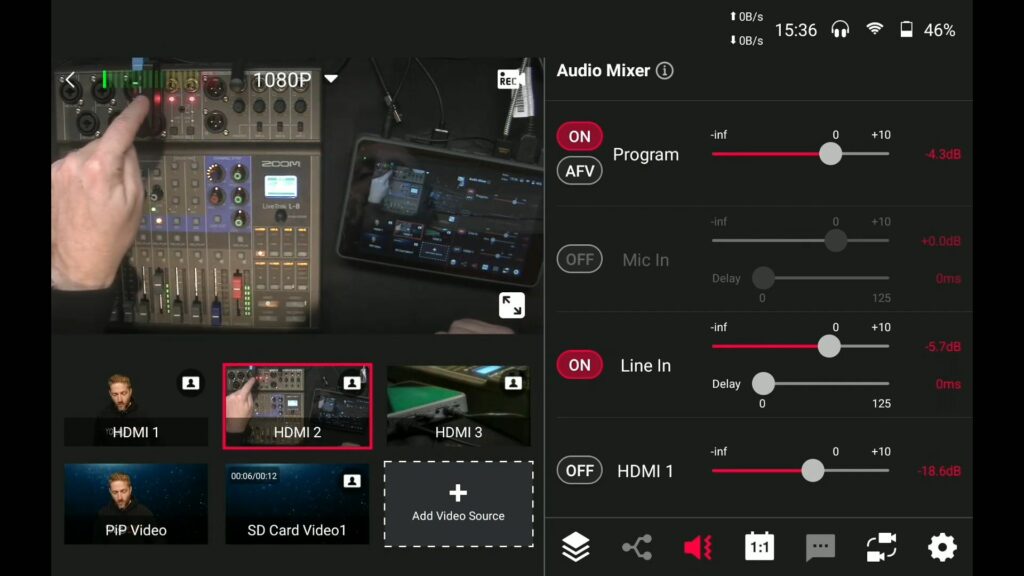
When this receiver/digital processor is near these inputs, or something positioning with regards to this mixer, that noise is transferred into the mixer and then recorded.
That is a prime example that needs to pay attention to in every stage in your audio setup. Because you never know where things are going wrong. Like all I did is to move the rotation of the digital receiver and the digital circuitry going on in the receiver itself. There is a pairing so there might be some bi-directional communication between the receiver and the transmitter. So the noise is picked up by the mixer.
Conclusion
I just want to show you that as an example of how hard the audio is. It is a challenge and you really have to be diligent to get good audio into your Yolo Box. That helps you get good audio in the recording and live streams.
I hope these tips have been helpful to you and the streams you do. And the program you make can sound as good as you can.
Still having questions about audio on YoloBox, visit this blog post for all about YoloLiv audio.
To know more about Yololiv tutorials and reviews, subscribe to our YouTube channel here: https://www.youtube.com/c/YoloLivTech. Enjoy more videos from Yololiv!
Cerise is a support specialist at YoloLiv with three years of experience working as a Customer Support Specialist in the consumer electronics industry. She also produces articles including video productions, tips and tricks and expert knowledge in the audiovisual industry.


